 FREE 1 to 3-Day Delivery on Orders $119+ Details
Best Sellers


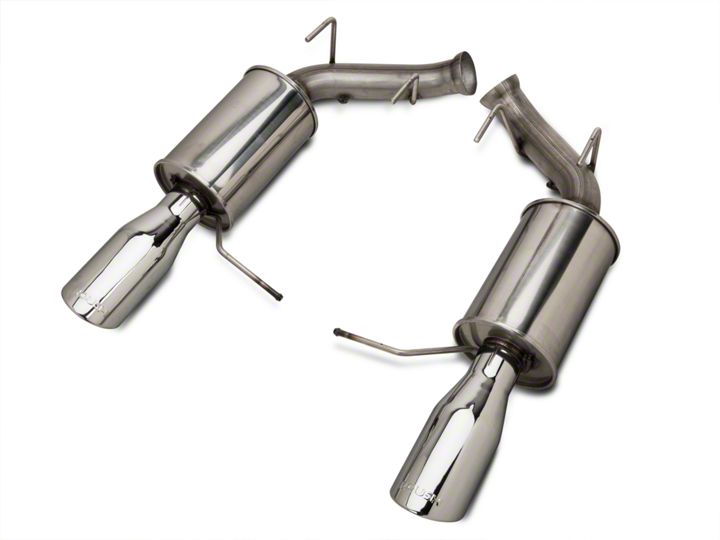
How to Install a Roush Axle-Back Exhaust on Your 2011-2012 Mustang GT & GT500
Installation Time
2 hours
Tools Required
- Ratchet
- 4" Socket Extension
- 13mm Socket
- 15mm Socket
- Brick or Block
- Jack and Jack Stands (or Ramps)
- Second person
Shop Parts in this Guide
Installation
Removal of stock exhaust:
Step 1:Start by placing bricks or large blocks in front of the front tires to prevent the vehicle from rolling.
Step 2:Place a jack under the pumpkin and elevate the rear of the vehicle approx. 8 - 12 inches.
Step 3:Use jack-stands under the axle to secure the vehicle. Do NOT leave the car on the jack as this is very unsafe.
Step 4:Remove the (2) 13mm bolts from stock exhaust flange bracket. There is a “clip” on each bracket that holds it in place which we will get to later.
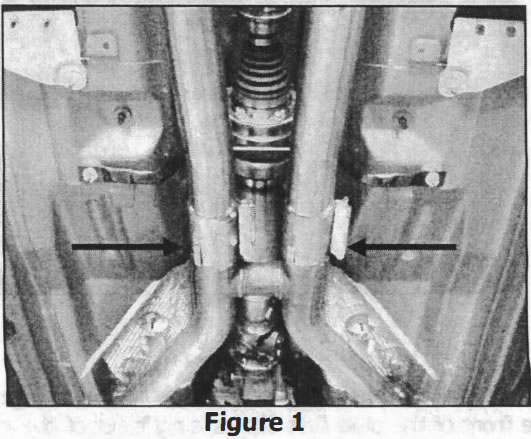
Step 5:Pop out the rear most exhaust hanger from its mount.
Step 6:Remove the (3) 13mm bolts on the front most exhaust hanger bracket on the driver side. Once that is removed, the exhaust should only be attached by the flange. This is where your second person comes in handy.
Step 7:One person needs to keep the stock exhaust elevated while the other feels around the flange for the clip holding the clamp. Using both hands, pry apart the clamp. Hold the piping going over the axle and have your helper twist and turn the exhaust until the clamp pops off the clip.
Step 8:Your driver side muffler should now be removed with the front most hanger mount attached to it.
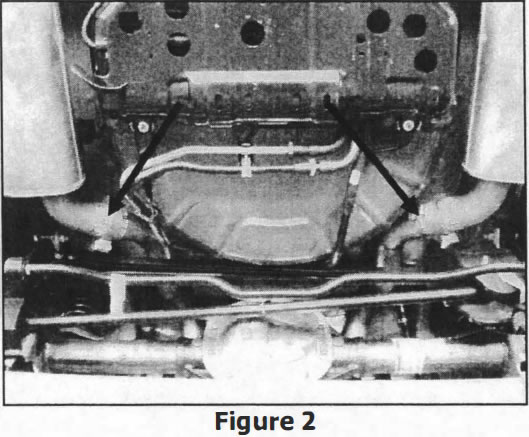
Step 9:Repeat the same process for the passenger side. There are only (2) 13mm bolts holding the hanger mount on this side.
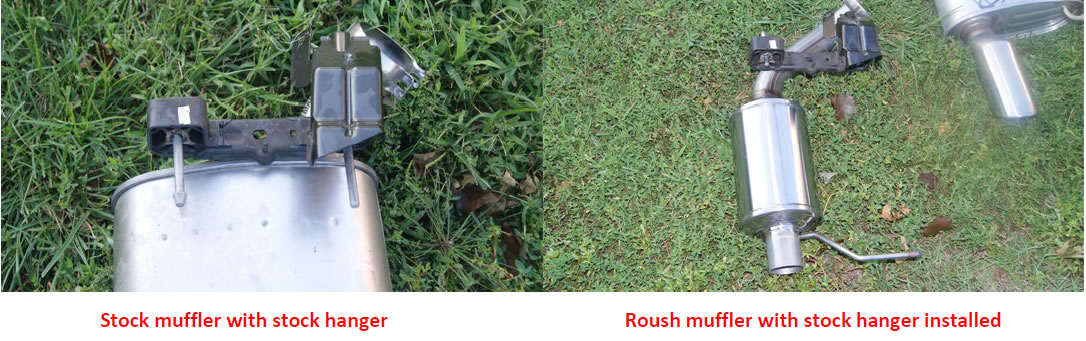
Step 10:Remove the hanger mounts from your stock exhaust and place them on your new Roush Axle-back exhaust.
Installation of Roush Axle-back Exhaust:
Step 1:Basically repeat every removal process in reverse, doing (1) side at a time.
Step 2:Seat the flange into place and tighten the 13mm. Do not torque it down yet to allow for later adjustments.
Step 3:Remount the stock exhaust hanger mount to the vehicle. Remember there are (3) bolts on the driver side and (2) bolts on the passenger side.
Step 4:Pop the rear most hanger into its mount. You will need a 15mm socket to attach the exhaust tip.
Step 5:Place the exhaust tip clamp on the tip and slide it over the pipe on the rear of the muffler. Tighten it just enough to where it’s tight, but the tip can still move slightly. Once again, you will need your 2nd set of hands for the next part.
Step 6:Adjust the axle-back until you are happy with how it looks behind the car. Once the desired position is achieved, have your helper hold the exhaust firmly in place while you tighten down the clamp around the flange.
Step 7:Repeat the same process for side 2.
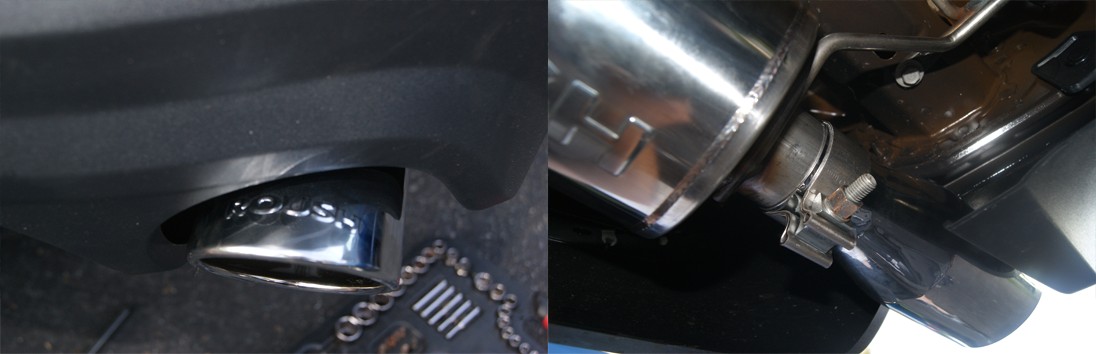
Step 8:Now it’s time to adjust the exhaust tips. Position the tips however you like them and firmly tighten the 15mm bolt on each site. Note: You should have at the very least 2” of exhaust tip covering the muffler piping; the farther back the tip is seated, the higher the chance of losing the tip. If you look in the picture below, you will see the clamp is at the very end of the exhaust tip; the closer you get to the end, the tighter you can make the clamp.
Step 9:Make sure all bolts (9 in total) are tightened down.
Step 10:Place the jack under the pumpkin to raise the car. Remove the jack stands and make sure all tools are out from under the vehicle. Slowly lower the car down to the ground. You can now remove the brick/block from the front tire.
Step 11:Last but not least, start the car. While you will be in awe of the sound, hop under the car and check the flanges. You want to make sure there are no exhaust leaks.
Enjoy your new Roush axle-back exhaust system!!
Installation Instructions written by AmericanMuscle customer Ryan Koepplinger 9.22.11
