FREE 1 to 3-Day Delivery on Orders $149+ Details
How to Install RTR Rear Licence Plate Surround w/Ducts on your 2013 Mustang
Installation Time
2 hours
Tools Required
- Fork Tool
- Hook Tool
- Drill Motor
- Step Drill Bit (or similar)
- Saw to Cut Plastic
- Sharpie (fine tip marker)
- Side Cutters (or similar)
- Detail Spray and Microfiber
- Flat Screwdriver or 10mm Socket and Ratchet
Shop Parts in this Guide

RTR License Plate Surround with Ducts Instructions
CDC# 1398-7007-01
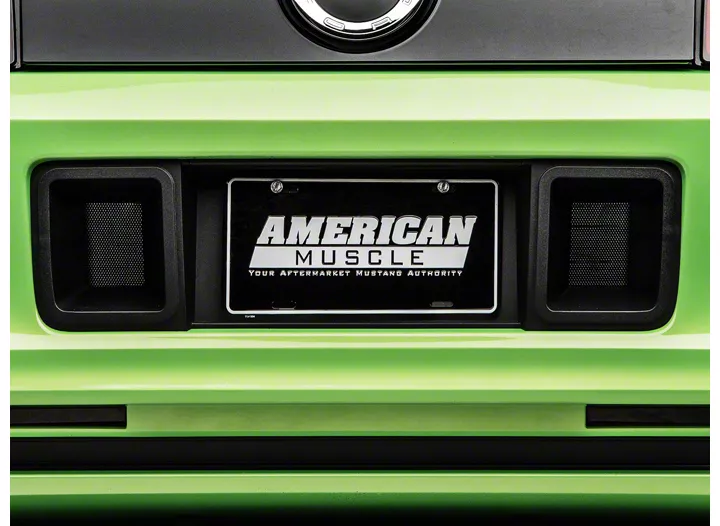
Note: The RTR License Plate Surround is molded “Textured Black” to match OE finishes and does not require paint.
Kit Components:
► RTR License Plate Surround with Black Mesh Panels
► 2 – 4” Zip Ties
► 1 – Installation Guide
► 1- Template
Tools Required:
► Fork Tool
► Hook Tool
► Drill Motor
► Step Drill Bit (or similar)
► Saw to cut plastic
► Sharpie (fine tip marker)
► Side Cutters (or similar)
► Detail Spray and Micro Fiber
► Flat Screw Driver or 10mm Socket and Ratchet.
Attention: Below is a suggested method of installation. A second method would be to completely remove the rear Fascia to disengage the molded retainers that secure the factory License Plate Trim. If you have any hesitation with the installation of this product, please seek the help of a local professional installer. Failure to follow instructions may result in loss of this product or damage to fascia. Classic Design Concepts is not responsible for improper installations.
Installation Procedure:
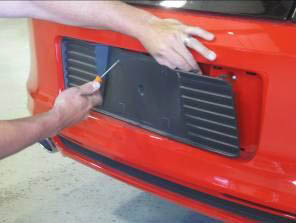
1. Remove your license plate from vehicle using either a flat blade screw driver or 10mm socket.
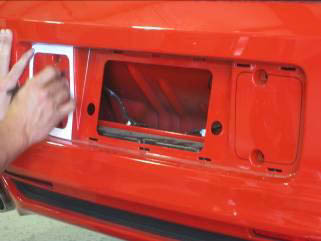
2. Remove License Plate Light Trim. Use a Fork Tool to release part from Fascia
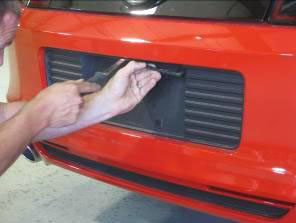
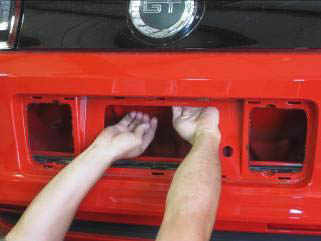
3. Remove original License Plate Panel. Insert a small hook tool into the holes used to retain the License plate. Grip firmly and pull swiftly to dislodge the molded retainers from the Fascia.
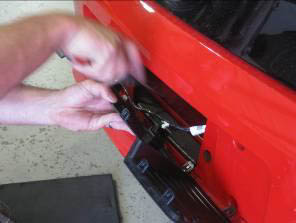
4. Use Fork Tool to release wire harness from back side of License Plate Panel.
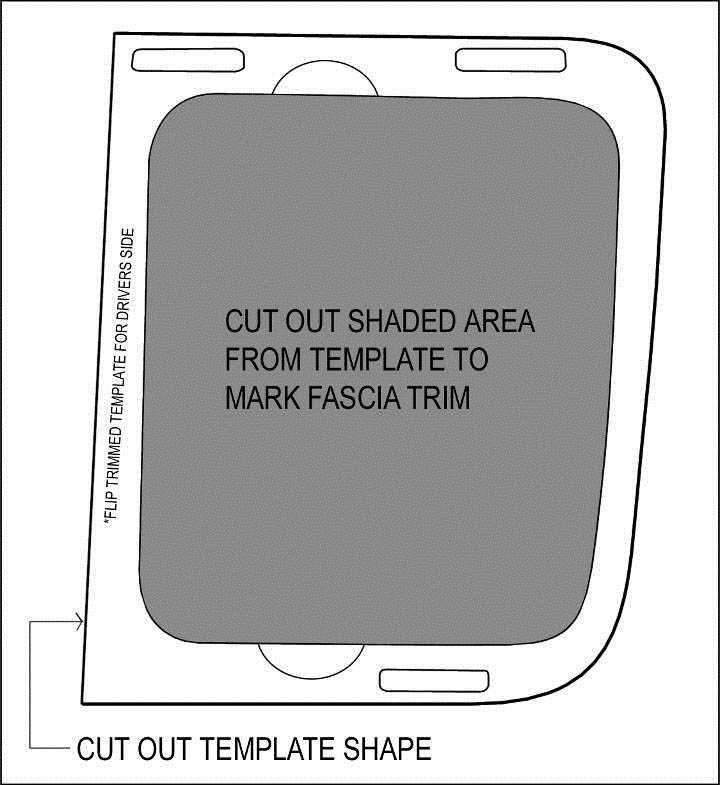
5. Cut out the provided Paper Template as shown. (Last Page of Instructions)
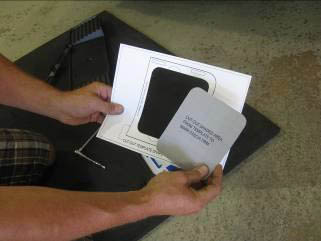

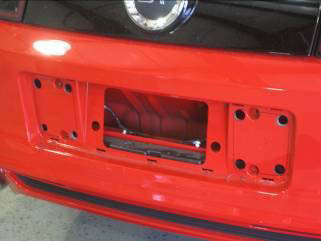
6. Place Template on Passenger Side as shown and mark with a Sharpie or other fine point marker. Flip Template and mark the Driver side.
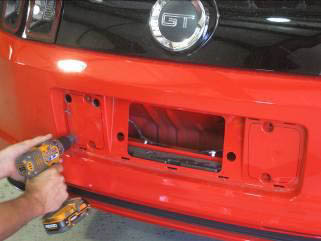
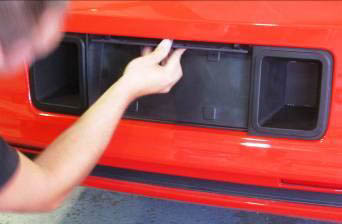
7. Using a Step Drill or similar, drill the 4 corners on both Driver and Passenger sides as shown. Caution: Make sure all wires are out of the way.
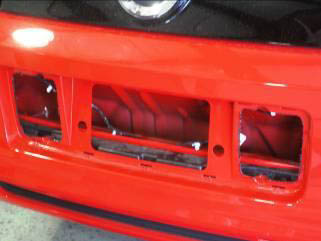
8. Use a saw with a blade capable of cutting plastic to finish cutting the openings.
Caution: Make sure all wires are out of the way.

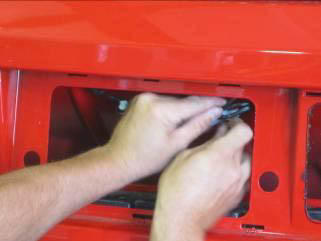
9. Use the provided 4” Zip Ties to secure the loose wire harness to the License Plate Light wires.
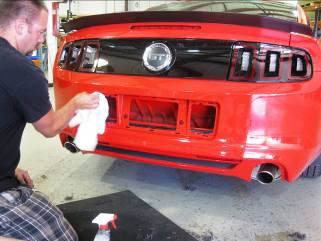
10. Clean the Fascia while there is easy access.
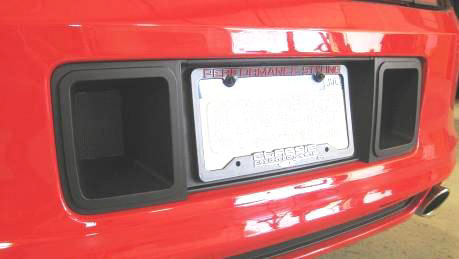
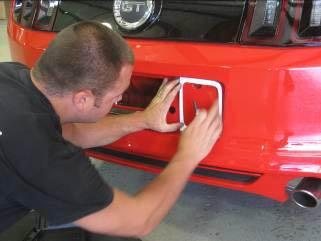
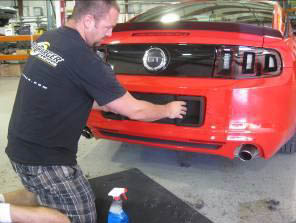
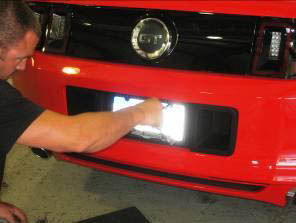
11. Install your RTR License Plate Surround. Simply press part in to Fascia and make sure all of the molded retainers properly engage.
12. Reinstall License Plate Light Trim piece that was removed in Step # 2.
13. Reinstall your License Plate.
Thank you for choosing Classic Design Concepts for your restyling needs. If you have any questions or concerns regarding installation please contact [email protected] or call 866-624-7997.