 FREE 1 to 3-Day Delivery on Orders $119+ Details
Best Sellers


How to install a SHR Satin Window Switch Plate on your 2005-2009 Mustang
Installation Time
15 minutes
Tools Required
- Small, Flat blade screwdriver
- Large pliers (optional)
- Safety glasses (please wear at all times during installation)
Installation
Thank you for your purchase of SilverHorse Racing products. Please read all directions before beginning the installation. A factory shop manual should be available for reference during installation. If, after reading these and any accompanying directions, you feel that you may not be able to complete the installation safely and properly, please seek out professional installation by certified technicians. Please read and understand our product purchase agreement (included) prior to starting installation. Vehicle should be off with key removed from ignition and in park with parking brake set prior to beginning installation. Expected installation time is 10 minutes.
1. Turn key to the off position and remove from ignition, making sure vehicle is in park / neutral and the parking brake is set on a flat, level surface.
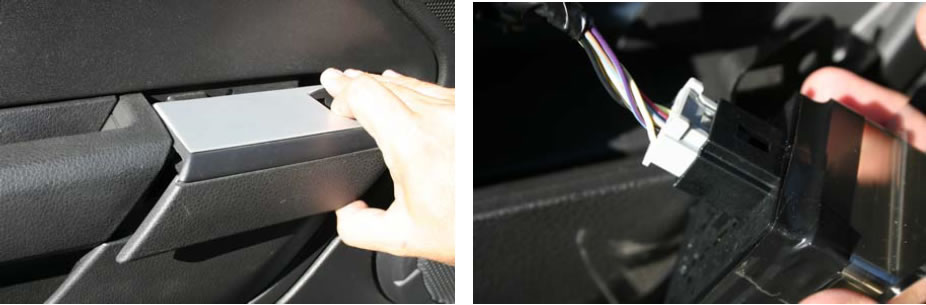
2. Starting with the driver’s side, grasp the original switch plate and the section below it. They will unclip from the door panel as an assembly. See photo. Flip the piece over to expose the switch (there are two on the convertible) and unclip the factory wiring from the switch(es).
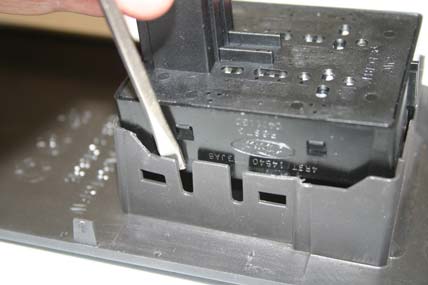
3. Using your fingers, push on the two clips retaining the switch plate to the lower cover. This will release the original switch plate from the cover.
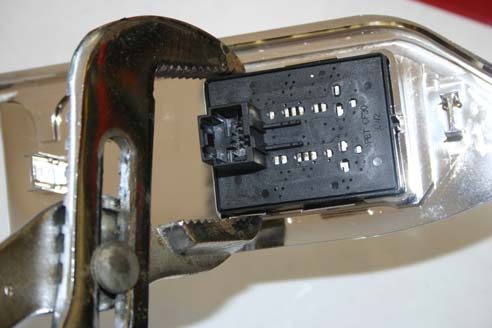
4. Using the small screwdriver, walk the power window switch(es) out of the original cover.
5. Take the new switch plate (they are engraved on the bottom D=Driver, P=Passenger, V=Convertible Driver Side) and gently bend the switch openings just enough to start the switch in the pocket, DO NOT OVER BEND – THESE WALLS ARE INTENTIONALLY THIN AND YOU CAN BREAK THE SWITCH PLATE AND RENDER THE PART WORTHLESS. THIS IS NOT COVERED BY ANY WARRANTY. Insert the switch into the pocket, and press into place until the side tabs clip into position. You can now bend the sides of the switch pocket back into the vertical position, capturing the window switch.
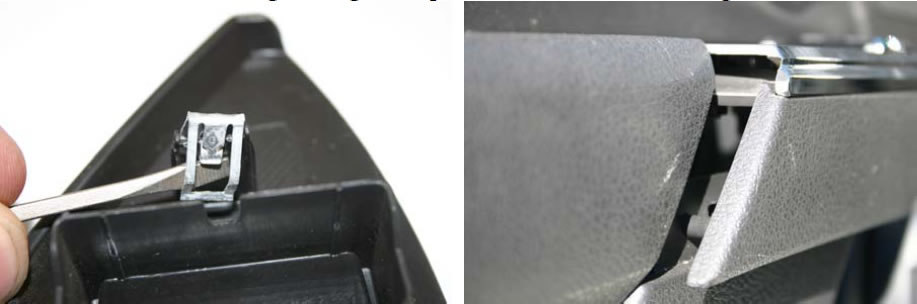
6. Using a small screwdriver or prying tool, remove the spring clips from the posts on the original door switch plate and transfer to the new switch plate. Install the new switch plate into the lower cover. Reconnect the wiring for the switches, temporarily turn the key to the on (but not start) position and test switches. If everything works well, reinstall on the door, using the alignment pins on the lower cover as a guide.
7. Repeat for passenger side of vehicle & Enjoy!
