 FREE 1 to 3-Day Delivery on Orders $149+ Details
Steeda Cold Air Intake and SCT SF3 Custom Tuner Combo ('05-'09 V6) - Installation Instructions
Installation Time
60 minutes
Tools Required
- Wrench with extension and/or nut driver
- 10mm socket
- 8mm socket (optional)
- Flat head screw driver
- 20T Torx wrench (looks like a small screwdriver with a star shaped head)
- 7/32 Allen Key
- Small clean rag (to cover battery terminals)
- Larger rag/cloth (to use as a work surface)
Installation
1. As with any project where you are touching the cars electrics you should disconnect the battery. The easiest way is to loosen the nut on the negative (black) terminal. I normally place an old clean rag over the top of the battery and place the negative wire on top of that to prevent accidental connections. As you are only disconnecting the mass airflow sensor it’s not strictly required – especially as you need to reconnect the battery before re-tuning – but if you want to err on the side of caution it won’t do any harm.
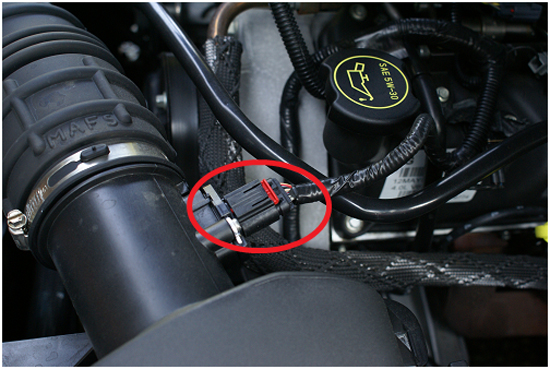
2. Disconnect the Mass Airflow Meter wiring harness. Simply depress the red tab and pull the plug away from the meter body. It is a fairly tight fit but doesn’t require too much force.
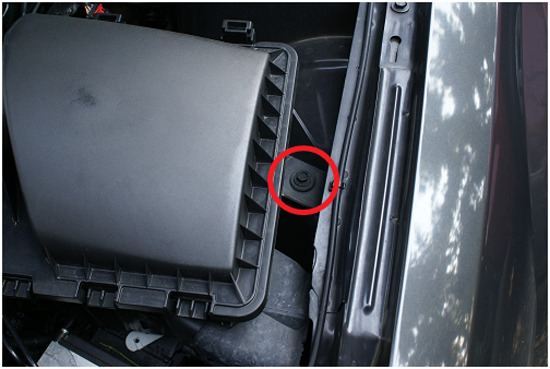
3. Using the 10mm socket remove the bolt that holds the air filter assembly to the engine bay. This is a screw, not a bolt, so don’t worry about dropping a nut down into the bodywork. Keep the screw you remove somewhere safe as you will need it to reseal the hole later on
4. Loosen the clamp that holds the flexible hose to the air filter assembly. You can use either the 8mm socket (on a nut driver or wrench extension) or a flat head screwdriver to undo the hose clamp, but be careful not to undo it all the way (it can be a pain to re-thread the clamp) – just undo it until you can slide the hose off the air box assembly.

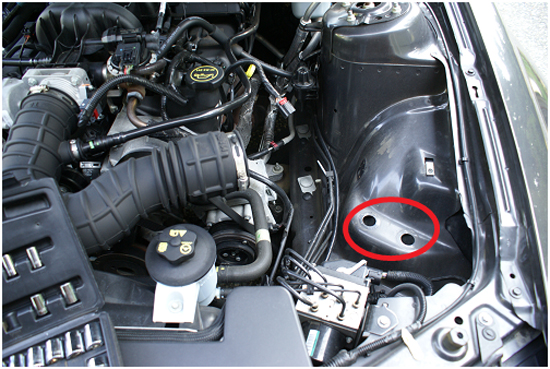
5. One the flexible hose is disconnected remove air box assembly from the engine bay. The assembly at this point should only be held in place by two posts near the cars wing. They are not fixed but are held in place by rubber grommets. The grommets may stay on the posts as you lift the air box out or they may stay in their holds. Do not lose them as you need them to remount the new heat shield.

6. Carefully using a T20 Torx wrench remove the two screws holding the Mass Airflow Sensor in the air box cover. Once the screws are removed you should be able to carefully slide it out of the housing (some slight wriggling may be required as it’sa fairly tight fit). Place the sensor somewhere safe as you will need to re-use it later. Make sure the exposed wires are kept clean.

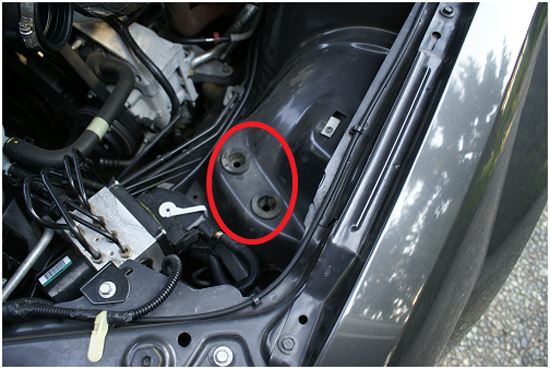
7. Remove grommets if they are still on the posts on the original filter and position them back in the holes highlighted in step 5. Once this step is complete you are ready to start assembling the new Cold Air Intake!
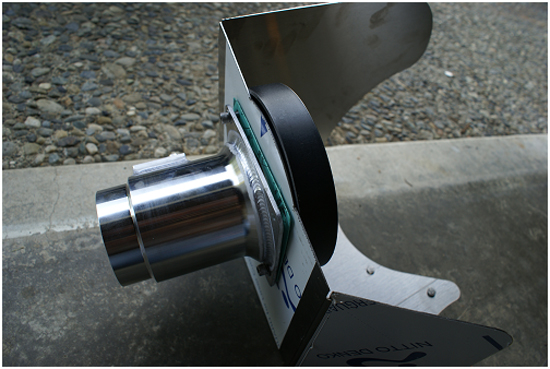
8. If the heat shield (large shaped aluminum piece) still has plastic on please make sure you remove the covering BEFORE connecting any hardware (the billet sensor housing and the air guide) – as it’s difficult to remove later. However, to protect the other surfaces while you are working you will want to make sure you leave it in place on the other sides. If you have a cloth to place the heat shield on while working it can also help prevent scratches.
9. Attach the billet meter housing to the heat shield by passing the provided ¼” bolts through washers then through the meter housing then the gasket then the heat shield and finally into the air flow guide. The holes are arranged asymmetrically so the pieces should only align when correctly positioned but make sure before tightening that the airflow through to assembly is unobstructed. Tighten the bolts with a 7/32” Allen key making sure the assembly is firmly connected(you don’t want air leaking when it’s fitted)
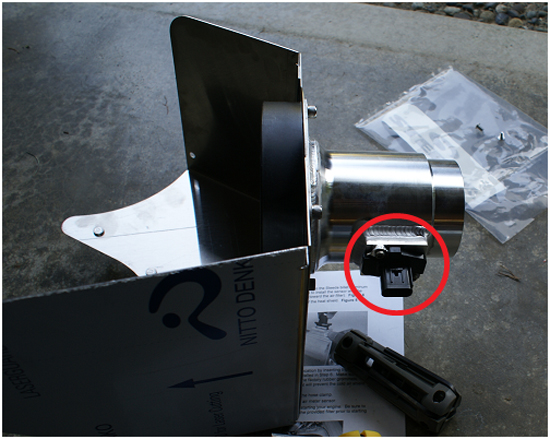
Note:in the following picture the bolts have not been tightened so it’s easier to check the position / sequence of items. Also the plastic should be removed BEFORE attaching the components.
10. Install the Mass Air Flow Sensor (from step 6) into the billet housing. Making sure that the exposed metering wires face the incoming airflow (it should only fit one way – facing towards where the head shield) and that it is firmly in place(again, we don’t want air leaking around the sensor). To help get a good fit it’s worth checking the screws fit nicely into the housing before installing the sensor.
11. Remove any remaining backing plastic and install the edge molding along the bottom and over the top edges of the heat shield. You should start on the long edge on the base (running near both the mounting posts) and then up and over as far as it goes(you can see from the picture in Step 12 where it fits)
12. Being careful not to dislodge the molding place the assembly into the engine bay so the posts on the bottom of the heat shield align with the two grommets and the flexible intake attaches to the end of the billet mounting. As you insert it make sure no wiring is caught underneath as this can prevent the posts seating correctly in the grommets.
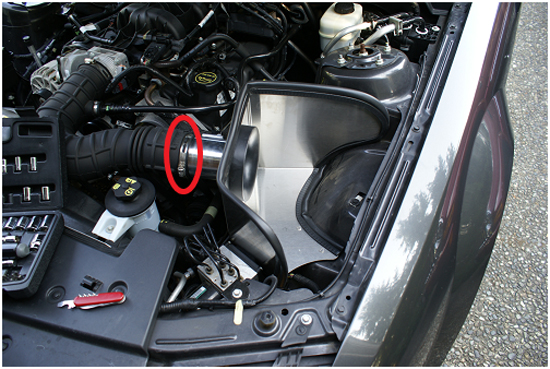
13. Once the heat shield is firmly in place use either the flathead screwdriver or 8mm socket and nut driver to tighten the hose clamp joining the flexible hose to the assembly.
14. Reconnect the wiring harness for the Mass Airflow Sensor – this should be a simple push to connect but make sure it is secure (and that the sensor is still firmly mounted in the assembly).
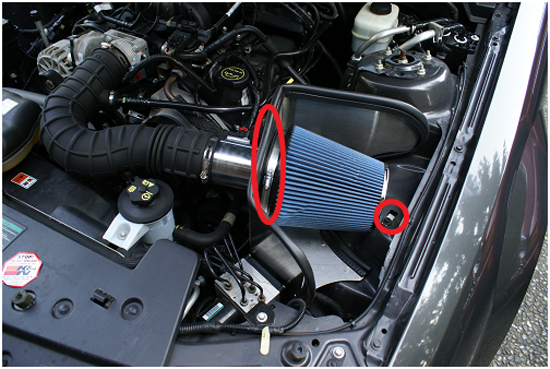
15. Remove the plastic wrapping from the air filter and slip it over the air guide and tighten the hose clamp to secure it in place. Double check all the clamps, hoses and bolts and for tidiness you can replace the screw (using 10mm socket) that you removed in step 3 (you may want to coat with WD40 or similar before replacing).
16. Reconnect the battery if you disconnected it in Step 1.
Before Starting the Vehicle you MUST Update the Tune
If you have purchased the combo kit that comes with the SCT X3 Tuner follow the instructions on the supplied CD for model 3015
1. Recommended that you turn off all circuits in the car that can put a load on the battery and remove the fuel pump fuse before flashing
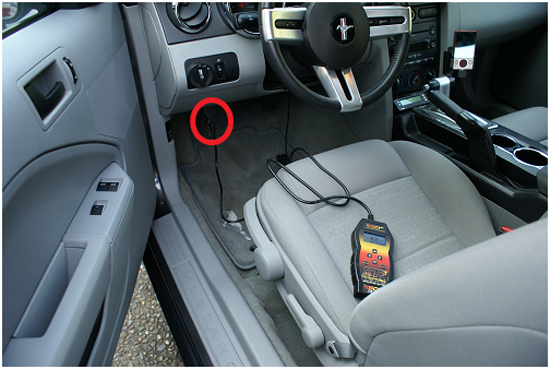
2. Connect tuner to ODB-II socket (beneath steering wheel)
3. Follow on-screen prompts to perform a custom tune
4. Select the pre-loaded custom tune that you requested when you ordered your combo kit
5. On the first tune the SCT device will download the stock configuration for your vehicle so you can return it to original condition if required and then apply the updates
Installation instructions provided by AmericanMuscle customer Jeremy Cath 6.11.09
Related Guides
-
Installation
-
-
Installation

