 FREE 1 to 3-Day Delivery on Orders $119+ Details
Best Sellers


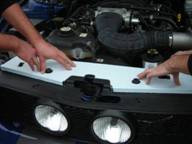
Steeda Brushed and Polished Stainless Steel Radiator Cover (2005-2009 Mustang) Installation Guide
Installation Time
2 hours
Tools Required
- Rubbing Alcohol
- Paper Towels
- The Supplied Sealant
- A Cloth Towel
- Some type of Weights 1lb 5lbs max
Installation
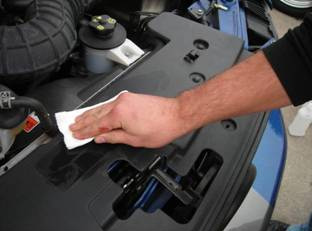
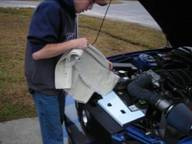
1. First thing you need to do is properly clean the radiator cover using rubbing alcohol and a paper towel. This will clean any dirt and oil that may prevent the sealant from proper adhesion.
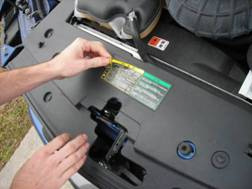
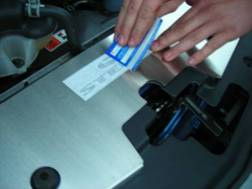
2. We chose to remove the factory service information sticker to be accessed for future reference and kept it with our owner’s manual. If you choose not to it will be covered by the install, and unable to be accessed.
3. Now you will need to prep the back side of new radiator cover by also cleaning it from any dirt and oil. Again, making sure that when we apply the sealant it will adhere the first time.

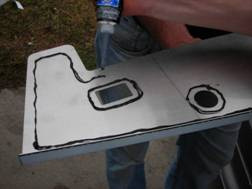
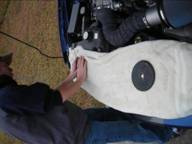
4. Next you want to place the supplied sealant in a matter that you will not get any excessive over hang. We choose ½ inch around all edges for our applied sealant. We also applied sealant to larger exposed areas for extra adhesion
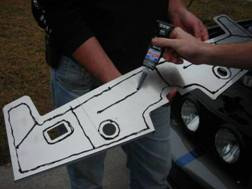
5. Now flip your radiator cover over and align all necessary holes with the hood bumpers. Here is where you’re going to need a towel and some weights. It is recommended you apply equal amount of pressure for up to 60 Mins to allow proper bond of sealant before continuing.
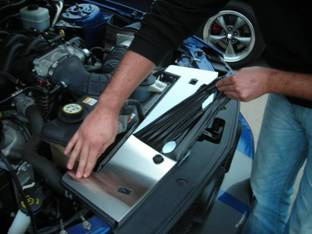
6. After your sealant has bonded, it’s time to remove the protective outer coating on your radiator cover.
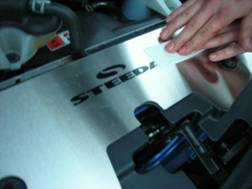
7. Finally it’s time to apply your supplied Steeda vinyl sticker to your work. This step is optional.
8. Now you’re finished! Go out enter the next car cruise and show off your new radiator cover!
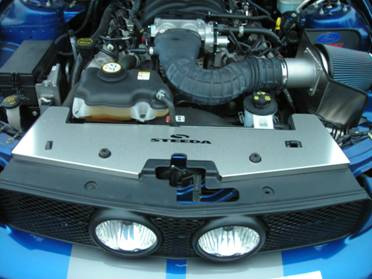
Finished Installation.
Installation instructions provided by AmericanMuscle customer Harold Benne and Ryan Shipes
Best Sellers
Related Guides
-
Installation
-
Installation
-
Installation
