FREE 1 to 3-Day Delivery on Orders $119+ Details
Best Sellers


How to Install a Steeda Tri-Ax Short Shifter - MT-82 on your 2011-2012 Mustang GT or V6
Installation
1. Apply the parking brake and place the car in neutral. If you are not using a hoist, place chocks on both sides of the rear wheels to prevent any possibility of the car rolling.
2. From inside the car, unthread the shifter knob.
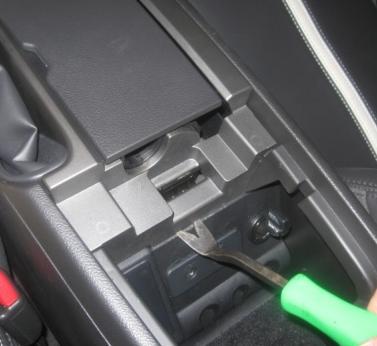
3. Open the rear door of the center console and carefully unclip the center console cover from the center console by prying up between the cover and bar. Gently lift up on the sides of the cover to unclip the rest of the clips. There are around6 clips securing the cover tithe console. See figures 1 and 2.
Note: The leather shifter boot collar has two small FRAGILE plastic ears securing it to the upper lever. Care MUST be taken to gently slide the collar up the lever while lifting off the center console/shifter boot, or the ears will break off!!!!!!!!!!!!!!!!!!!!
Note: Be sure to disconnect the electrical connectors for the traction control, and cupholder illumination, if so equipped.
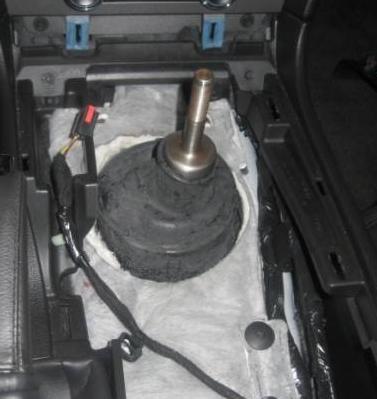
4. Set the center console aside, pull the sound deadening/insulating fabric over the shifter lever and fold it back behind the shifter and rubber boot, out of the way.Seefigure3
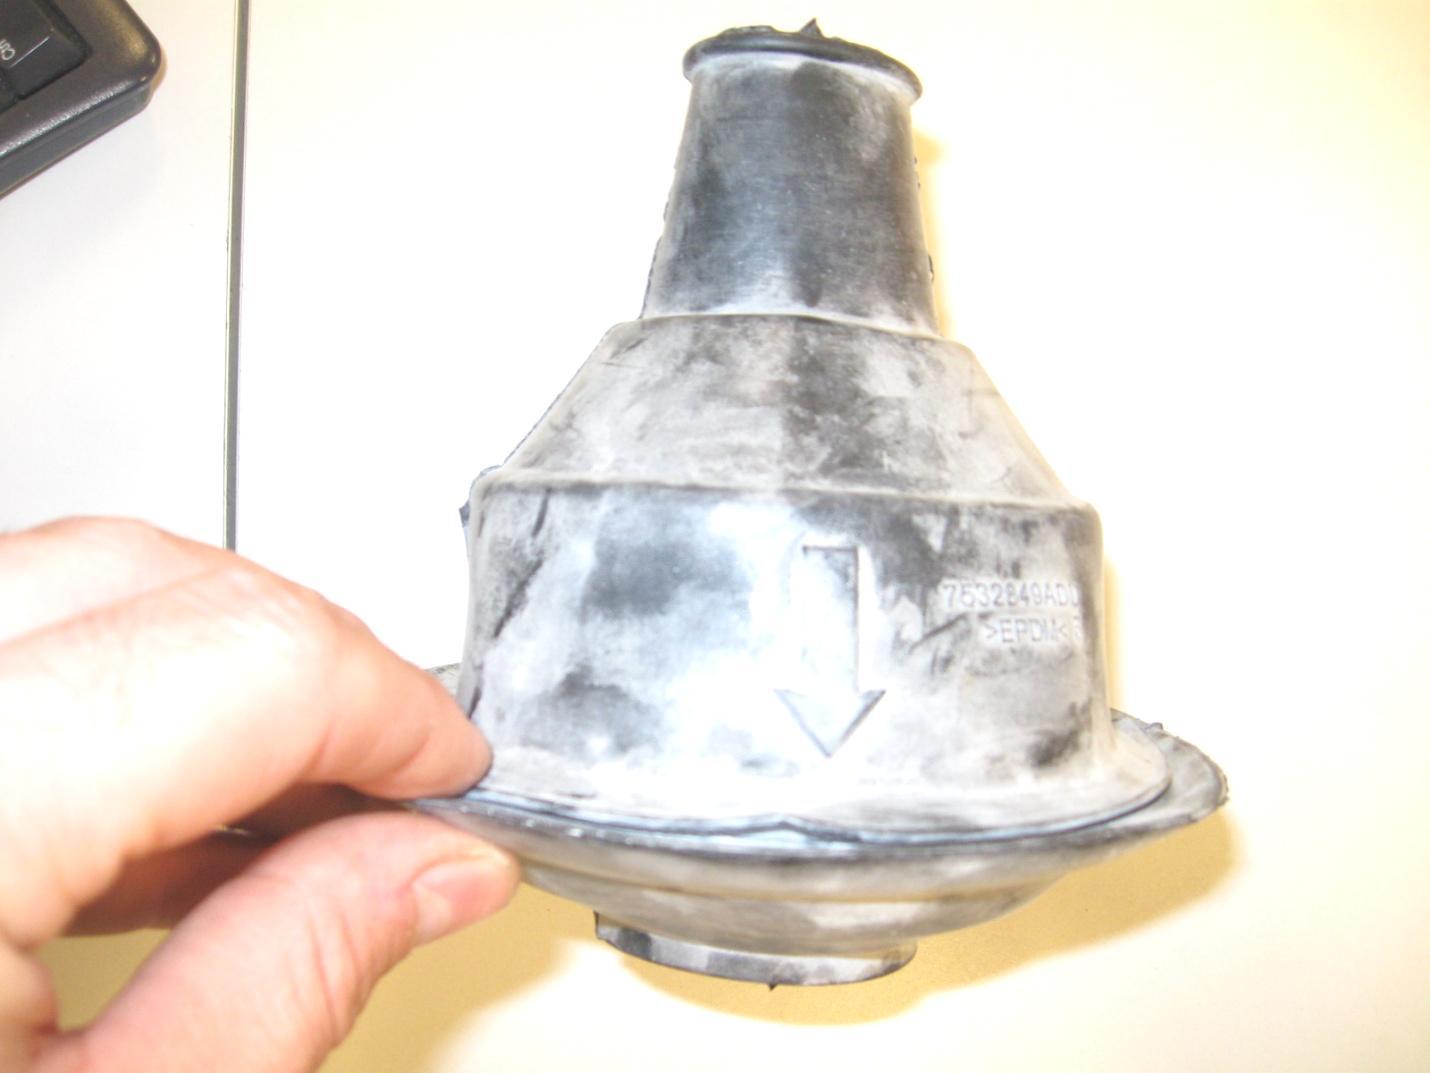
5. Carefully lift the rubber boot up and off the shifter lever, shifter base, and the floor pan to expose the shifter assembly.
Note: Be sure to note how the boot fits on the upper lever, floor pan, and shifter base prior to removal.
Note: Mark the boot’s orientation to the floor pan for re-installation purposes. The boot is not simply round and must be oriented in place
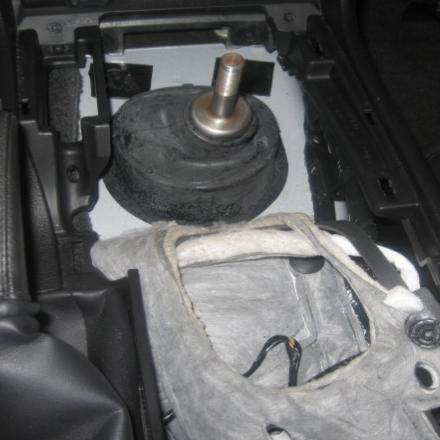
6. From under the car, remove the two 10 mm nuts securing the rear shifter bushing and shifter assembly to the floor pan. Lower the shifter assembly and gently pry the bushing from the rear of the shifter assembly (noting its orientation) and set it aside. Allow the shifter assembly to rest on the drive shaft. See figure 4.
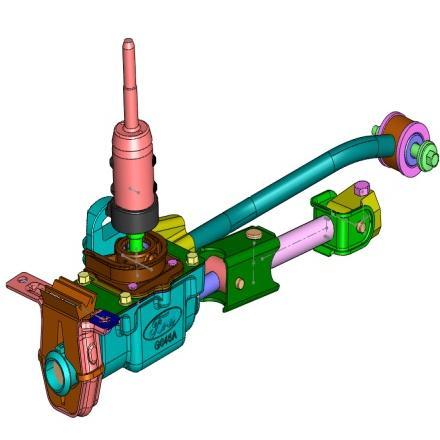
7. From back inside the car, remove the four 10mm head bolts securing the shifter mechanism to the shifter base. Pull up on the shifter lever and remove the unit. See figure 5.
Note: Be careful not to tear or lose the thin gasket between the shifter and the shifter base
Steeda Tri-Ax Shifter Installation:
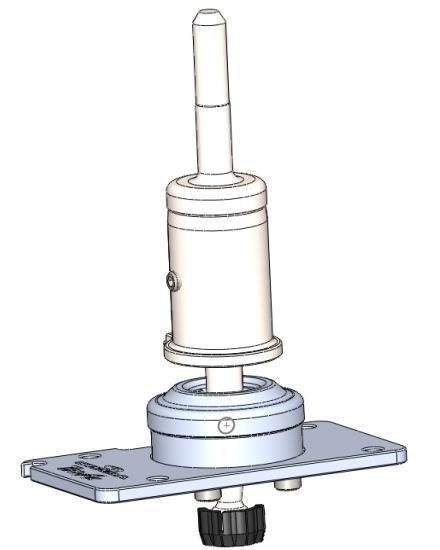
8. Transfer the plastic cup attached to the bottom of the factory shifter lever onto the bottom of the Tri-Ax lever, by carefully prying it off of the lower lever and snapping it onto the Tri-Ax lower lever. See figure 6.
- Note: Apply some grease to the inside of the cup before transferring it.
9. With the factory shifter base gasket set back in place, feed the Tri-Ax shifter assembly through the floor pan and set it onto the factory base.
Note: Be sure the plastic cup, now attached to the Tri-Ax lower lever, is seated properly inside the linkage rail.
10. Reinstall the four 10mm head bolts back into the shifter base.
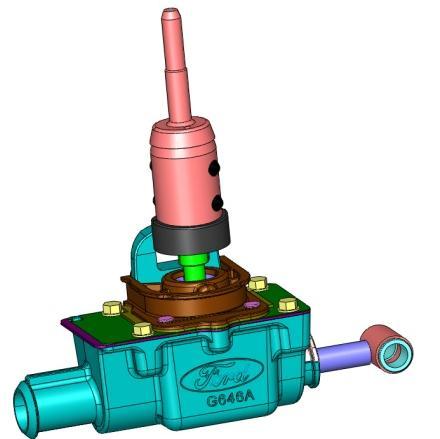
Note: Before final tightening of the bolts, make sure the shifter goes into all gears. Due to tolerances in the factory shifter base, theatre-Ax shifter may need to be adjusted very slightly left or right. The flat face on the upper lever reverse lock out ear is to just touch, or almost touch the boss on the side of the shifter base when in first and second gear. See figure 7.
11. From under the car, reinstall the rubber bushing back onto the base of the shifter and secure the shifter assembly back into place with the two 10 mm nuts you previously removed. Leave the nuts loose with about half an inch of thread between the nut and floor pan for reinstalling the rubber boot.
12. From inside the car, reinstall the rubber boot over the shifter and the floor pan.
Note: MAKE SUREthe bottom hole of the rubber boot fits securely over lip on the shifter bearing cage and the lip on the reverse lockout boss. Itcannotjust rest on top of the shifter.Note: MAKE SUREthe lips on the outside, around the middle of the rubber boot fit around the hole in the floor pan.
Note: MAKE SUREthe boot fits over the upper shifter lever just as it did with the factory shifter lever.
13. From under the car, finish tightening the nuts for the rear bushing.
14. From inside the car, reinstall the insulation/sound deadening material back over the shifter and the floor pan.
15. Place the enter console cover back over the center console and reconnect any electrical connectors that were disconnected.
16. Clip the center console back into place.
Note: Make sure all the clips snap back into place.
17. Reinstall the shift knob. You are done!!
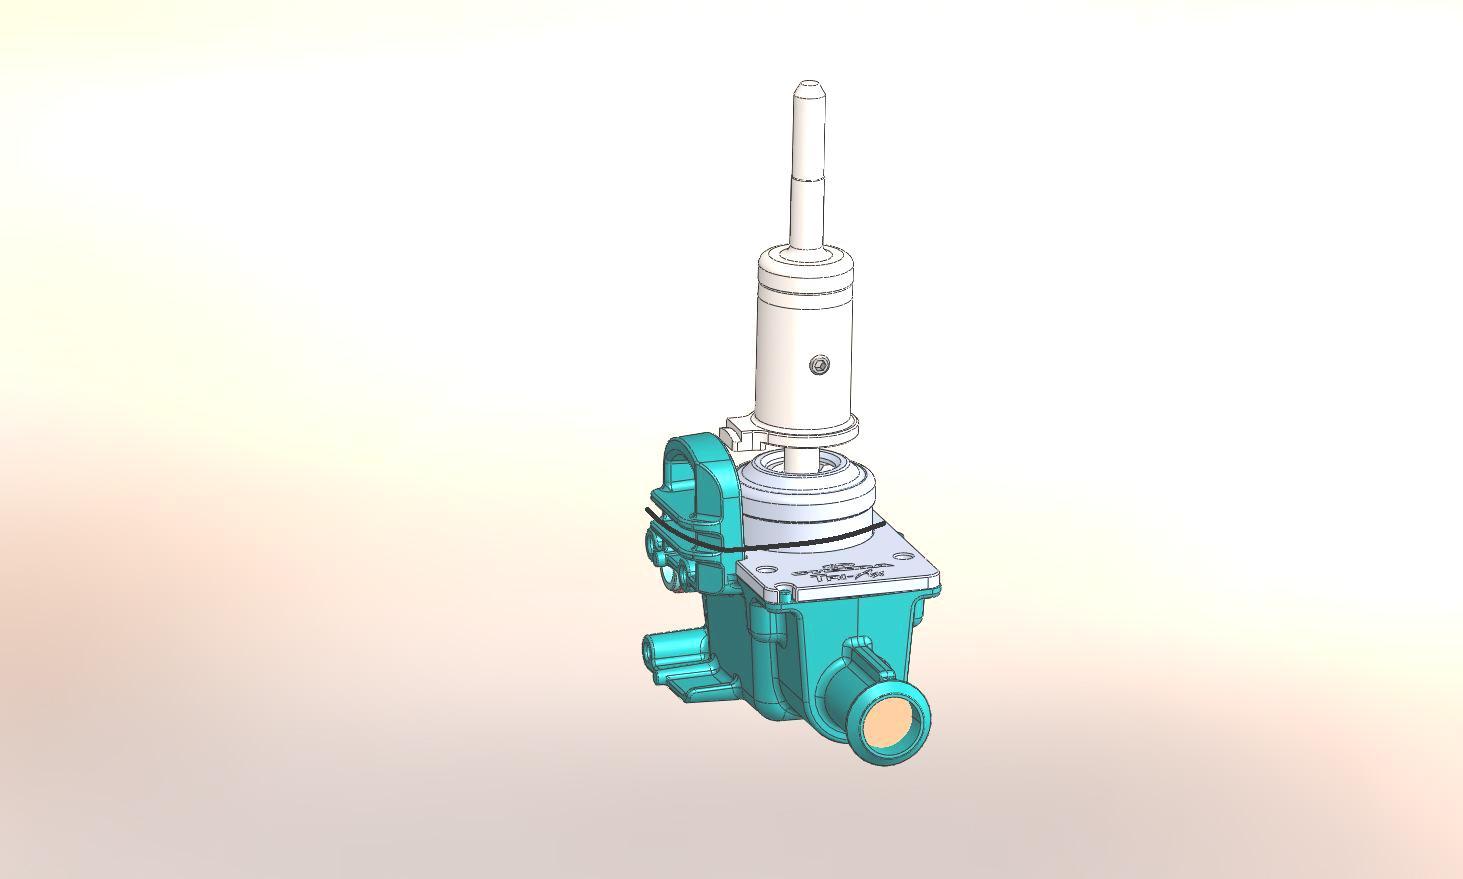
Reverse Lockout Spring Replacement:
The design of the shifter allows for the amount of force required to shift the car into reverse to be changed. A small coil spring and several shims are included in the shifter assembly. The provided spring has a lower spring rate than the spring installed in the shifter to allow less force to be used to engage reverse. To change the spring, remove the set screw from the upper shifter lever, and push the pin behind the set screw out through the set screw hole. You will need to insert a small tool into the 1/8 inch hole behind the pin to extract it through the set screw hole. Now lift the upper lever from the lower lever and remove the spring (it may still be in the bore of the upper lever). Carefully stack the lighter spring and shims onto the top of the lower lever and reinstall the upper lever onto it. Be sure to install the upper lever in the correct orientation and reinstall the pin and set screw into the lever. The pin must be fed through the slot in the lower lever to function properly.