 FREE 1 to 3-Day Delivery on Orders $149+ Details
Steeda Strut Tower Brace Installation Guide ('99-'04 GT/V6)
Installation Time
30 minutes
Tools Required
- Tape Measure
- Razor Knife
- Hacksaw
- Jack
- Jack Stands
- Electrical Tape
- Marking Pencil or Marker
- Drill and 5/16" Drill Bit
- 1/4" Drive Ratchet
- 7 mm Socket
- 1/2" Wrench
- 1/2" or 3/8" Drive Ratchet
- 1/2" Socket (Deep Wall)
- 5/16" Socket (For Removal of Air Intake)
- Flat Head Screwdriver (For Removal of Air Intake)
Installation
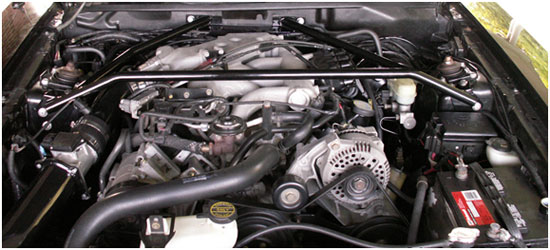
1. Remove the plastic clips that hold the wiring in place on the middle of the firewall. Move wires or any hoses that are in the way of the brace which should fit flush with the plastic ledge on the firewall. The brace should also fit fairly flush with the strut towers. (When it is tightened up the small gap will become flush)
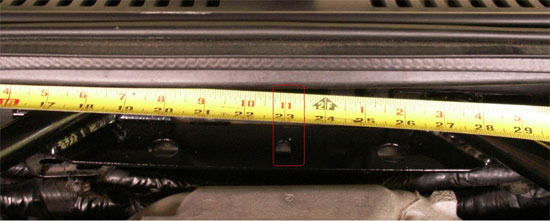
2. Get the strut tower brace centered on the ledge. As a starting point the middle slot on the back of the brace and the passenger side fender should measure about 23 inches apart.

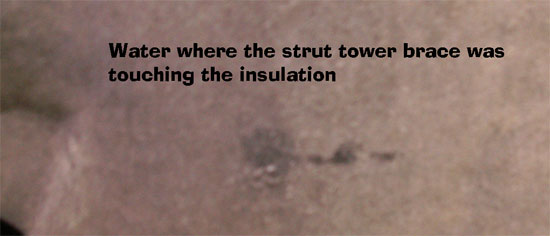
3. While the brace is still in the engine bay carefully close the hood and check to see if the brace is touching the hood. IF THE BRACE TOUCHES THE HOOD IT IS INCORECTLY ALIGNED. Move the brace to fit your Mustang. There is plenty of play in the brace alignment so it can be made to fit each car. It may help to pour a small amount of water on the top corners of the front tube on the brace. This will allow you to see if any contact is made by checking the insulation on the bottom of the hood for water.

4. With the brace correctly aligned press it firmly back and down so that the brace is flush with the plastic on the firewall. Trace around the outside of the back of the brace on the plastic panel.
5. Remove the brace from the car.
6. Remove the windshield wipers rubber molding at the top of the firewall and take the plastic pins out of the plastic cowl panel. To remove the plastic panel put your finger in between the windshield and the panel and gently pull up. NOTE: These are EXTREMELY FRAGILE and will break without applying much force. Before taking the panel completely off take the windshield washer hose off of the nozzles on the panel.
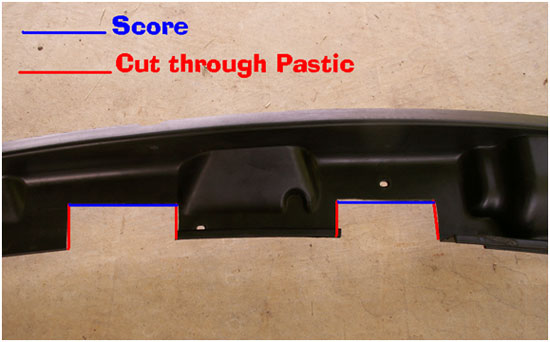
7. To remove the plastic cover on the firewall unscrew the 8 bolts that hold the cover on. The bolt heads are 7mm. With the panel out of the car you can cut the marked lines. Completely cut the vertical lines and score the top lines with a razor knife. Using a hacksaw will allow you to straight cut much easier than a razor knife. Then work the cut section until it breaks along the score. The razor knife can be used to trim the edges the hacksaw left rough.
8. Put the brace back into the car and use it as a template to mark the eight holes. Use a small marker to mark the center of each hole. Measure the two holes to be drilled on the firewall to make sure they are correct. The angle that the bars connect on the brace makes it difficult to mark the holes.
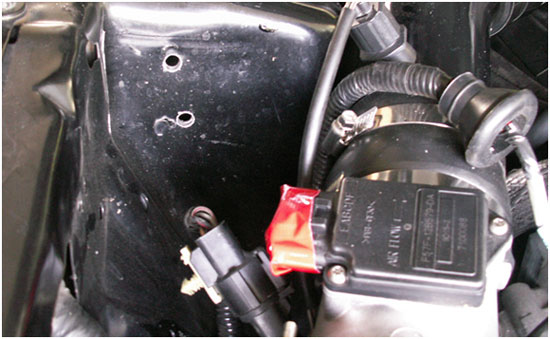
9. Remove the brace and drill the holes using a 5/16” drill bit. Using a punch will help keep the drill bit from walking You may need to take the intake off the car to drill the holes on the side of the passenger strut tower on some Mustangs with stock air intakes. This will require a 5/16” socket/wrench and a flat head screwdriver.Make sure to tape up any sensors you unplug or the throttle body if you remove the air intake to keep shavings out of the engine.
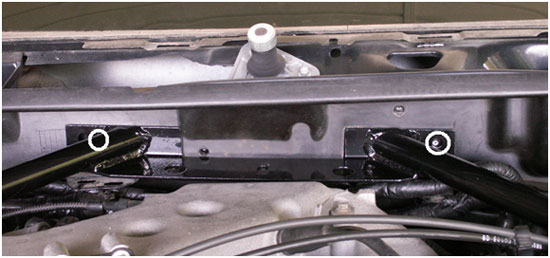
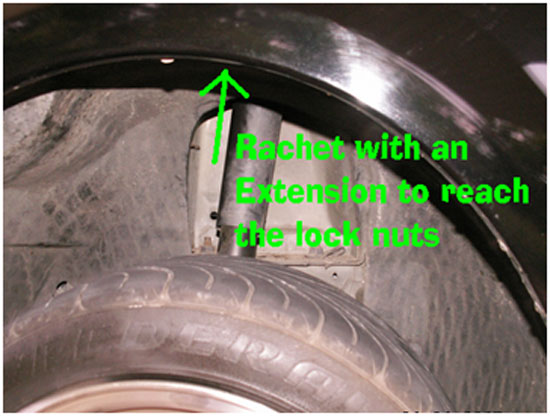
10. Put the brace back into the car and bolt it down with the hardware from the kit. Use a 1/2 ” wrench and 1/2 ” socket (3/8” or 1/2 ” drive) to tighten the bolts. Use a jack and a stand for safety to lift one side of the car at a time in order to get the nuts started and tightened for the bolts on the strut tower.
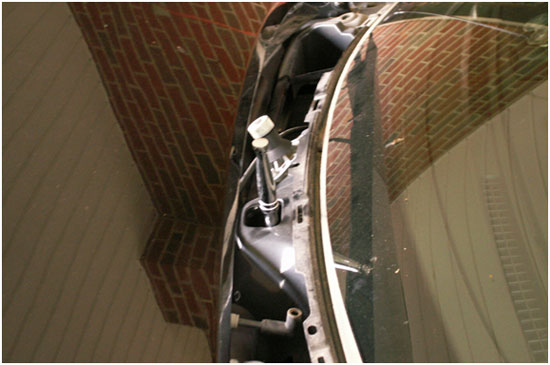
11. Put the plastic cowl panel back on. Snap the push pins back into place and put the rubber strip back on the plastic firewall panel. Put the windshield wipers back on to complete the installation.
Installation instructions provided by AmericanMuscle customer Derek Proctor 9.22.08
