 FREE 1 to 3-Day Delivery on Orders $149+ Details
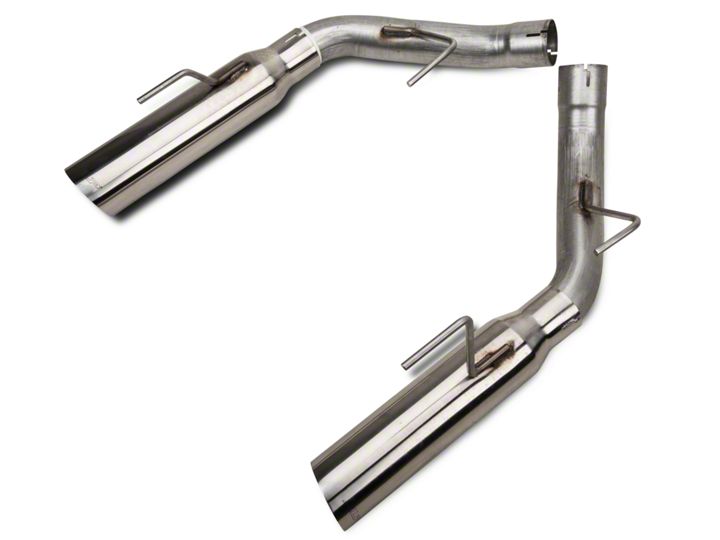
SLP Loudmouth Axle-Back Exhaust ('05-'10 GT & '07-'10 GT500) - Installation Instructions
Installation Time
2 hours
Tools Required
- Adjustable Wrench
- Socket Wrench
- WD40 (optional)
- Flat Head Screw Driver (optional)
Shop Parts in this Guide
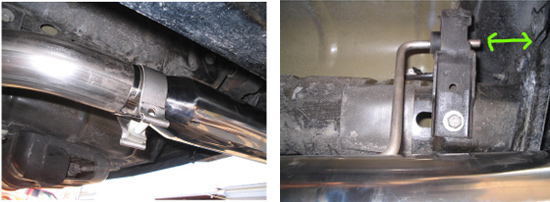
Remove your stock factory axle-back exhaust system (muffler) by removing the bolts that hold the rubber isolator brackets, the one closest to the rear bumper (one per side) to the chassis and then unbolting the band clamps on the over the axle pipe(8 bolts total, both sides). You may need to use some WD40 to loosing the bolts and the band clamps before they come loose. Do not try and force them loose.
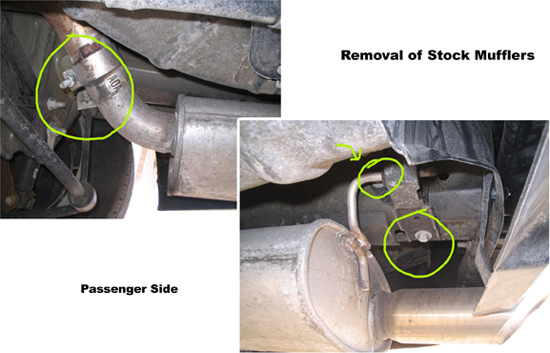
Note:It may be necessary to remove all four rubber isolator brackets in order to remove the stock exhaust.

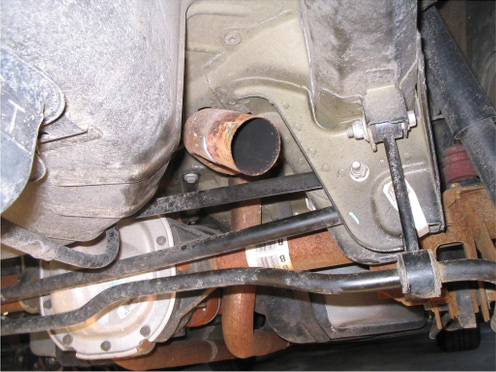
Picture of stock axle-back removed
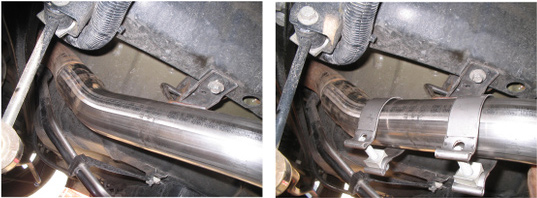
3. With the stock over the axle pipe now out of the way you can install the new SLP Loudmouth Mustang exhaust over the axle pipe in its place. Slide the SLP pipe into place and insert the hanger into the stock rubber isolator brackets (location closest to the axle). Before installing the polished tips be sure to slide the Band Clamps onto the pipe, two per side.
4. You can now place the polished tip on the end of the pipe and slide its hanger into its rubber isolator bracket. Now temporarily bolt the rubber isolator bracket back onto the chassis in its stock location.
NOTE:Do not tighten any of the bolts yet.
5. Before tightening any bolts check for clearance around the new pipes and tips to make sure there is no rubbing on the body, chassis, or moving parts. Also check that the exhaust is level and the tips are in the correct position under the rear bumper. Once happy with the fitment you can start tightening all the bolts. Make sure the band clamps are tight as these hold the exhaust piping together.
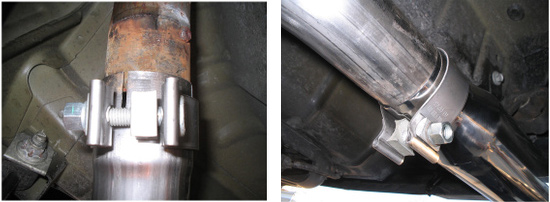
Pictures of band clamps in place
6. Start up your car and listen to your new SLP Loudmouth Exhaust for any excessive rattling noises. If you hear any double check and tighten any and all bolts that are causing the noise.
7. When your all done go for a ride so all your neighbors and friends can hear how a real car sounds.
Installation instructions provided by AmericanMuscle customer Josh Maraman

