 FREE 1 to 3-Day Delivery on Orders $149+ Details
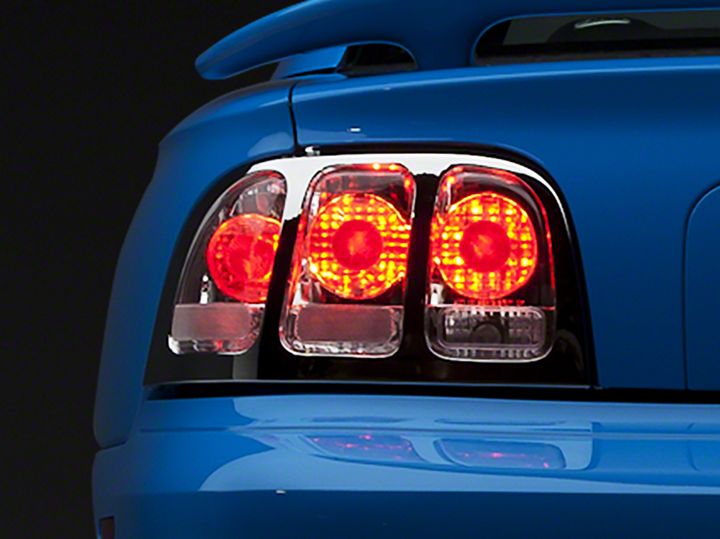
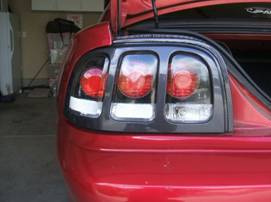
Mustang 3-Light Carbon Fiber Taillight Installation Guide ('96-'98)
Installation Time
2 hours
Tools Required
- Philips Screwdriver
- Socket Wrench
- Wrench
- Hammer (optional)
- File (if necessary)
Shop Parts in this Guide
Installation
Note:Before beginning installation it is a good idea to properly seal your new taillights from condensation with a silicon sealant. Click Here for more details.
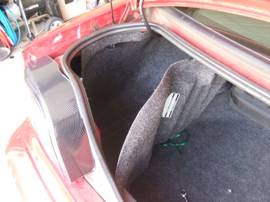
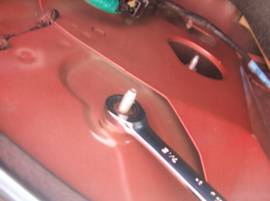
1. Begin first by opening your trunk and removing the carpet panel located behind the taillights. There will be black socket plugs holding the trunk lining in place and can be easily removed with a Philips screwdriver. Remove the first panel as shown below
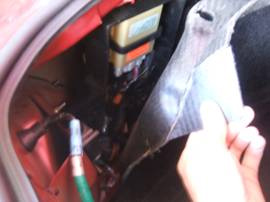
2. Remove the second carpet liner in the trunk. To remove this there will be one or two more socket plugs located on the underside of the trunk lining on the side of the trunk. This is removed the same as the previous plug by using a Philips screwdriver.
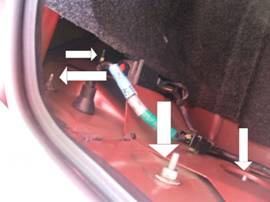
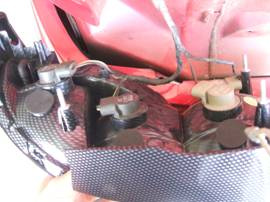
3. Once the panel is loose pull it away to reveal four small bolts protruding from the back of the back of the taillight. These are located as seen below. These bolts will have nuts and washers on the back of them. Remove the nuts and washers. It is recommended to use a wrench with a ratchet because the outside nuts are difficult to remove. One of the bolts may be easier to remove with a socket wrench as well.
4. After removing the nuts, set them off the side for installing your new taillights then proceed to remove the taillight fixture. Removing the taillight can be difficult so you can use a hammer to lightly tap on the back of the bolts and it should come out easily. You can then proceed to remove the light bulbs from the back of the taillight by twisting them out of their sockets.
5. Once you have removed your old taillight you can place the bulbs into your new taillight. To do this simple press the bulb into the socket and twist it to set it in place. The bulbs have a three-pronged locking system that must be place in the slots appropriately to lock properly in place. In some cases the socket hole may be too small for the bulb. You can use a file to shave down the inside of the socket to fit the bulb. Be careful to not knock the bulbs out of place while re-installing them or they will not light up. The easiest method to install the bulbs is to begin with the reverse light and work your way outward.
6. After you have placed all the light bulbs into your new taillights, remember to place the wire holder into the small holding socket located below and between the two outside lights on the back of the taillight. This will hold your wiring in place

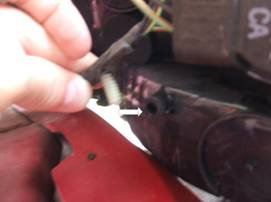
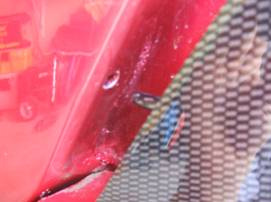
7. Now that you have placed all the bulbs into the taillight and have secured the wires with the wire holder, push the new taillight’s four bolts into the four open holes in the back of your mustang. Make sure to notice the small plastic pin locked on the outside of the taillight on the side of the car. This pin fits into a small hole located on the side of the car. This will hold the side of the taillight to the car. Re-apply the nuts and washers that you set aside from the previous taillight or apply new ones. When tightening the washers back in place be sure not to tighten them too tight as it will crack your new plastic taillights.
8. Start your mustang up and check to make sure the blinker, brake light, and reverse lights are all working correctly. If so you are now finished the installation of your new carbon fiber taillights. Close the carpet trunk lining back up and re-apply the socket plugs using your screwdriver.
Installation instructions provided by AmericanMuscle customer Justin Pierce
Related Guides
-
Installation
-
Installation

