 FREE 1 to 3-Day Delivery on Orders $149+ Details
1996-2004 Mustang GT Steeda Cold Air Intake Installation Guide
Installation Time
60 minutes
Tools Required
- Flathead Screwdriver
- 5/16" Wrench
- 8mm Socket
- 10mm Socket
- 11mm Socket
- 1/8" Allen Key
Installation
Removal of Stock Assembly:
1. The first step is to remove the factory rubber intake tube. Remove the two hose clamps. Use a flat head screwdriver or 5/16 socket. Disconnect the two vacuum hoses by pulling them out of the rubber intake tube. Next, remove the Intake Air Temperature sensor (IAT) from the intake tube. On mid 01 and up there is not one. This just pulls out. Remove the intake tube (see pic #1).

2. Next remove the factory air box assembly. First disconnect the mass air meter wire harness plug. Then remove the one 8mm bolt that holds the air box to the fender (see pic #1). Pull out the air box assembly with the mass air meter still connected. Remove the rubber grommet that mounts the air box to the fender, this will be reused.
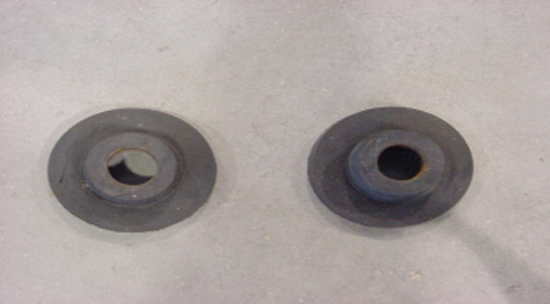
3. Remove the factory mass air meter from the air box. Remove the four bolts with a 10mm socket. Also remove the two rubber grommets on the bottom side of the air box. You will need to transfer these onto the Steeda base (see pic #2).
Installation of the Steeda Cold Air Induction Kit
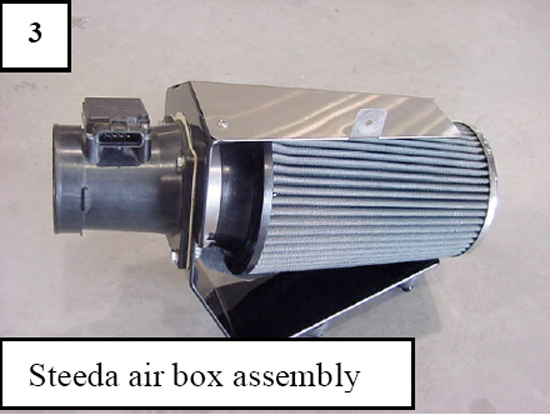
1. Bolt the mass-air meter to the Steeda cold air base. Use the new 11mm bolts and washers supplied along with the new supplied gasket to bolt them together. Attach the Steeda air filter to the base with the supplied hose clamp. Also attach the heatshield to the base using a 1/8 allen key. Then take the two factory rubber grommets and place them back into the factory holes in the engine compartment.
2. Install the Steeda air box assembly into the factory location. Make sure the nipples on the bottom side of the base go through the factory rubber grommets. Move any wires that will cause the cold air base not to sit flat. Once the base is in, attach the heat shield to the fender by installing the rubber grommet (from the factory air box) onto the heat shield. Then reuse the OEM 8mm bolt and bolt it to the fender.
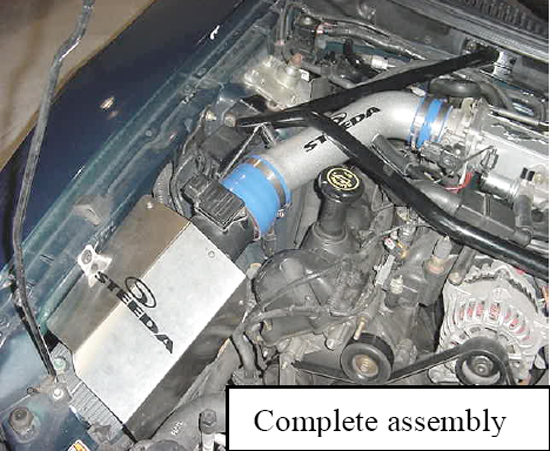
3. Install the intake tube using the included silicone pieces and four hose clamps. The two small clamps are for the throttle body, while the larger ones are for the mass air meter. The short straight section will go from the throttle body to the intake tube. The reducer/longer piece will go from the mass air meter to the intake tube. Adjust the intake tube so it does not interfere with the strut tower or any strut tower brace. Tighten the hose clamps.
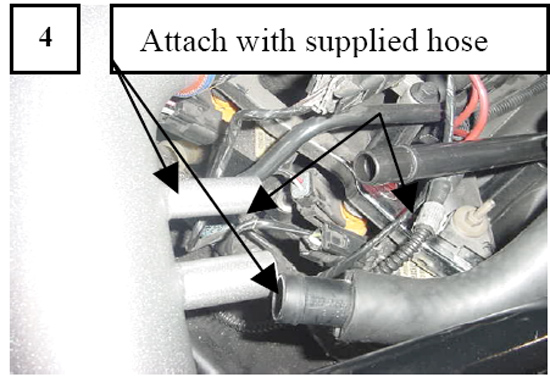
4. Attach the two factory vacuum tubes to the Steeda intake. Use the supplied 5/8 and 3/4 hose to attach the tubes to the intake (see pic #4). No hose clamps are needed, as it is a tight fit.
5. Finally install the IAT senor into the hole in the black intake base with the supplied grommet, use silicone spray or similar lubricant on the inside diameter of the grommet to make pushing in the IAT sensor in easier. Reinstall the wiring harness to your mass air meter. Also verify clearance from any other accessories nearby. Move if necessary.
Installation instructions provided by Steeda
Related Guides
-
Installation
-
Installation
-
Installation
