 FREE 1 to 3-Day Delivery on Orders $149+ Details
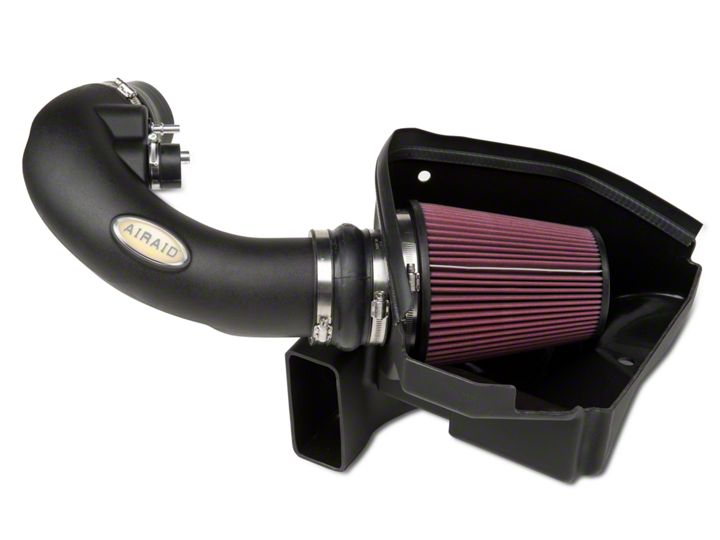
How to Install an Airaid Cold Air Intake on Your 2011-2012 Mustang GT
Installation Time
1 hours
Tools Required
- 5/32" Allen Wrench & 3/32" Allen Wrench
- 5/16", 10mm Sockets
- Ratchet & Extension, Pliers, and Screwdriver
Shop Parts in this Guide
Installation
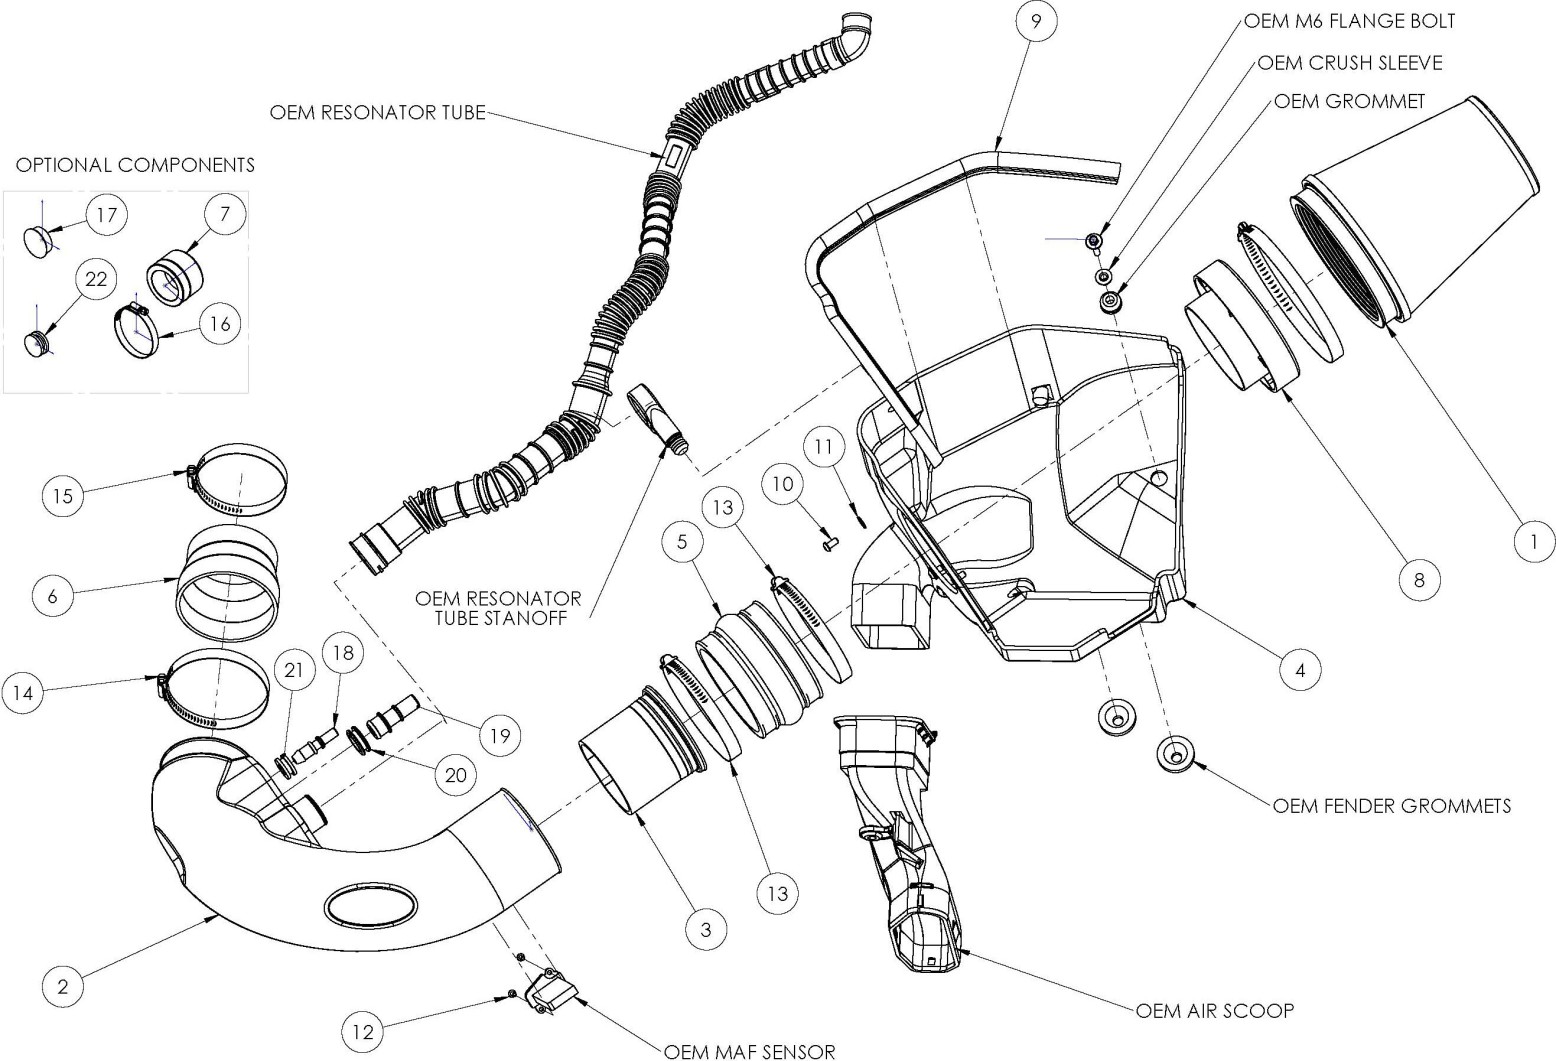
Packing List:
| #1 | 700-461 | Airaid Premium Filter | 1 |
| #2 | KIT264T | Airaid Intake Tube | 1 |
| #3 | KIT264I | Modular Venturi Tube (MVT) | 1 |
| #4 | KIT264CAD | Cool Air Dam | 1 |
| #5 | KITHUMPHS05 | Urethane Hump Hose | 1 |
| #6 | KITRDCR18 | Silicone Reducer | 1 |
| #7 | KITCAP02 | Urethane Cap* | 1 |
| #8 | KIT1121MAFADA | Urethane Cap* | 1 |
| #9 | KITWSTRIP03 | Weather Strip 25” | 1 |
| KIT238HP | Hardware & Instructions | 1 | |
| #10 | KIT15DHC3050 | ¼-20 Button Head Bolt | 3 |
| #11 | KIT09FWZ019 | ¼” Flat Washer | 3 |
| #12 | KIT15BHC3038 | 8-32 x 3/8” Button Head Bolt | 2 |
| #13 | KITHS72 | #72 Hose Clamp | 2 |
| #14 | KITHS64 | #64 Hose Clamp | 1 |
| #15 | KITHS56 | #56 Hose Clamp | 1 |
| #16 | KITCLAMP60SS | 60mm Hose Clamp | 1 |
| #17 | KITPLUG01 | Firewall Plug* | 1 |
| #18 | KITFITTING05 | 3/8”Aluminum Fitting | 1 |
| #19 | KITFITTING15 | 5/8”Aluminum Fitting | 1 |
| #20 | KITGRMT10 | 5/8”Grommet | 1 |
| #21 | KITGRMT03 | 3/8”Grommet | 1 |
| #22 | KITGRMT17 | Blind Grommet | 1 |
| #23 | KITBIT01 | #20 Torx Driver | 1 |
Disconnect The Negative Battery Terminal!
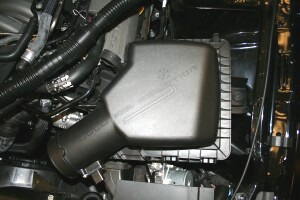
1. Remove the Engine cover by simply lifting up, and set aside.
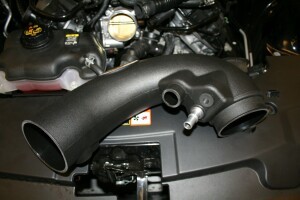
2. A) Loosen the hose clamps on the factory intake tube B) Squeeze the clamp and disconnect the resonator from the air intake tube. C) Carefully depress the hose lock tabs, and disconnect the crank case breather line and the brake aspirator line (if equipped, AT models only). D) Remove the factory intake tube.
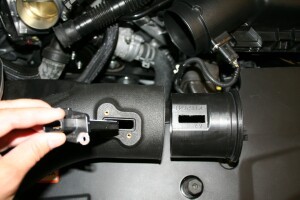
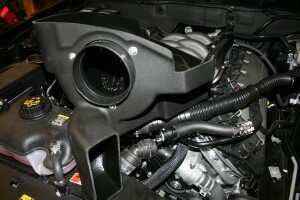
3. A) Slide the red tab, and disconnect the wiring harness from the Mass Air Flow sensor (MAF). Carefully pry the harness anchor from the air box using a screwdriver. B) Separate the resonator tube from the stand off attached to the Air box lid. C) Using a 10mm socket, remove the bolt securing the air box to the inner fender and remove the air box assembly. This bolt will be reused in step 9.
4. Install the Grommets and Fittings into the Airaid intake tube (#2). A) All models will require the use of the 5/8” Fitting (#19) and the 5/8”Grommet (#20). B) Automatic transmission equipped vehicles will also use the 3/8” Fit-ting (#18) and 3/8” Grommet (#21). Manual transmission vehicles will not need the 3/8” components and will use the Blind Grommet(#22).
5. Using the supplied Torx driver, remove the MAF sen-sor from the Factory airbox and create the Tube assem-bly.
A) Slide the Modular Venturi Tube (#3) into the Airaid intake tube (#2) making sure to align the two slots for the MAF senor. B) Install the MAF sensor into the intake tube using two provided 8-32x3/8” screws (#12).
6. Install the filter adapter (#8) using three 1/4-20 button head bolts (#10), and flat washers (#11) into the Airaid Cool Air Box (CAB) (#4) as shown.
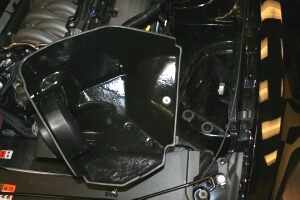
7. Transfer the factory air box mounting grommets. A) Locate and remove the Two Lower air box mounting grommets, and install them in the inner fender. B) Re-move the Upper air box mounting grommet and steel sleeve, and re-install into the Airaid CAB.
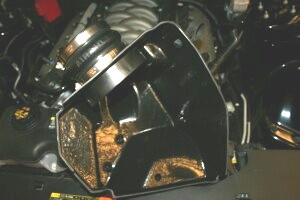
8. Install the hump hose (#5) onto the filter adapter using two #72 hose clamps (#13) as shown. Leave the two hose clamps loose for now. Transfer the Resonator stand off from the factory air box into the CAB.
9. Install the CAB into the vehicle. Make sure that the Air inlet of the CAB aligns with the factory duct, and the two locating pins on the bottom align with the factory grommets. Next reinstall the factory bolt that was removed in step #3 thru the steel sleeve and grommet and into the inner fender.
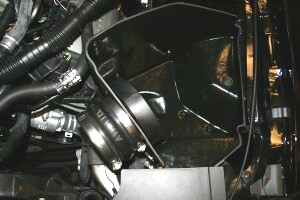
10. Install the Silicone Reducer (#6) and Hose clamps onto the throttle body. Place the #56 clamp (#15) on the Throttle body side of the reducer, and the #64 clamp (#14) on to the tube side.
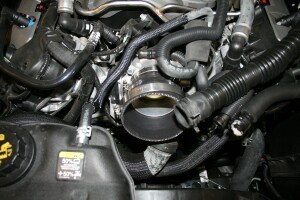
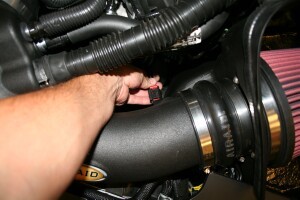
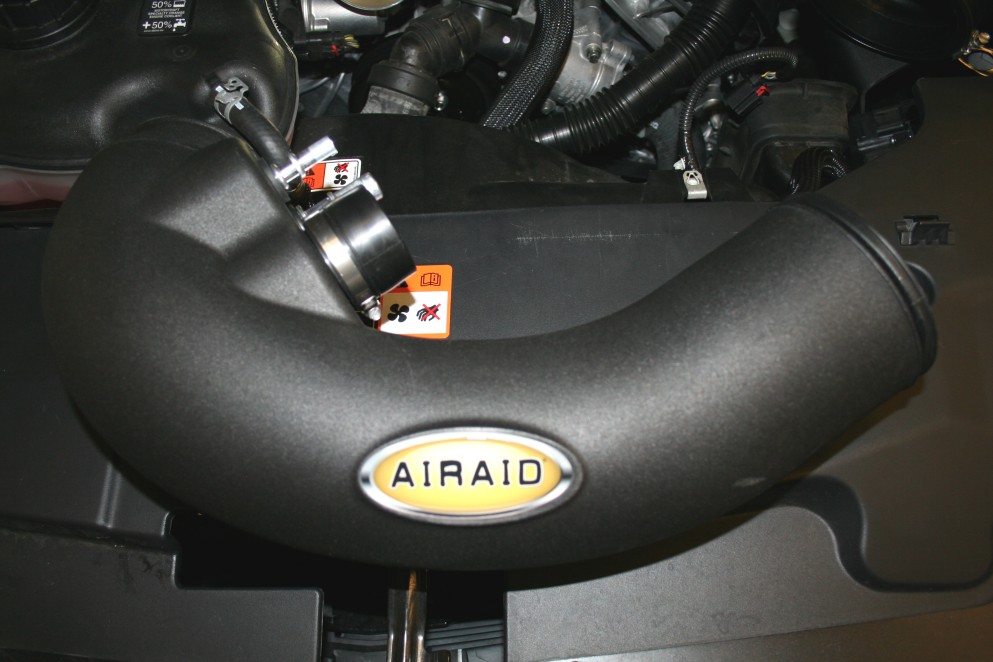
11. Install the Airaid Intake Tube into the couplers as shown, and tighten all Hose clamps. A) Reconnect the Resonator tube to the Airaid Intake using the OEM clamp. B) Reconnect the breather line/lines to the Alumi-num Fittings depending on your application.
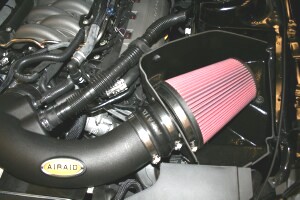
12. A) Install the Airaid Premium Filter (#1) onto the filter adapter and tighten the hose clamp. B) re install the Resonator tubing into the factory Stand off.
13. Reconnect the Mass Air Flow sensor, which is now located in the lower back side of the intake. Slide the locking tab back into the connector.
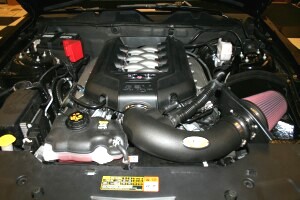
14. Install the Weather Strip (#9) onto the CAB with the contoured edge going away from the filter. Start at the front of the vehicle and work your way back. Replace the engine cover.
15. Double check your work!
Make sure there is no foreign material in the intake path. Make sure all clamps, hoses, bolts, and screws are tight. Double check the hood clearance!
Reconnect the negative battery cable!
Optional Installation Notice!
Airaid has made it possible to eliminate the factory in-duction roar resonator if you so desire. The removal of the resonator from the intake has no negative effect on the performance of this kit.
Remove the entire Resonator tube assembly and all asso-ciated stand offs from the intake tube to the Fire wall.
A.) Install the Urethane cap (#7) with the 60mm Hose Clamp (#16) onto the Airaid Intake tube.
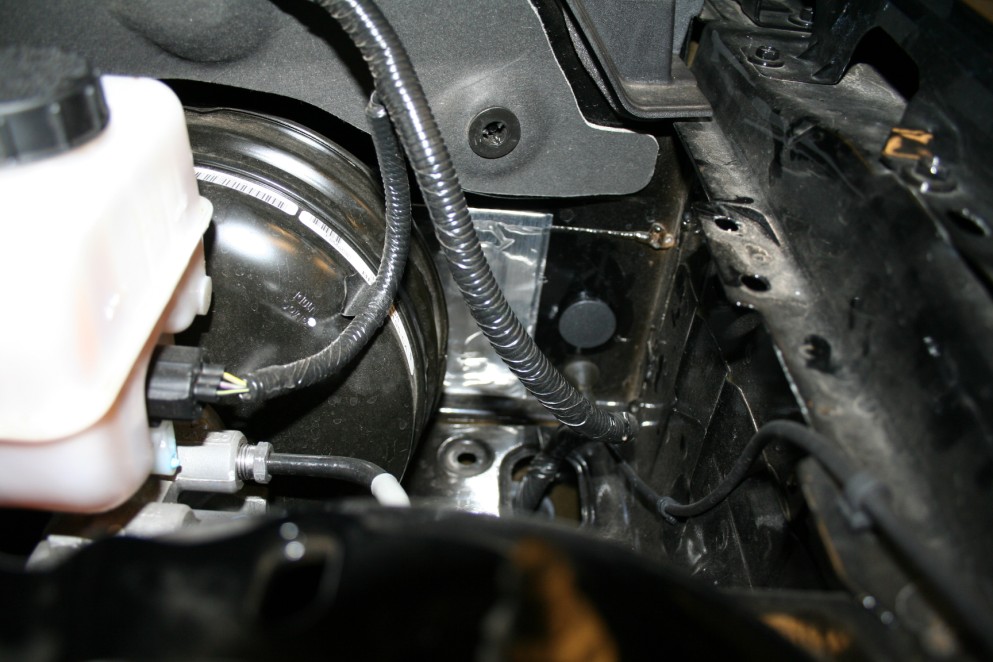
B.) Snap the Firewall plug (#17) into the firewall hole.
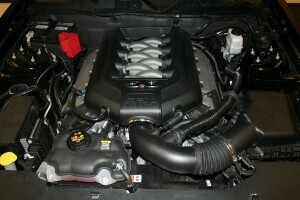
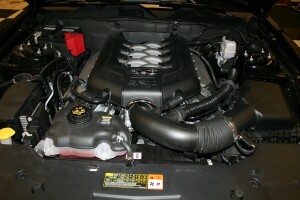
Before!
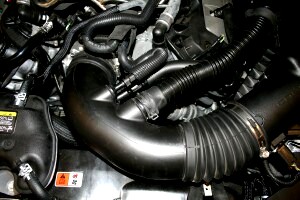
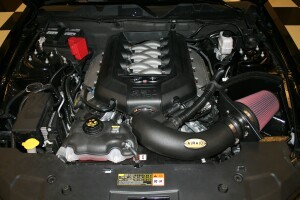
After!
Related Guides
-
Installation
-
Installation
-
Installation

