 FREE 1 to 3-Day Delivery on Orders $149+ Details
How to Install BBK Twin 62mm Throttle Body on your 2005-2010 Mustang GT
Installation Time
2 hours
Tools Required
- 8mm socket
- 10mm socket
- Ratchet
- Ratchet extensions
- Voltmeter
- Pins or paperclip
- 2.5mm allen wrench
- T20 torx bit
- Tuner (not required, but recommended)

Shop Parts in this Guide
Installation
1. The first thing you want to do is remove your air intake box or cold air intake. Remember to disconnect the PCV line and the MAF sensor harness.
Installation
1. The first thing you want to do is remove your air intake box or cold air intake. Remember to disconnect the PCV line and the MAF sensor harness.

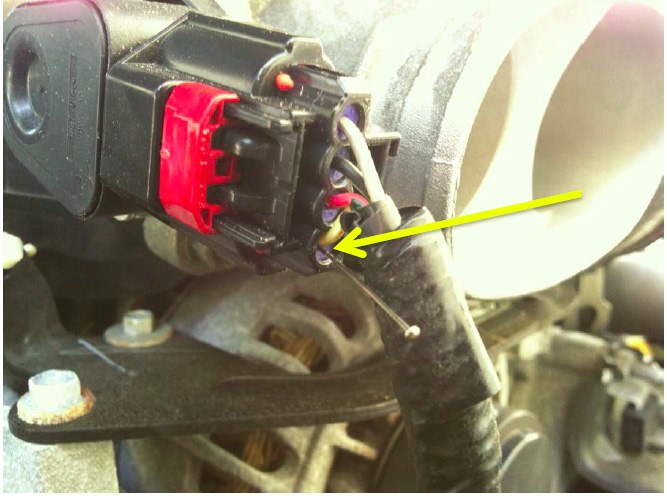
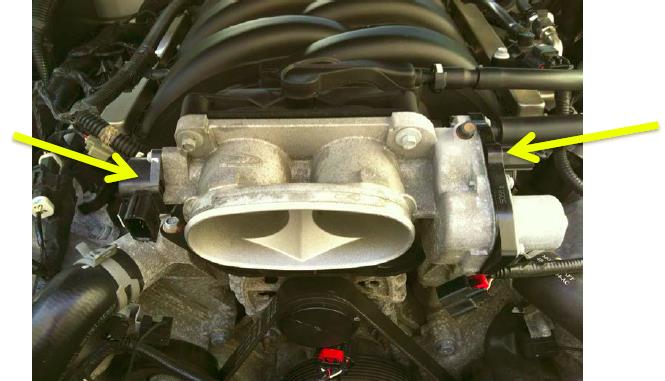
2. Then before you remove the stock throttle body, you MUST check the voltage reading of the TPS (throttle position sensor) located on the left side of the throttle body. This ensures that when you install the BBK unit, it will perform correctly and accurately.
3. To check the voltage, push a pin in between the yellow wire and the blue grommet in the TPS harness.
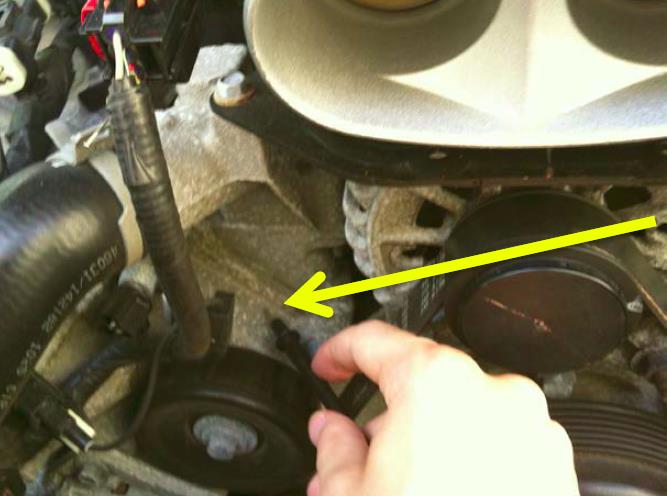
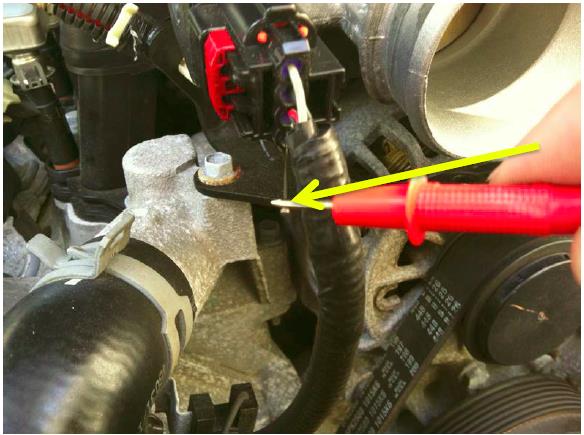
4. Take your voltmeter and connect the positive (red) probe to the pin in the harness and the negative (black) probe to a grounded source (I used the engine itself).
*The car’s power must be ON to get a voltage reading, it does NOT have to be started.
4. Take your voltmeter and connect the positive (red) probe to the pin in the harness and the negative (black) probe to a grounded source (I used the engine itself).
*The car’s power must be ON to get a voltage reading, it does NOT have to be started.
5. You should get a reading around 1.2 volts. If your voltage is much lower, then try replacing the pin in the harness to get a better connection and also check your grounds.
5. You should get a reading around 1.2 volts. If your voltage is much lower, then try replacing the pin in the harness to get a better connection and also check your grounds.
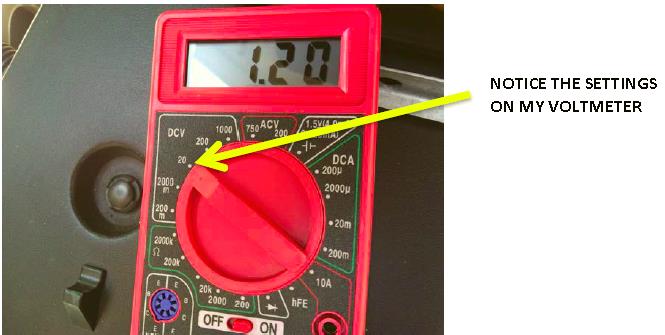
*Once you are satisfied with your voltage reading from the TPS, REMEMBER it!!! You will need this when you install the BBK TB for adjustments.
6. Now you can remove the stock TB by first disconnecting the TPS and actuator motor harnesses located on both sides of the TB.
*Once you are satisfied with your voltage reading from the TPS, REMEMBER it!!! You will need this when you install the BBK TB for adjustments.
6. Now you can remove the stock TB by first disconnecting the TPS and actuator motor harnesses located on both sides of the TB.
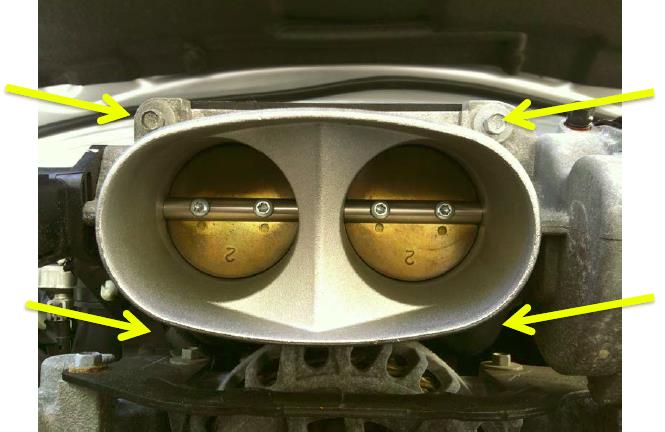
7. Then you can remove the (2) bottom nuts with a 10mm socket and the (2) top bolts with an 8mm socket. Then bring the TB to a workbench or counter.
7. Then you can remove the (2) bottom nuts with a 10mm socket and the (2) top bolts with an 8mm socket. Then bring the TB to a workbench or counter.
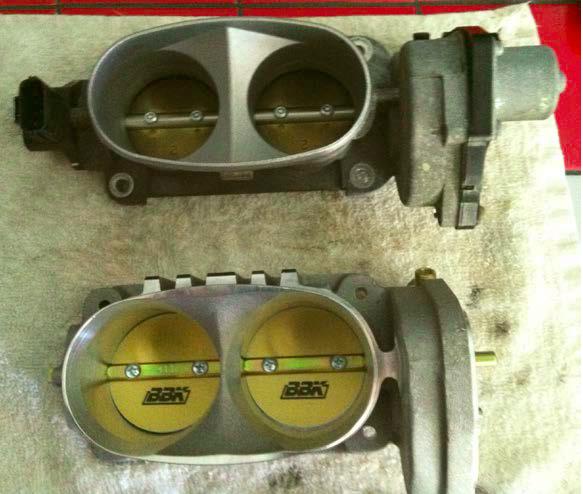
8. Now its time to transfer the parts from the stock TB to the BBK unit using a T20 torx bit. With these side by side you can really see the difference in size!
8. Now its time to transfer the parts from the stock TB to the BBK unit using a T20 torx bit. With these side by side you can really see the difference in size!
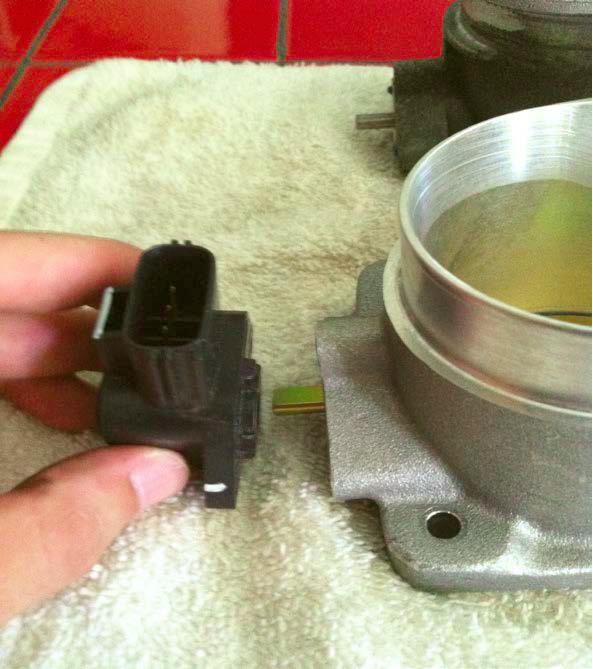
9. To transfer the TPS sensor, unscrew the (2) torx screws and slide it onto the BBK TB WITHOUT turning it (this could cause damage to it). Make sure the alignment tab sticks into the designated hole on the TB.
9. To transfer the TPS sensor, unscrew the (2) torx screws and slide it onto the BBK TB WITHOUT turning it (this could cause damage to it). Make sure the alignment tab sticks into the designated hole on the TB.
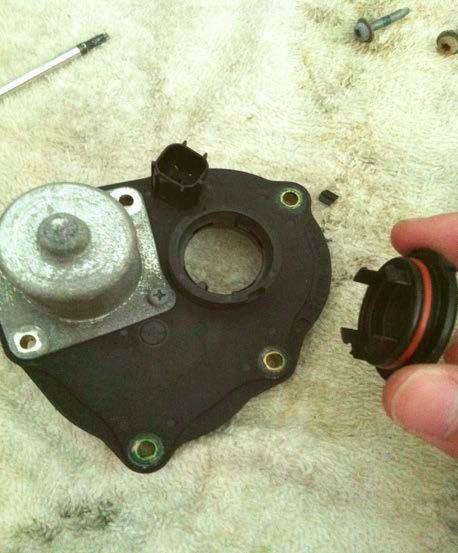
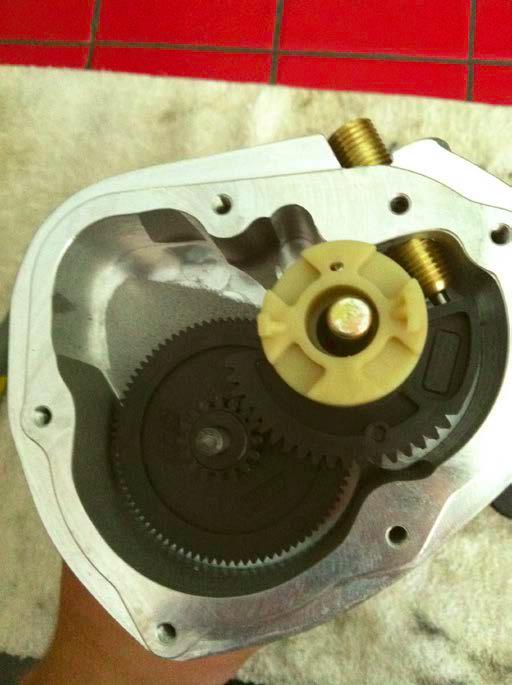
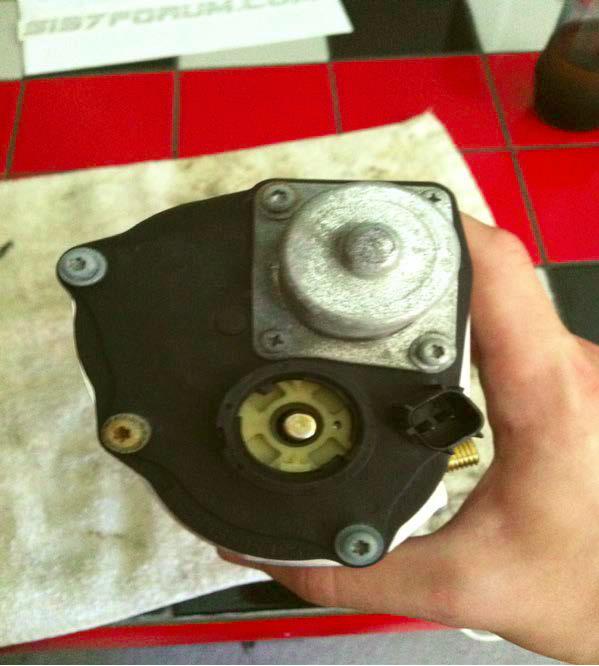
10. Now unscrew the (5) torx screws on the other side of the TB. Do not unscrew the Phillips head screws. Take the cover off slowly because there is a wound spring inside. Do not lose this, it is necessary!
10. Now unscrew the (5) torx screws on the other side of the TB. Do not unscrew the Phillips head screws. Take the cover off slowly because there is a wound spring inside. Do not lose this, it is necessary!
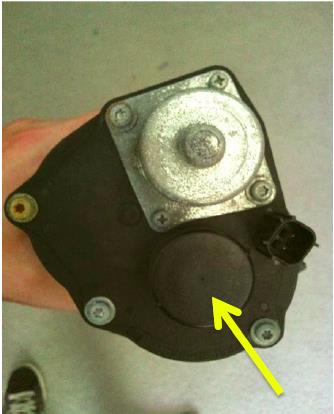
*You must remove this dust cover. To do this, get a screwdriver that you were using and use the tip to punch the cover out.
*You must remove this dust cover. To do this, get a screwdriver that you were using and use the tip to punch the cover out.
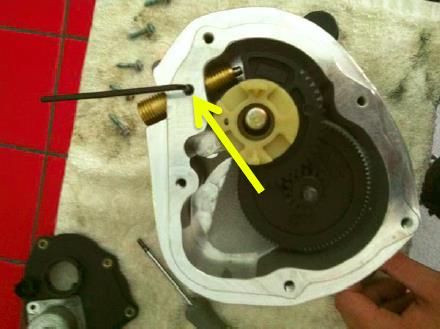
11. Now using your 2.5mm allen wrench, you can loosen the screw that juts into the brass plunger, just enough so you can turn the plunger slightly (you will need this for adjustment purposes later).
11. Now using your 2.5mm allen wrench, you can loosen the screw that juts into the brass plunger, just enough so you can turn the plunger slightly (you will need this for adjustment purposes later).
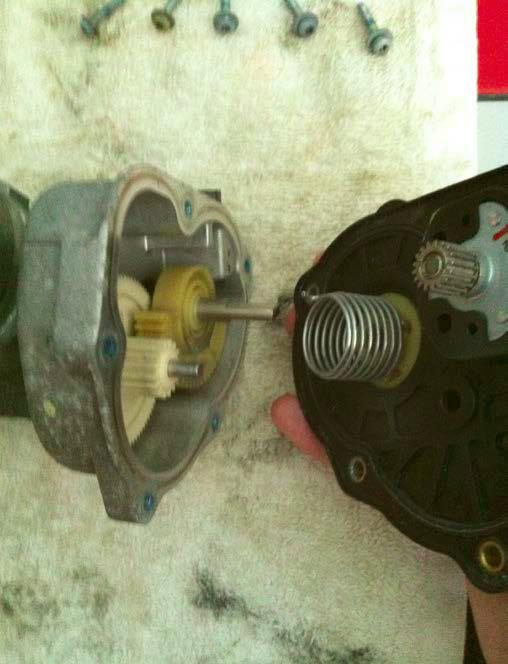
12. Now place the spring into the BBK TB and get it to seat itself in the gear’s notch. Then you can reinstall the cover, but do not tighten the screws down yet, you will be removing this again later.
12. Now place the spring into the BBK TB and get it to seat itself in the gear’s notch. Then you can reinstall the cover, but do not tighten the screws down yet, you will be removing this again later.
13. Now, using the tip of a screwdriver, or the allen wrench, turn the spring counter-clockwise until the tabs are seated in their notches.
13. Now, using the tip of a screwdriver, or the allen wrench, turn the spring counter-clockwise until the tabs are seated in their notches.
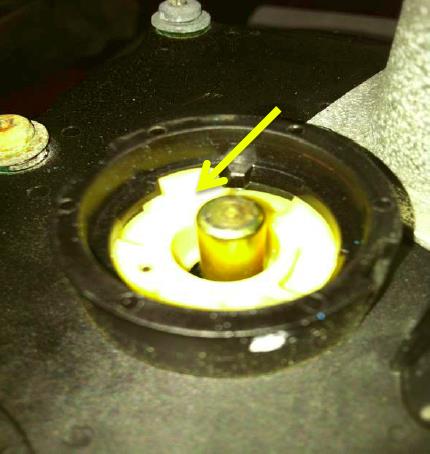
* To make sure you did this correctly, push the throttle blades open and let go, they should close by themselves with some force.
14. The BBK TB is ready to be installed now. Bolt it back to the intake manifold and plug in the harnesses (do not over tighten the bolts, the threads in the intake manifold strip easily).
15. Now for the most crucial part of the install, you must recheck the voltage of the TPS and adjust it so that it is identical, or close to the previous reading on the stock TB. Follow the same procedure as before to get a reading. When I installed mine, the reading was slightly higher than before (1.25v compared to 1.21V).

16. To adjust the voltage, turn the brass plunger in small increments to either raise or lower the voltage (clockwise to increase, counterclockwise to reduce). You will notice while looking at your voltmeter that the adjustments needed are very slight. When the voltage matches your previous reading, remove the cover on the TB once again and tighten the 2.5mm screw with the Allen wrench to prevent the plunger from accidently turning and messing up your TPS voltage. Then you can put the cover back on and tighten the screws. Don’t forget to wind the spring again (counterclockwise) and seat it in the notches. Then put the dust cover back on.
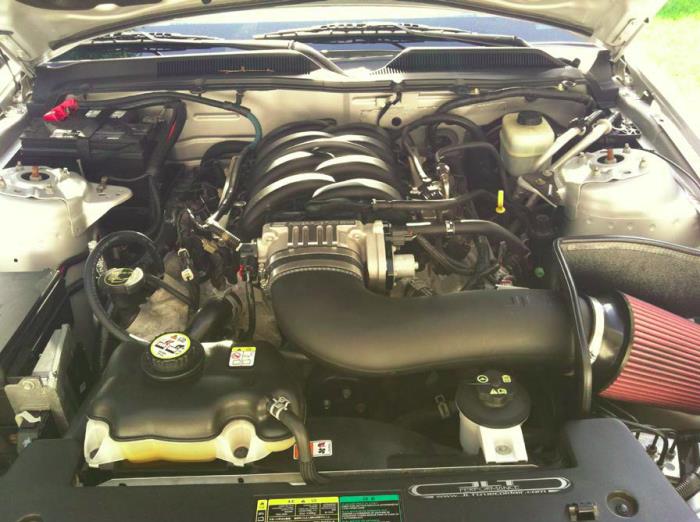
17. Now just reinstall your intake and make sure that all of the harnesses and hoses are connected, then enjoy your added performance!!!
16. To adjust the voltage, turn the brass plunger in small increments to either raise or lower the voltage (clockwise to increase, counterclockwise to reduce). You will notice while looking at your voltmeter that the adjustments needed are very slight. When the voltage matches your previous reading, remove the cover on the TB once again and tighten the 2.5mm screw with the Allen wrench to prevent the plunger from accidently turning and messing up your TPS voltage. Then you can put the cover back on and tighten the screws. Don’t forget to wind the spring again (counterclockwise) and seat it in the notches. Then put the dust cover back on.
17. Now just reinstall your intake and make sure that all of the harnesses and hoses are connected, then enjoy your added performance!!!
Installation Instructions written by AmericanMuscle customer Matt O’Rourke 7/18/12
Installation Instructions written by AmericanMuscle customer Matt O’Rourke 7/18/12
