 FREE 1 to 3-Day Delivery on Orders $149+ Details
BBK Cold Air Intake ('96-'04 GT) - Installation Instructions
Installation Time
60 minutes
Tools Required
- Small flat blade screw driver
- Phillips head screw driver
- 8mm socket and wrench
- 10mm socket and wrench
- 7/16 socket or wrench
- 3/8 socket or wrench
- Floor jack
- Wheel chock or block for rear tires

Shop Parts in this Guide
Installation

Removal of Stock Intake :
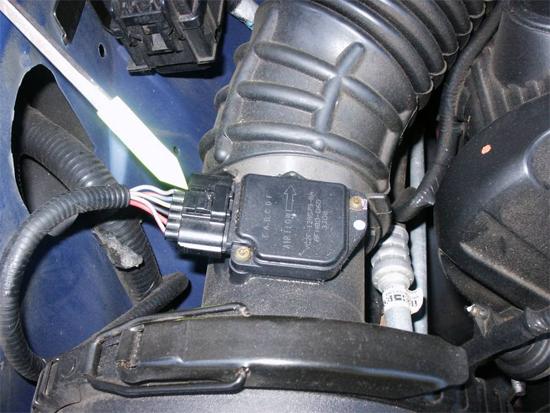
1. Use a small flat blade screw driver to depress the tab on the electrical connector on top of the mass-air sensor and pull back the electrical plug to disconnect.
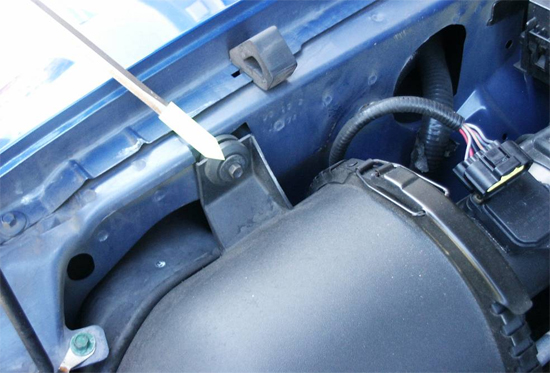
2. Use an 8mm socket to remove the bolt holding the stock air box to the inner fender. Set the stock rubber grommet and bolt aside to reuse for installation of the new filter mount.
3. Use a flat blade screw driver to loosen the stock hose clamp on the throttle body. Disconnect the two (2) small hoses from the stock inlet tube (valve cover breather tube and throttle body hose). Rotate the entire stock assembly counter-clockwise while pulling up and out.
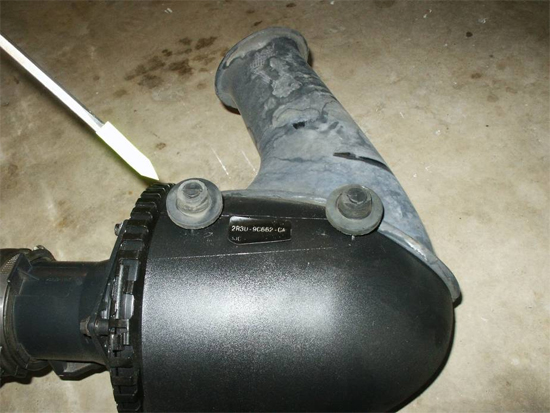
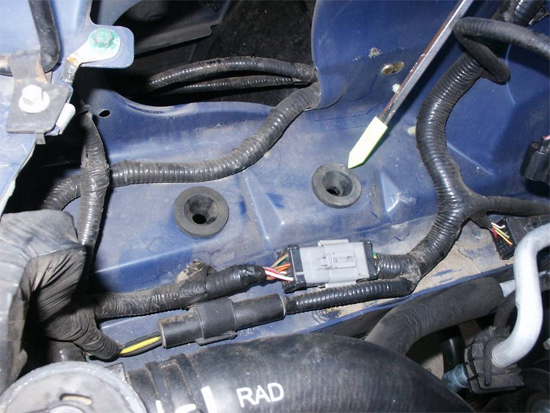
Note:The rubber grommets on the bottom of the stock air box will sometimes remain attached to the air box. Be sure to remove both of them and reinstall into the holes on top of the frame rail.
4. Use a flat blade screw driver to loosen and remove the hose clamp and hose from the mass-air sensor. Use a 10mm socket to remove the four (4) bolts holding the mass-air sensor to the stock air box.
Installation of the New System:
1. Use a phillips head screw driver to attach the two (2) supplied aluminum grommet studs to the underside of the new chrome filter mount with the supplied screws. The studs must be facing down to slip into the stock rubber grommets in the frame rail.
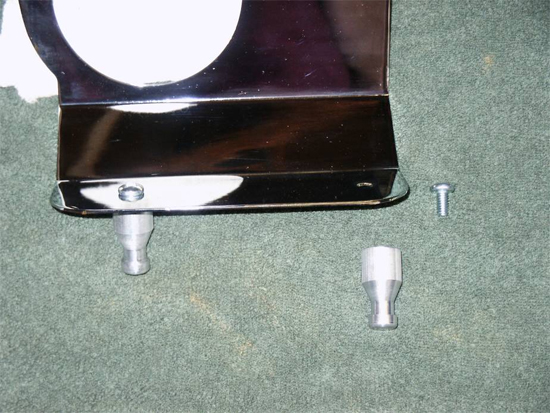
2. Slide the stock rubber fender grommet (set aside in step 2 above) into the notch on the new filter mount. Install the large air tube rubber grommet into the hole in the filter mount. Attach entire new filter mount assembly back onto the inner fender using an 8mm socket with the stock fender bolt (from step 2 above). Be sure to press the grommet studs down into the fender rail grommets prior to tightening the fender bolt.
3. Install the supplied small inlet tube grommet and billet plug into the hole located in the air inlet tube (mass-air sensor to throttle body section). It helps to lube the plug prior to attempting installation.
4. Slide the supplied (single diameter) rubber tube coupler and two (2) hose clamps onto the air inlet tube (tube end closest to the throttle body). Slip the rubber tube coupler, air inlet tube (mass-air sensor to throttle body) and hose clamps over the throttle body. Do not tighten the hose clamps just yet because some adjustment to the entire system will be required after completing installation.
5. Reconnect the two small hoses (throttle body and valve cover breathers) to the air inlet tube. The short section of supplied ½” diameter hose will be required to connect the valve cover breather tube to the new air inlet tube. You will need to heat and lube the hose to allow it to slip over the stock valve cover breather tube.
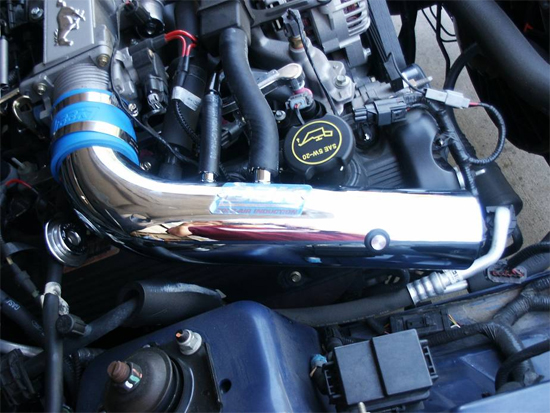
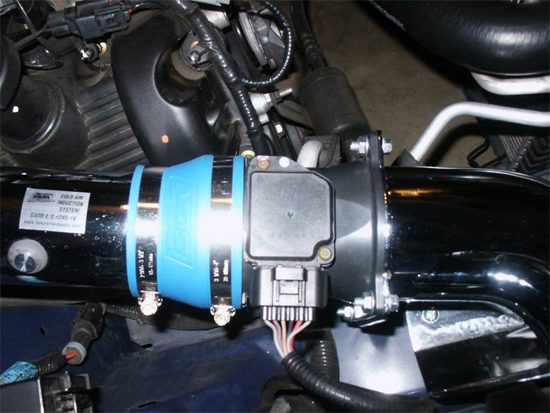
6. Slide the large end of the supplied rubber reducing coupler over the mass-air sensor and install the hose clamps. Slide this assembly onto the air inlet tube that feeds the throttle body (previously installed in step 4). Here again, wait to tighten the hose clamps until after final adjustment.
7. Slide the remaining air inlet tube (filter to mass-air sensor) into the large rubber grommet in the filter mount.
Please Note:Grommet will need to be moistened or lubed to allow the air inlet tube to slide through without binding the grommet.
8. Attach the mass-air sensor to the filter air inlet tube with the supplied nuts and bolts using a 7/16” wrench (or socket) on the nuts and a 3/8” wrench (or socket) on the bolts.
9. Reconnect the electrical plug to the top of the mass-air sensor. Make sure it seats properly and “snaps” back into place.
10. Adjust the entire air intake system to sit properly and allow clearance with the valve cover and other obstructions. After you are satisfied with the arrangement, tighten all four (4) hose clamps on the rubber tube couplers.
11. Last step will be to install the new BBK filter to the end of the air inlet tube. This will need to be accomplished from under the car. If your Mustang is lowered (like mine), you will need to jack the front end up in order to allow enough room under the car to gain access.SAFETY NOTE: Make sure to use wheel chocks or blocks at the rear wheels prior to jacking the car up.Once under the car, remove the inner fender push-pin to allow room to slide the filter up and onto the end of the inlet tube. Tighten the hose clamp, reinstall the inner fender push pin and remove the jack and chocks.

12. That is all. You are now ready to go out and enjoy the modification you just installed.
Installation instructions provided by AmericanMuscle customer Duane Petersen 7.11.10

