 FREE 1 to 3-Day Delivery on Orders $149+ Details
BBK Underdrive Pulleys - Installation Instructions
Installation Time
2 hours
Tools Required
- 8mm Socket
- 10mm Socket
- 18mm Socket
- 19mm Socket
- Socket Wrench (for sockets listed above)
- Socket Wrench (1/2 inch drive)
- 14mm Wrench (Automatic Transmissions)
- Cheater Bar (Not required, but it helps)
- 3-Jaw Puller
- Dremel with Cutting Wheel (or some method of cutting a bolt stud)
- Black RTV Sealant
Shop Parts in this Guide
Installation
1. The pulley installation isn’t too difficult but it will take a couple of Hrs, especially if you haven’t performed the swap before. This is due to the fact you’ll need to remove the fan assembly to have enough room to work with a3-jaw puller to remove the damper. The puller is probably the only tool you may need to acquire beforehand, as everything else needed is pretty basic.
2. The first thing you need to do is to remove your intake and air filter. By the time pulleys are generally installed, an aftermarket Cold Air Intake has generally already replaced the factory intake. So consult the documentation for your particular intake. Whether it’s a JLT, C&L, or even the factory intake, the procedure is generally the same. Disconnect the intake tube from the throttle boy, and remove the assembly from the car.
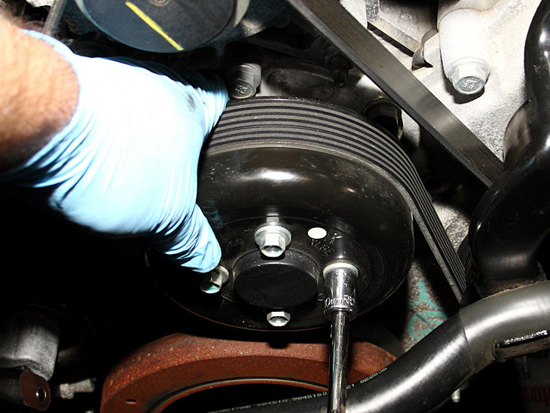
3. Next, loosen the bolts holding the water pump, but do not remove them yet. The belt will help prevent the pulley from turning, but you’ll probably have to use your hand to help hold it as well. These bolts need a 10mm socket.
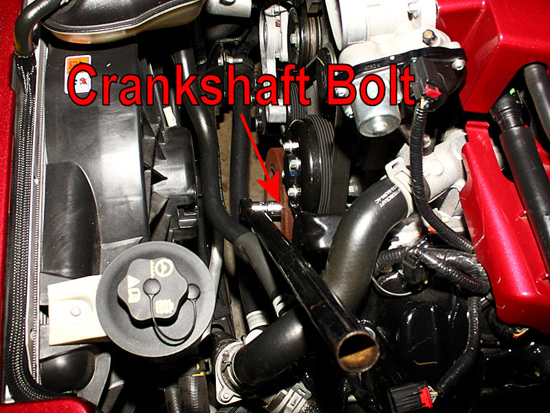
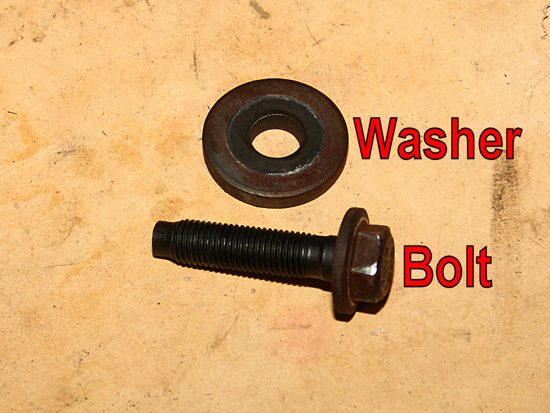
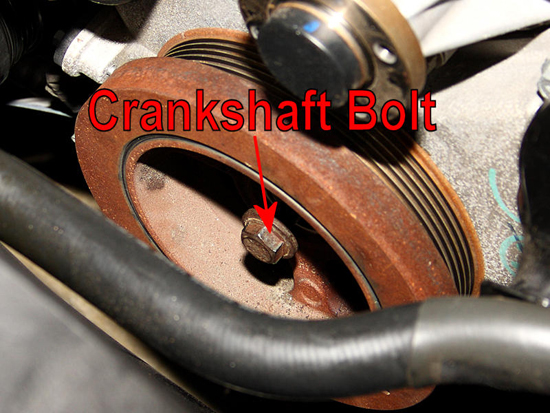
4. Next, go to work on the crankshaft bolt. Use an 18mm socket, and socket wrench. The use of a cheater bar over the socket wrench helps tremendously as it makes the wrench easier to hold and gives you more leverage. If you have a manual transmission, place it in reverse and pull up the parking brake. Then engine may turn some, but should stop, allowing you to loosen the bolt. For automatic-equipped cars, you’ll probably need to open the inspection hole on the transmission and hold the torque converter in place with a 14mm wrench to prevent the engine from turning.
5. Once loosened, the bolt should turn out easily by hand. Make sure you remove the factory washer as well. It will probably still be on the balancer.
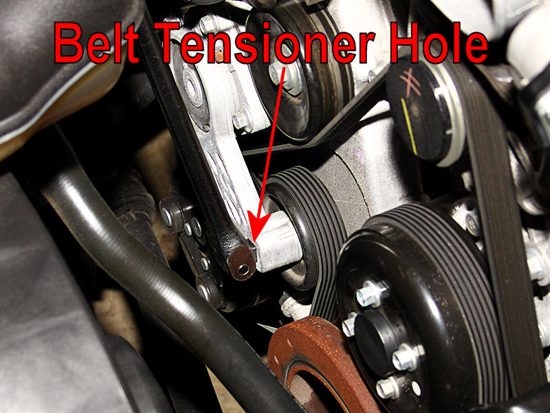
6. Use a ½ inch socket wrench or breaker bar. Place it in the belt tensioner hole, and then pry the tensioner downward.
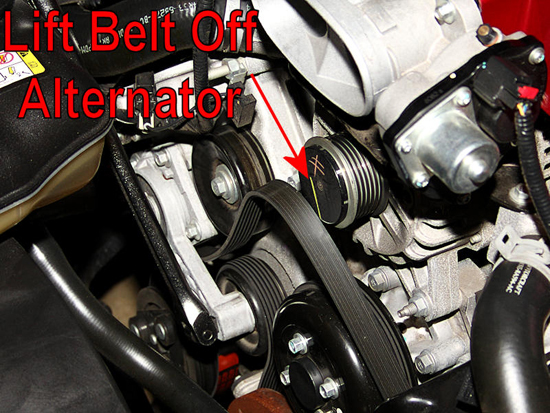
7. Lift the belt off of the alternator pulley. You can go ahead and remove the water pump pulley bolts, and water pump pulley at this time.
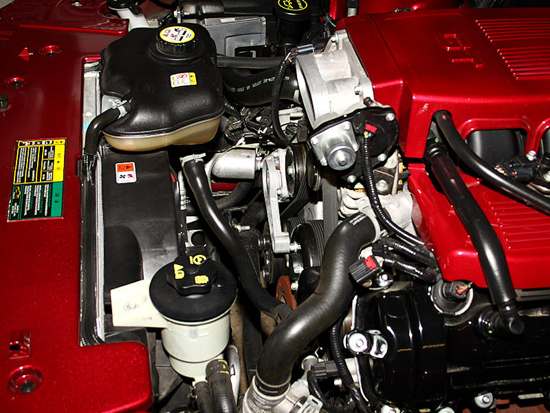
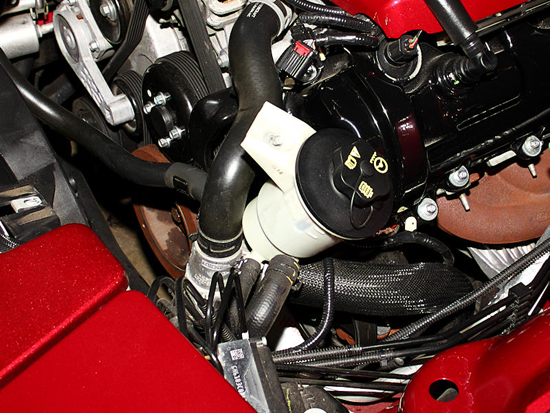
8. To gain enough access to remove the balancer, you’ll need to remove the cooling fan. Start by removing the power steering reservoir from the fan assembly. A single 8mm bolt holds it in place.

9. Once removed, swivel it out of the way.
10. Then remove the two 8mm bolts that hold the coolant tank reservoir in place.
oir in place.
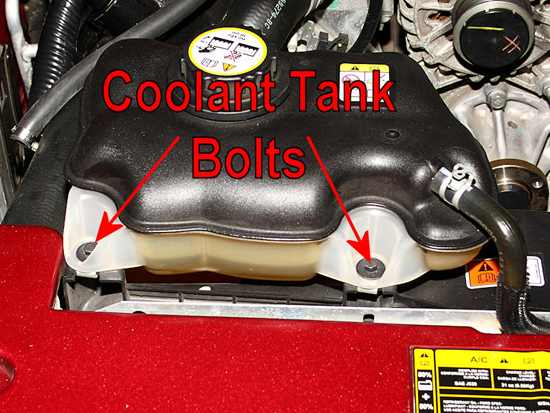
11. Lift the coolant tank up, and position it over on the driver’s side of the engine bay.
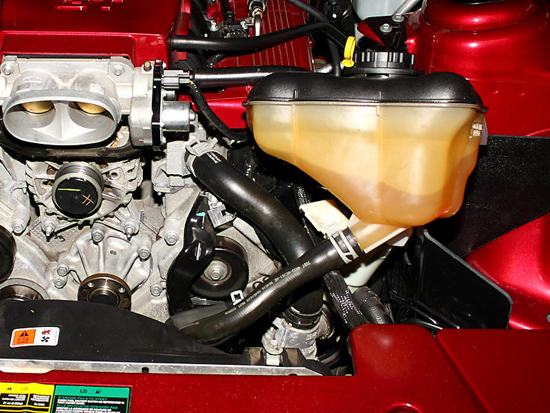
12. The wiring plug for the fan is a little tricky and hard to access, due to it being directly under a wiring harness. It can be found under the area the coolant tank sat. Press in on the plug tab, and then pull it away from the fan.

13. Use an 8mm socket and socket wrench to remove the passenger side fan housing bolt…
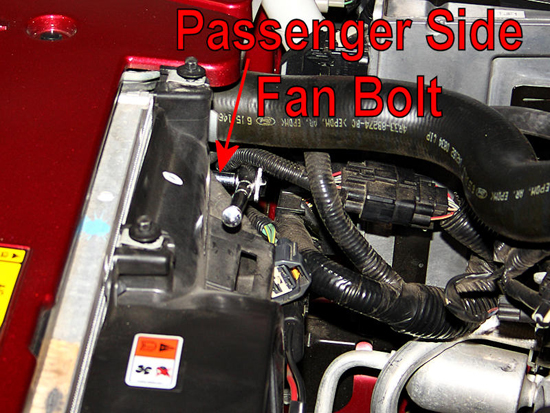
14. …and then also the bolt on the driver’s side of the fan housing.

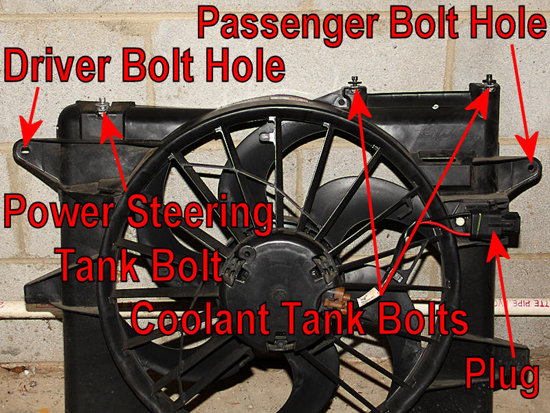
15. With the two bolts removed, the fan assembly will lift straight up and out. You will have to work it past a few hoses and harnesses. I found it easiest to shift it to the driver’s side of the engine bay, clear the upper coolant hose with the fan assembly’s mounting tab, then work the other side of the fan assembly up and out. With the fan out, you can see the various mounting locations, and the wiring plug.
16. Thread the crankshaft bolt back into the crankshaft.Do notreinstall the washer at this time.
17. Then thread the bolt all the way down by hand.
18. The balancer for the 4.6 does not use the threaded holes that are typically used on Fords. Instead the offer three balancer perches for a three-jaw puller, similar to older Chrysler balancers.
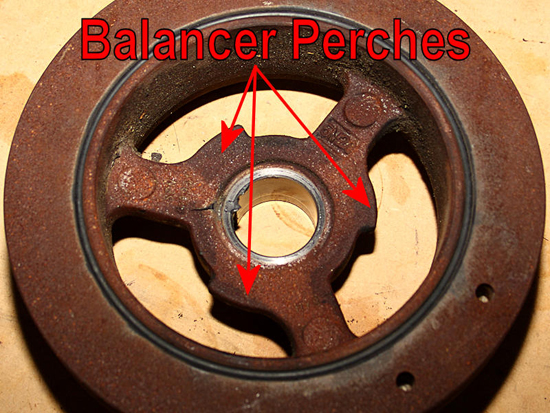
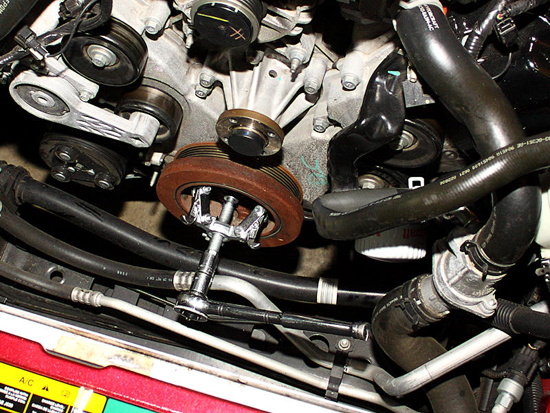
19. Place the hooks for the puller behind the perches, and tighten the puller to hold it into place. I used the smallest puller in a cheap three-piece set I picked up at Harbor Freight for $18. Use a socket and socket wrench to turn the puller and pull the balancer off. It should start working its way back with mild turning effort needed on the socket wrench.
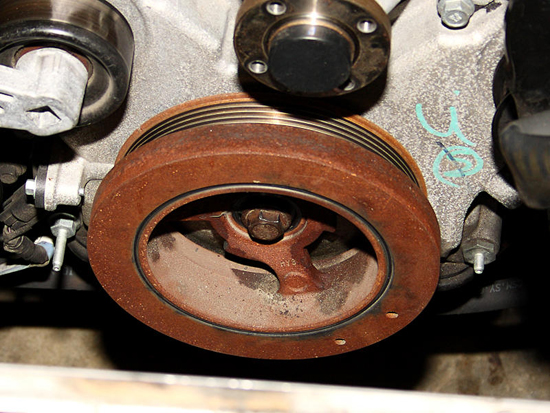
20. With the balancer now removed, clean the crankshaft of any grime and leftover sealant.
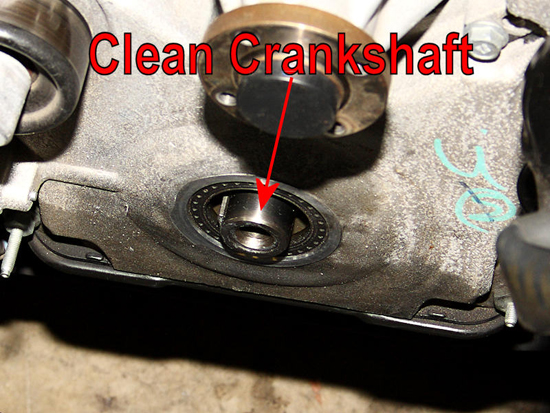
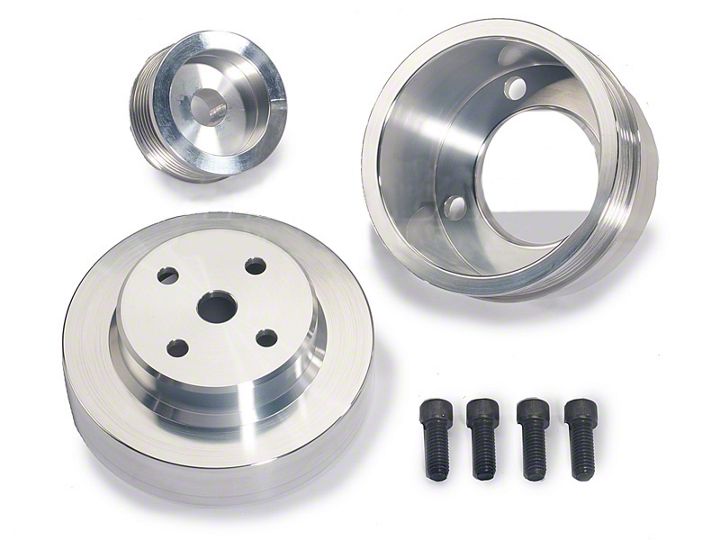
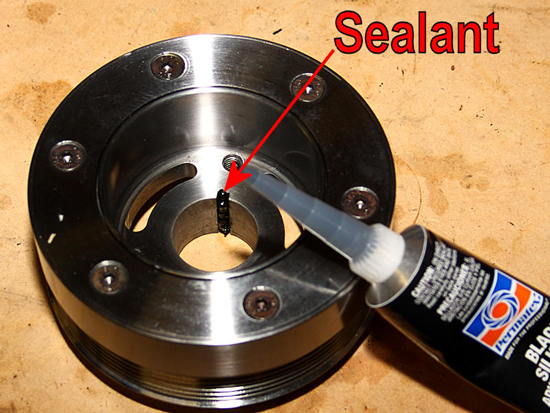
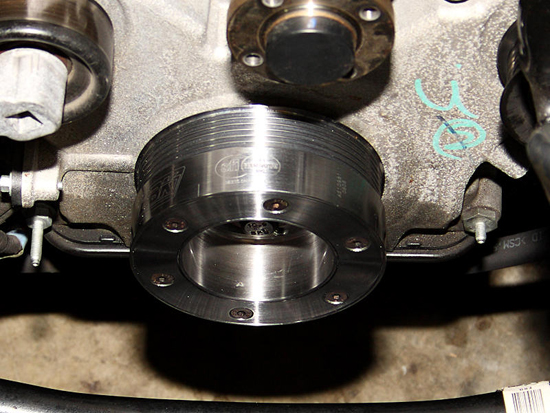
21. To prepare the BBK underdrive balancer, apply a thin bead of black RTV to the keyway opening. The keyway cut into the BBK unit ensures it goes on the crankshaft in the correct orientation, just as the factory piece does.
22. To pull the balancer into place, you’ll use the supplied BBK bolt and the factory washer. The bolt supplied by BBK will require the use of a 19mm socket, as its head is slightly larger than the factory bolt.
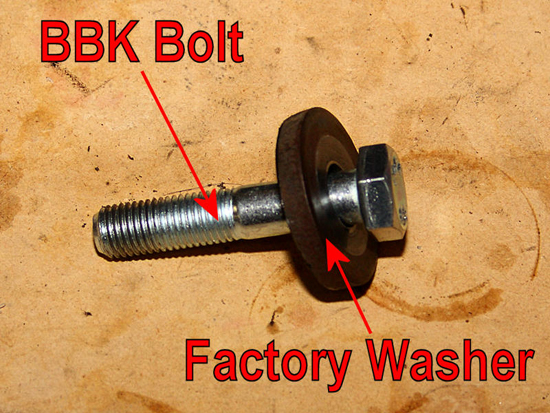
23. Set the balancer onto the crankshaft, ensuring that the keyway opening matches the spline on the crankshaft. Then thread the BBK bolt into the crankshaft. Use the bolt to pull the balancer onto the shaft. The BBK bolt will stop after a few turns, do not overturn it. The BBK bolt is only intended to pull the dampener on enough so that the factory bolt will fit. When the BBK bolt stops, remove it and the factory washer.
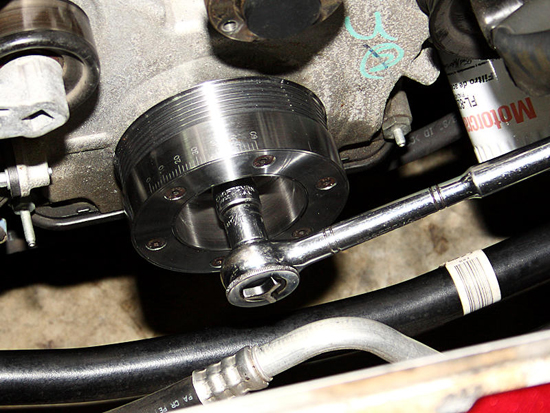
24. Then, place the factory bolt back in the factory washer, and reuse the factory bolt to pull the dampener fully onto the crankshaft. There will be only a small gap between the back of the damper and the engine block. You will feel the bolt start to tighten up, and the engine’s crankshaft start to rotate when this occurs.
25. Now you’ll need to torque the crankshaft bolt down. Place the car in first gear if it’s a manual, and tighten the bolt to 66 lb/ft. This makes sure the damper is fully seated. Then loosen the bolt one full turn, after placing the transmission back into reverse to prevent the crankshaft from turning as you’re loosening it. The crankshaft may spin a little at first, so the turn officially starts when the bolt actually moves.
26. Next place the transmission back into first gear, and tighten the bolt back up again. This time you’ll want a target of 37 lb/ft. Once that’s reached, tighten the bolt an additional 90 degrees.
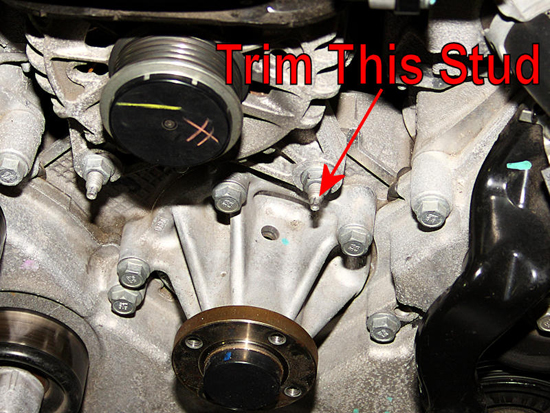
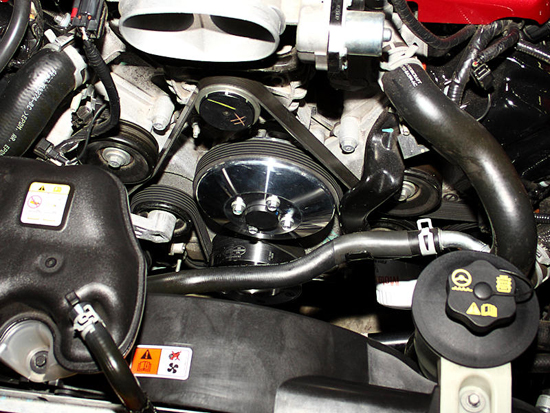
27. Now it’s time to focus on the water pump pulley, as a small modification must be made to allow it to fit. You’ll need to trim the stud indicated below.
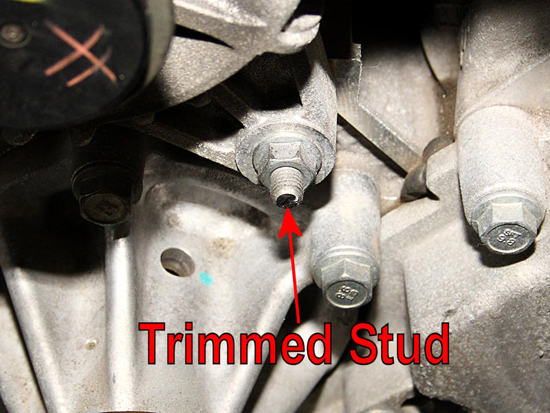
28. I used a Dremel with a cutting wheel, and performed this task in a matter of seconds. Cut the excess non-threaded portion of the stud off as shown. It’s a good idea to cover the alternator, throttle body, and water pump weep hole from stray metal dust. The weep hole can be seen in the picture below, just to the left of the stud you’re cutting.
29. With the clearance issue between the stud and the water pump pulley resolved, the pulley will slide right into place. Thread the pulley bolts back by hand, and snug them up. You’ll tighten them back up fully in a moment.
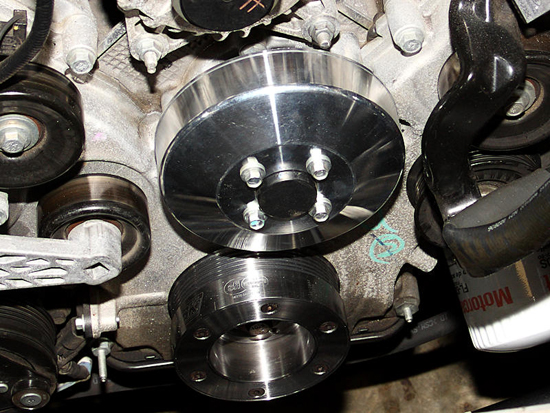
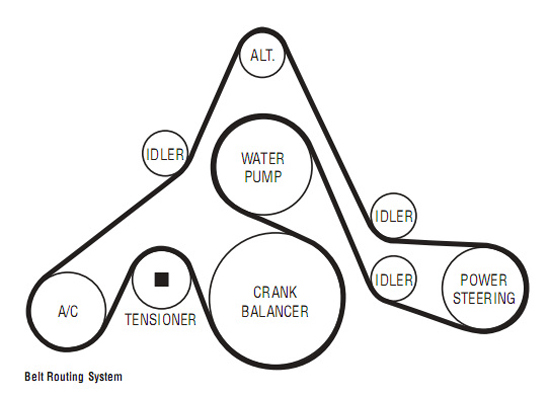
30. Place the belt back on the accessories, using BBK’s diagram below for proper routing. You’ll need to use a ½ inch socket wrench on the belt tensioner to get the belt into place. Once the belt is in place, check and retighten the water pump pulley bolts.
31. All that’s left now is to return the fan assembly into its place under the hood. There are two plastic tabs about halfway down on each side of the fan. These tabs fit into brackets alongside of the radiator to hold the lower half in position. Make sure they are engaged, and then bolt the fan assembly into place, followed by the coolant and power steering reservoirs.
32. Your pulleys are installed, and you’re ready to go. Enjoy your newfound power, and especially the fact that the underdrive pulleys have freed up the engine some in the lower RPM range!
Installation instructions provided by AmericanMuscle customer Eric Hege 3.23.09

