 FREE 1 to 3-Day Delivery on Orders $149+ Details
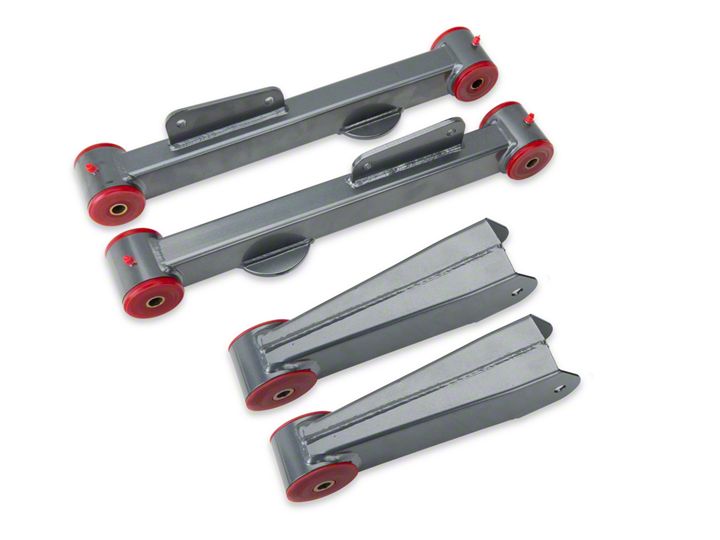
How to Install BBK Rear Upper & Lower Control Arm Kit on your 1999-2004 Mustang GT, V6 and Mach 1
Shop Parts in this Guide
Installation
Step 1 Carefully place the rear of your Mustang on jack stands located at the frame locations - not the rear axle.
! CAUTION!
Use extreme caution when working under vehicle
Step 2 Using a hydraulic floor jack, jack the rear axle housing under the center section until the axle reaches approximate ride height. Place jack stands under the axle for support. (A floor jack will be needed for upcoming steps.)
Step 3 Remove the rear sway bar by removing the two bolts at each side of the bar which attach the sway bar to the factory control arms.
Step 4 Doing only one side at a time, proceed to lift the rear of the control arm to eliminate any resistance against the mounting bolts.
Step 5 You may now remove the bolt locating the control arm to the rear axle.
! CAUTION!
Use extreme caution the control arm is under extreme pressure from the rear coil spring
Step 6 By carefully and slowly lowering the floor jack, you can now release all spring pressure against the control arm and remove the rear coil spring. (It is a good idea to mark the coil spring for future installation reference.)
Step 7 Upon removal of the factory coil spring, inspect the rubber insulators and replace with Ford part # d8bz-5536-A if necessary.
Step 8 Remove the bolt attaching the control arm to the chassis and proceed to remove the rear control arm. (Using something such as a wire brush, clean the control arm pivot at the chassis.)
Step 9 With the grease fittings pointing down and the sway bar mounting pad towards the front of the car (note that the sway bar mounting pad should also be offset towards the outside of your vehicle), you can now install the arm by reinstalling the front bolt. Do not tighten the bolt at this time.
Step 10 Using caution not to damage grease fittings, carefully place the floor jack under the new arm and reinstall the coil spring with rubber insulators by reversing removal procedure. Repeat for other side.
Step 11 Using a drop of Loc-tite™ on each mounting bolt, torque the control arm mounting bolts to approximately 70 ft lb.
Step 12 Reinstall the sway bar with ends towards the outside of the mounting pad on the control arm.
Step 13 To avoid any squeaking you may now lube the four grease fittings. (Be sure to reinstall dust caps on the grease fittings.)
Step 14 After driving the vehicle for approximately 5-10 miles, recheck all nuts and bolts for proper torque.
