 FREE 1 to 3-Day Delivery on Orders $149+ Details
Polished Mustang Billet Interior Door Handles ('94-'04) - Installation Instructions
Installation Time
2 hours
Tools Required
- Small Jeweler's Size Flathead or Hook
- Needle Nose Pliers
- Phillips Head Screwdriver, Large and Small
- Side Cutters or Dremel or Jewelers Side Saw
- Eye Protection
- Shop Cloth (Optional)
- Droplight (Optional)

Shop Parts in this Guide
Installation
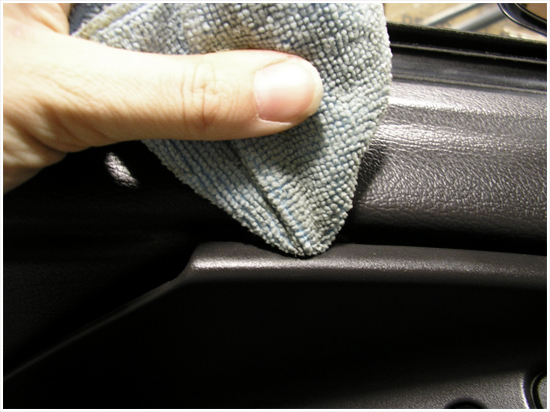
1. Using a small jeweler's size flathead or pick wrapped in a shop towel (to prevent damaging your interior), remove the top of the panel surrounding the lock and window controls by inserting it into the small notch and applying gentle pressure outwards
2. To release the bottom panel clip, you will need to lift the bottom part of the panel firmly. This will take a lot of pressure, and may require the use of your flathead to separate it from the surrounding panels
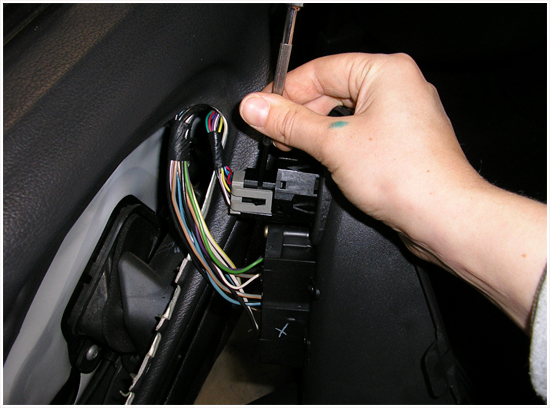
3. Disconnect the door lock connector using a Phillips Head screwdriver, and the window switch connector using your jeweler's size flathead screwdriver
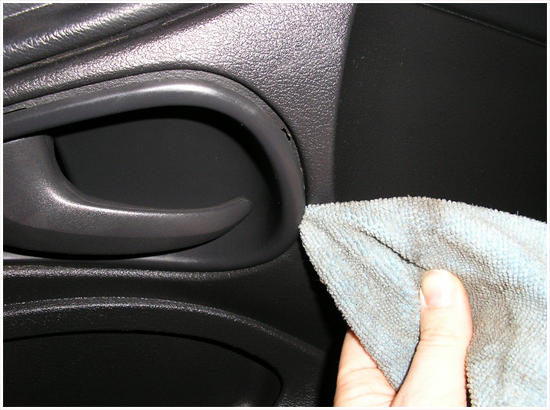
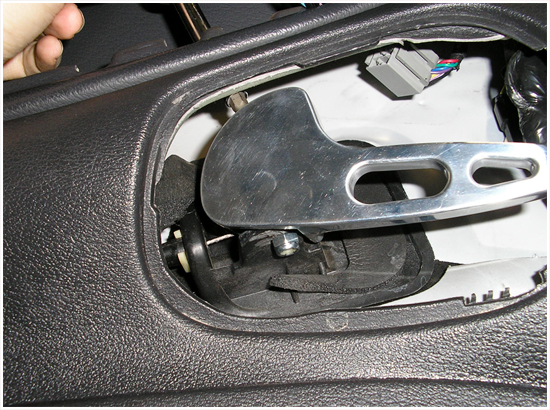
4. You will now have access to the back of the door handle. Using the jeweler's flathead wrapped in a shop cloth, or a hook tool, remove the plastic panel front around the door handle. To release the clip that is holding the panel in place, you will want to pry from the lower inner side of the panel. Putting the door handle in the open position will also assist in its removal.
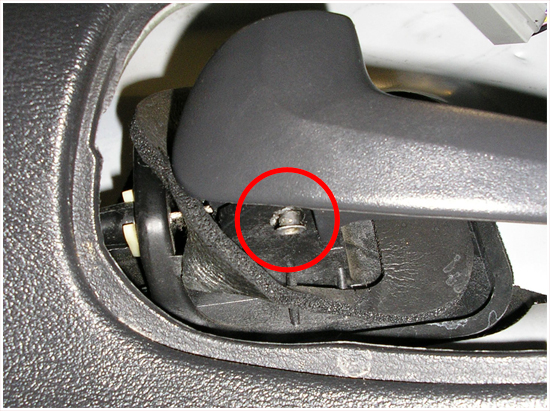
5. Using side cutters, a saw, or a dremel, cut the bottom of the roll pin used to hold the handle to the handle assembly. If using a dremel, make sure to wear eye and skin protection as metal shards will be ejected at high velocity. Remove original pin and discard.
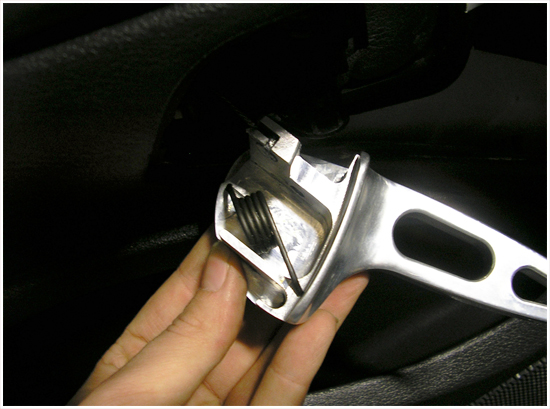
6. Before removing the old handle, not the direction and orientation of the old spring, which will be reused. Remove the spring, and make sure to put it somewhere you won't lose it.

7. Remove the door release cable from your stock handle. This can be done by holding the door release cable with your needlenose pliers and rotating the cable so it is aligned with the gap in the stock handle. BE VERY CAREFUL NOT TO PULL ON YOUR DOORRELEASE CABLE - if you stretch out your cable, it is not adjustable, so you will have to replace it! Remove your stock handle.
8. Put your new handle into place and install opening cable and re-install the stock spring. There is a small recess cut into the door handle that you should place one of the ends of the spring into in order to keep it aligned properly.
NOTE:FAILURE TO INSTALL THIS SPRING CORRECTLY COULD CAUSE THE DOOR HANDLE TO BE LOOSE, OR IN EXTREME CASES COULD CAUSE THE DOOR TO OPEN WHILE THE VEHICLE IS IN MOTION, SO PLEASE BE VERY CAREFUL!
9. Using the supplied hardware, reinstall the handle. You will probably need to use your Phillips Head screwdriver to push the hardware through. Secure with the nylock nut. Nut should be tight, but no so tight as to bind the handle to the assembly.
10. Test for proper door handle operation prior to reassembly of panels.
11. Reinstall panels in reverse order of removal.
12. Using the same process, do the passenger's side door.
13. Reconnect the battery terminal.
14. Congratulations! Enjoy your new billet aluminum door handles.
Installation instructions provided by Manufacturer
