 FREE 1 to 3-Day Delivery on Orders $149+ Details
How to Install Ford Racing Rear Lower Control Arms on Your 2005-2012 Mustang
Installation Time
2 hours
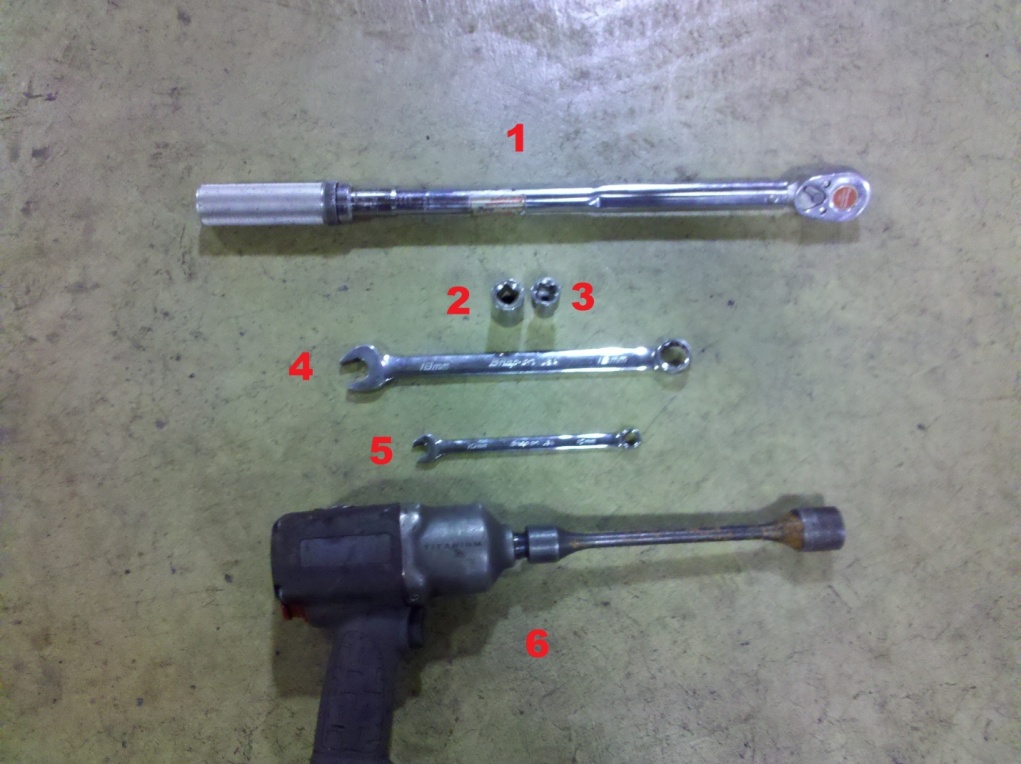
Tools Required
- Torque Wrench capable of 20 lb-ft and 129 lb-ft
- 18mm Shallow Socket
- 10mm Shallow Socket
- 18mm Open-ended wrench
- 10mm Open-ended wrench
- Lug adapter // lug wrench to remove tires.
- *Also need Floor Jack & Jack Stands.
Shop Parts in this Guide
Installation
There is a number of aftermarket Lower Control Arms available for the S197 body style. I chose the Ford Racing set, because I have other Ford Racing Parts on my car, and have had very good luck with them. Also, the Ford Service Manual recommends replacing the bolts and nuts whenever changing the Lower Control Arms. Unlike the other aftermarket manufacturers, the Ford Racing kit comes complete with the replacement hardware necessary to complete this project. As a result, there are no additional costs to install the Ford Racing set.
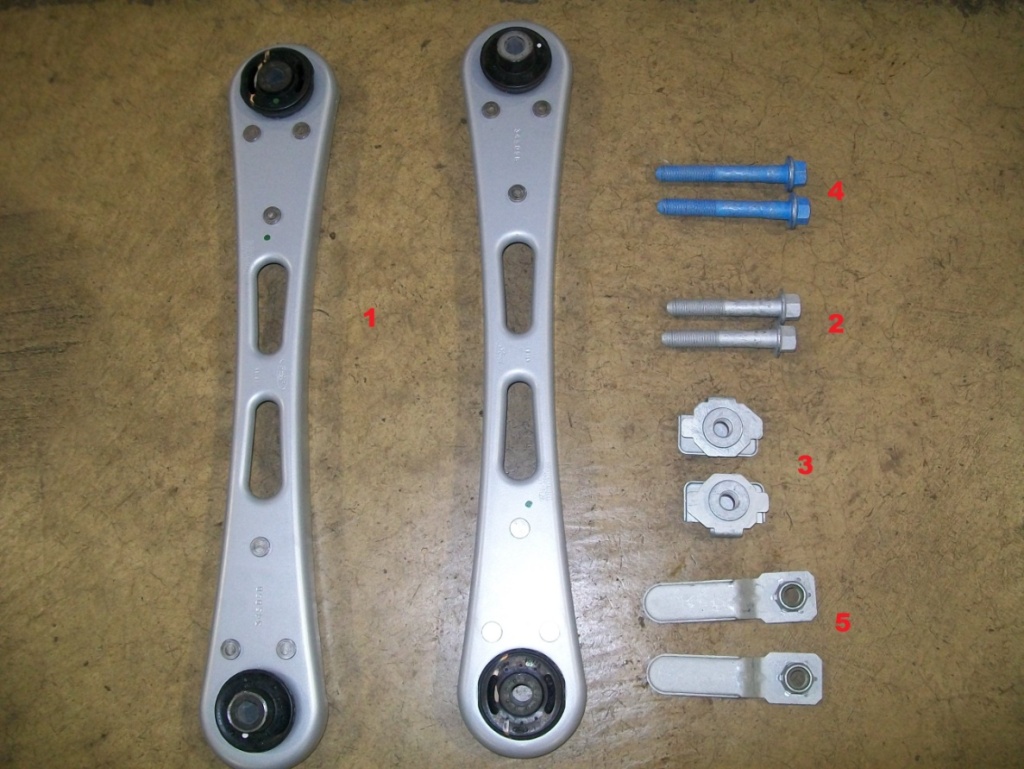
Package Contents:Open the box and pull out the contents to verify all components are included. You should have:
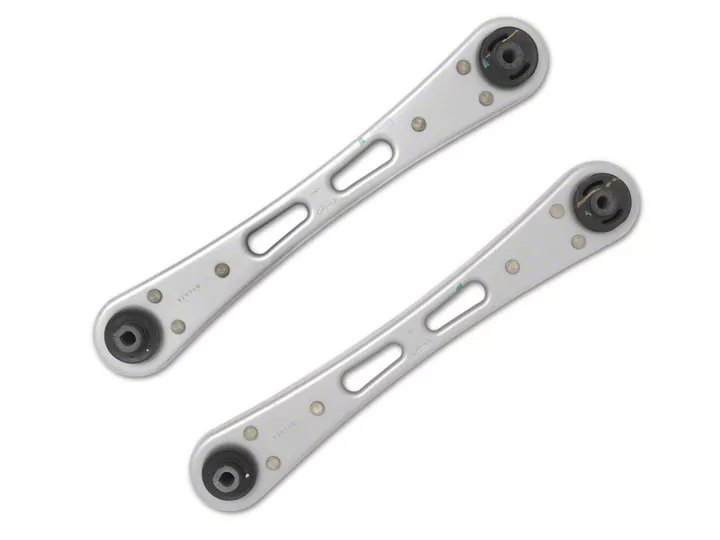
1. (2) Lower Control Arm
2. (2) Front Bolt
3. (2) Front Nut with Locking tabs
4. (2) Blue Rear Bolt
5. (2) Rear Nut with Arm
Pre-installation:
The easiest way to start is to park the car on a flat surface. With the car in park or in gear:
- Apply the emergency brake.
- Place a block in front of a front tire to keep it from rolling.
- Use a floor jack to lift the rear end up off the ground.
- Place a jack stand under each end of the rear end close to each wheel, but with enough room to get a torque wrench with socket on the rear bolt of the Lower Control Arm.
- Lower the car on to the jack stands.
- This will make sure the car is at the normal curb stance.
- Remove both rear wheels.
- Release emergency brake.
Installation – Driver side:
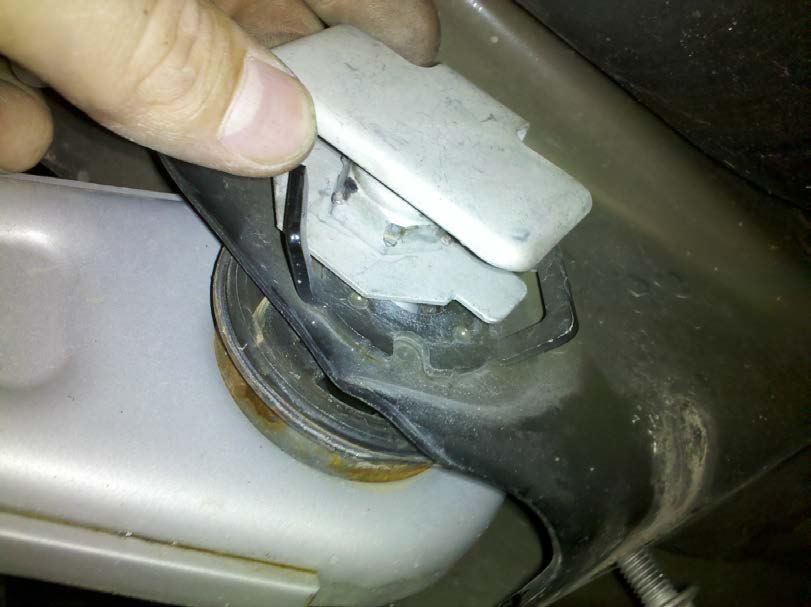
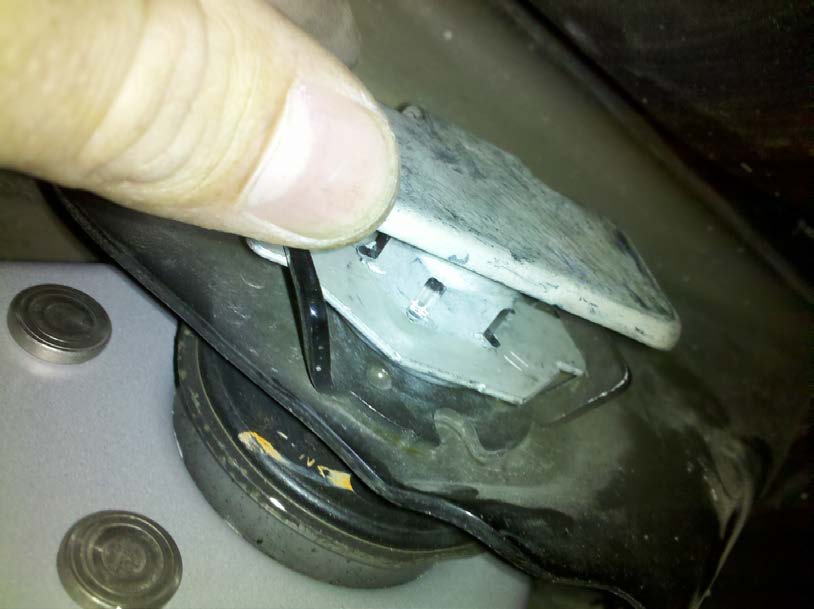
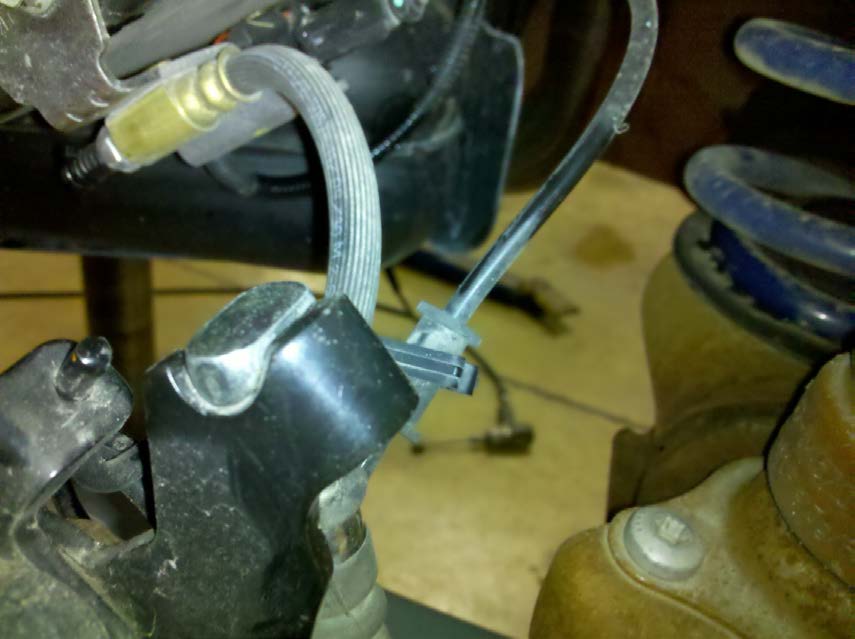
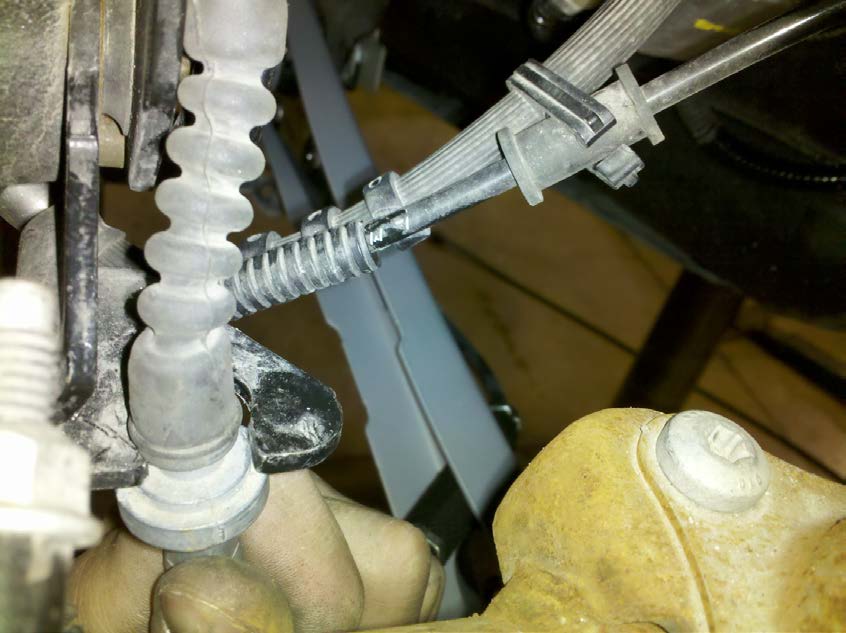
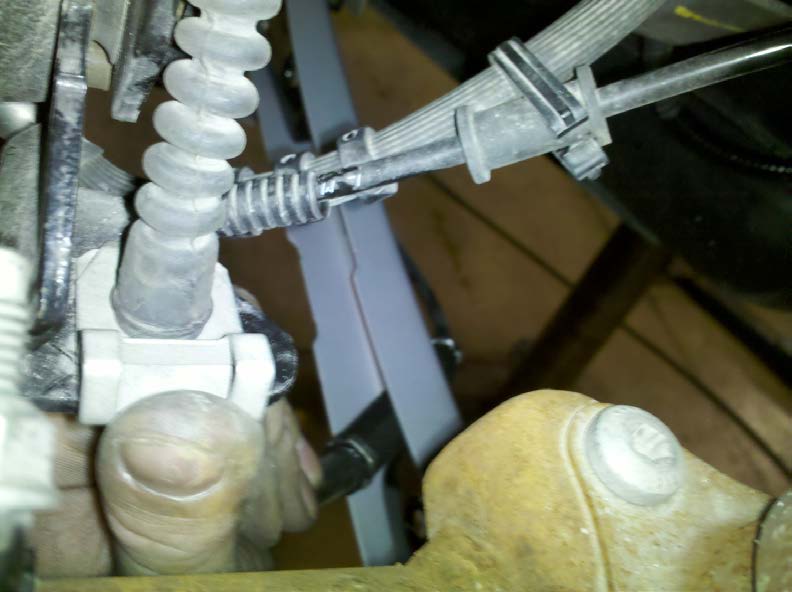
1. The Emergency brake cable will pass through the stock control arm. Follow it towards the front of the car. There will be a bracket holding the cable to the car located directly beneath the front Lower Control Arm bolt. Using the 10mm wrench, remove the bolt holding it on. NOTE: Reinstall bolt for the meantime to keep from losing it.
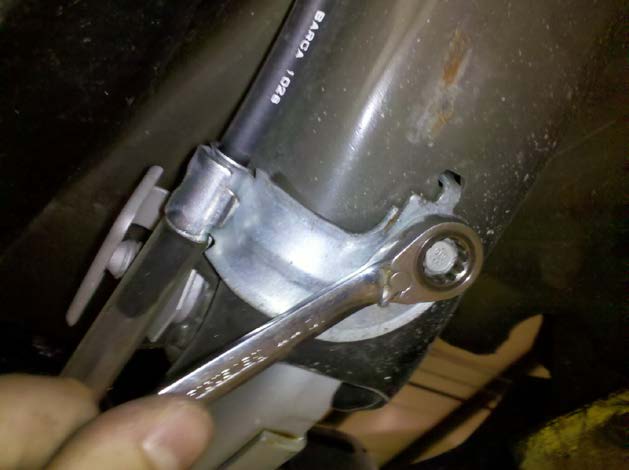
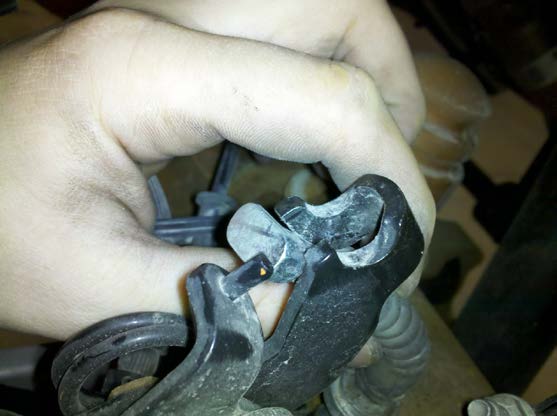
2. Locate and remove clip holding the emergency brake cable to the caliper bracket. NOTE: Keep clip as it will be reused.
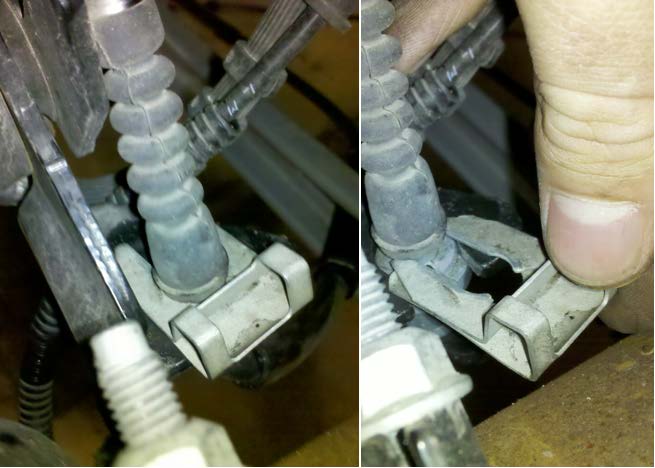
3. Remove the end of the emergency brake from the bracket and then feed the cable through the LCA.
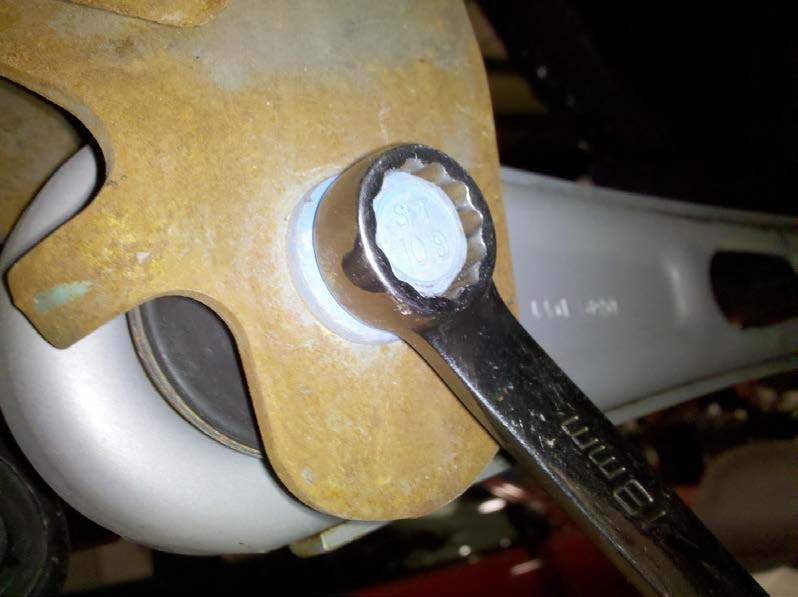
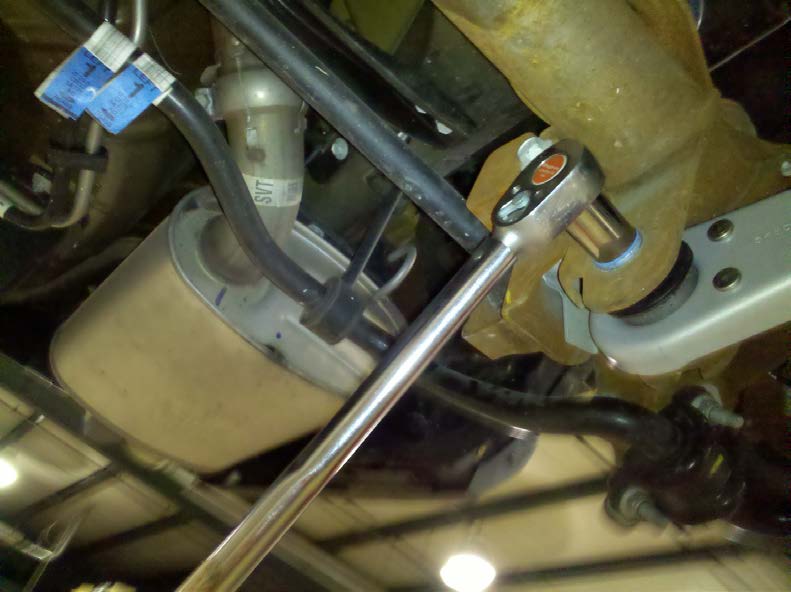
4. Using the 18mm wrench, remove the front bolt from the control arm.
NOTE: This bolt will not be reused and can be discarded.

5. Once the bolt is out, the nut will still be in place. Rotate the nut clockwise to remove it.
NOTE: This nut will not be reused and can be discarded.
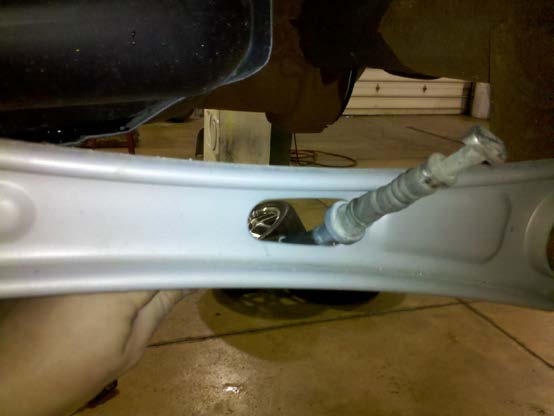
6. Using the 18mm wrench, remove the rear bolt from the control arm. The nut on the rear bolt has a handle; you may need to use your other hand to hold this while you remove the bolt.
NOTE: The rear bolt and nut will not be reused and can be discarded.
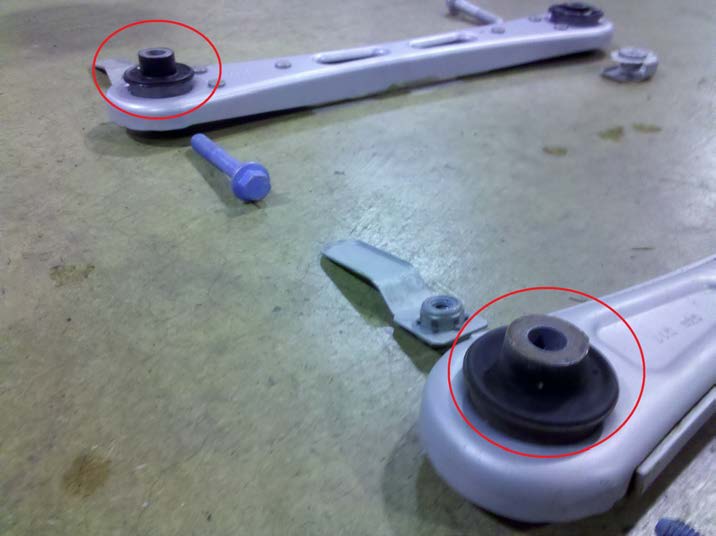
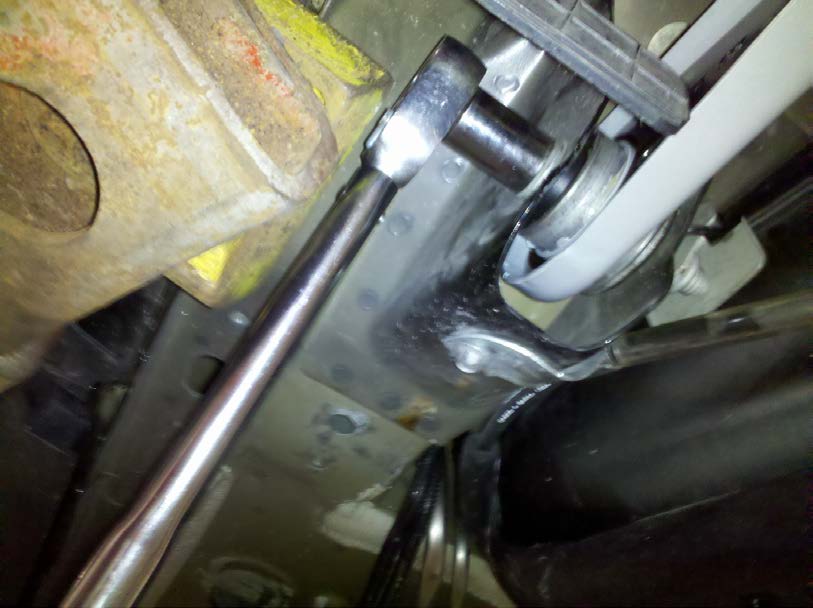
7. Notice the orientation of the factory control arm. At the rear, the spacer on the bushing is wider on the one side. This side should face the center of the car.
8. Take the new arm and place it in the bracket on the car, starting with the back bolt. Using the new blue bolt and new nut with handle, start the bolt from the center of the car and feed it through the hole towards the outside of the car. Before sliding it all the way through, position the nut accordingly, so the arm is against the rear end. This will hold the nut in place while you tighten the bolt. *Do not tighten bolt all the way, just enough to keep the nut in place.
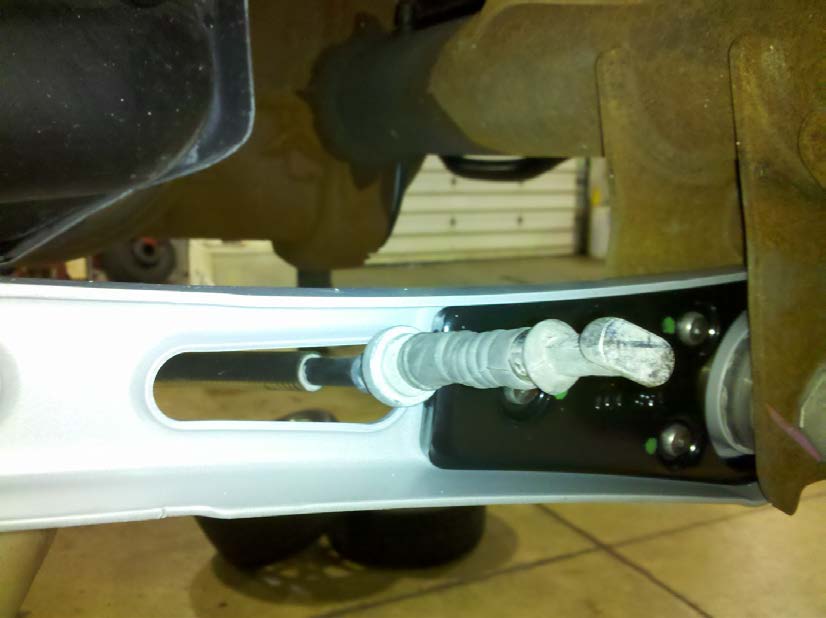
9. Next is the front end of the control arm. Using the new nut with tabs, insert the right tab into its slot, and then turn it counterclockwise to seat the left tab in its place. This will stay in place for the new bolt to go into.
10. Insert the new front bolt into the front bushing of the control arm from the outer side of the car toward the center of the car. You will be able to thread it into the new nut with tabs placed in the previous step.
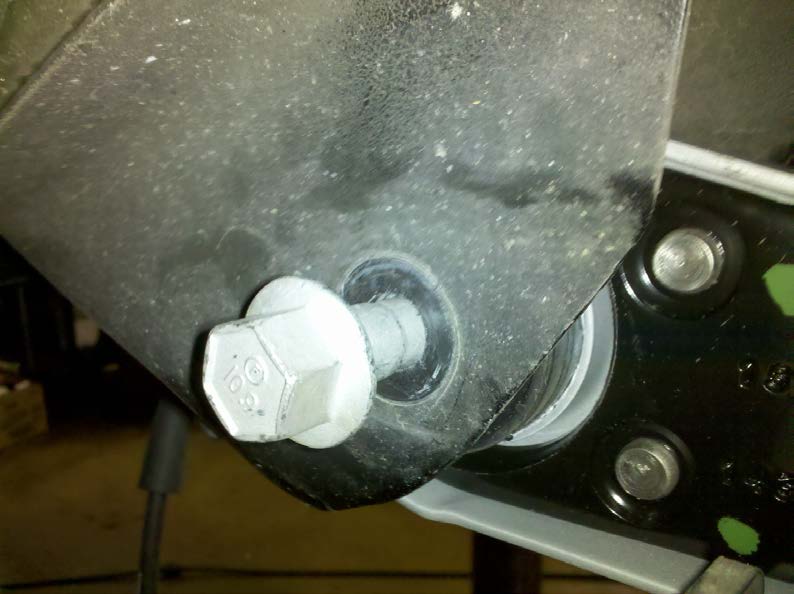
11. Using a torque wrench with an 18mm socket, torque rear bolt to 129 ft-lbs.
NOTE: The car needs to be sitting at curb stance before tightening and torqueing this bolt to avoid any stress or twisting at ride height.
12. Using the same torque wrench and 18mm socket, torque the front bolt to 129 ft-lbs.
NOTE: The car needs to be sitting at curb stance before tightening and torqueing this bolt to avoid any stress or twisting at ride height
13. Feed the emergency brake cable back through the rear opening of the new control arm.
14. Seat the end of the emergency brake cable in its seat.
15. Reinstall the base of the emergency brake into its position on the caliper bracket.
16. Replace the clip in the collar of the emergency brake cable.
17. Reinstall the emergency brake cable bracket.
Using the 10mm socket and torque wrench, torque bracket to 20 ft-lbs.

18. Installation of Passenger side LCA uses the same steps as the driver side.
19. Install wheels, ensuring proper torque on the lug nuts.
Take the car for a drive and make note of any unusual squeaks or noises. If they occur, recheck the torque on the bolts. You will feel the road more than with the stock Lower Control Arms. Enjoy and start shaving time off your 60’!
Installation Instructions written by AmericanMuscle customer Phil Lifer 11.9.11

