 FREE 1 to 3-Day Delivery on Orders $149+ Details
How to Install a Ford Racing Clamp On X-Pipe on Your 2011-2012 Mustang GT
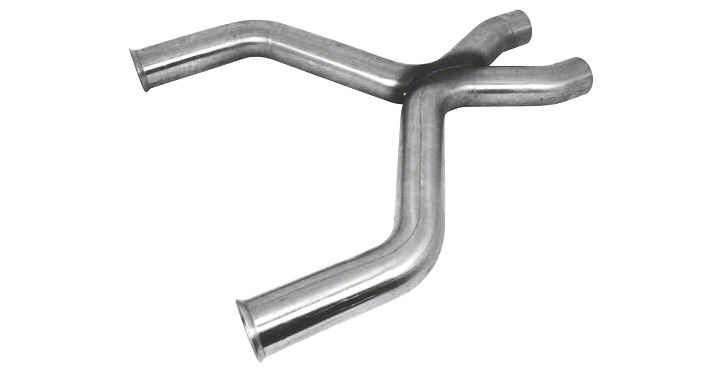
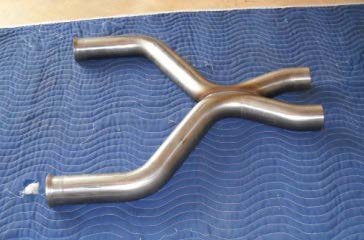
Shop Parts in this Guide
Installation
1. First, inspect your new part ensuring everything is in good shape and not damaged from shipping.
2. Lift the car with the jack and use jack stands to support the car.
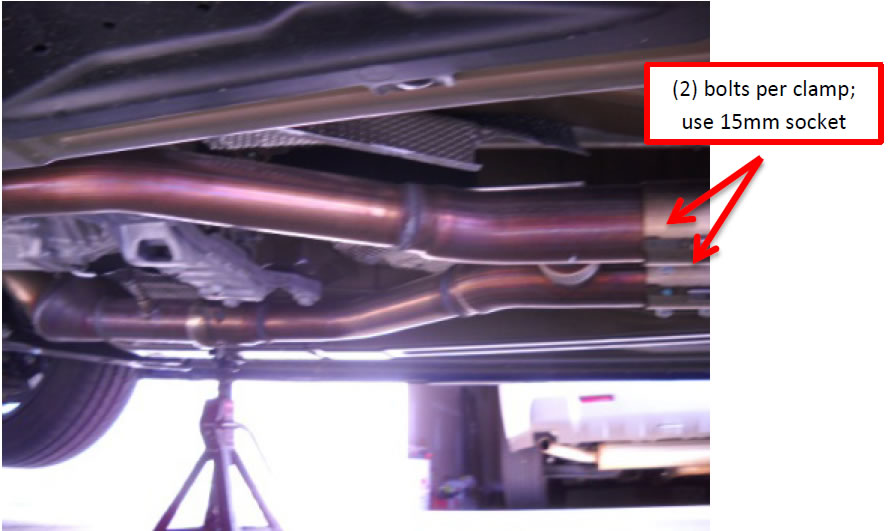
3. Once the car is off of the ground, loosen the (4) pipe clamp nuts where the stock H-pipe meets the rear mid-pipes using 15mm socket and ratchet.
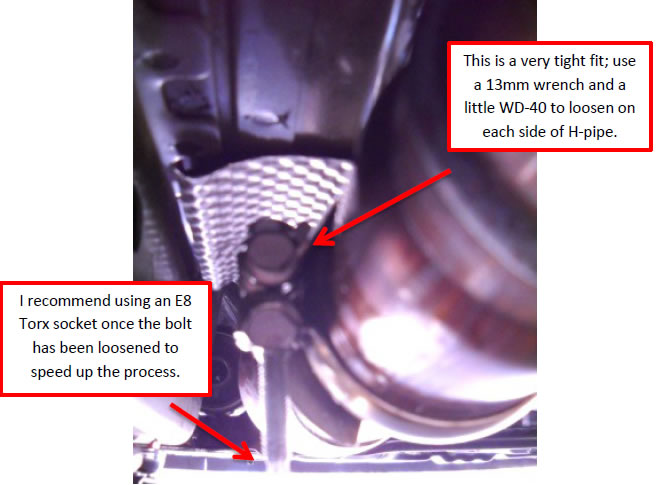
4. Now, you will need to loosen the clamps nuts on each side of stock H-pipe where the converters meet the H-pipe, using a 13mm wrench. I also used WD-40 to assist in getting these bolts loosened and an E8 Torx socket to finish it up.
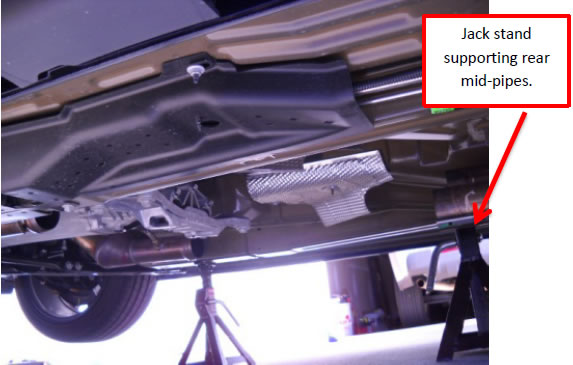
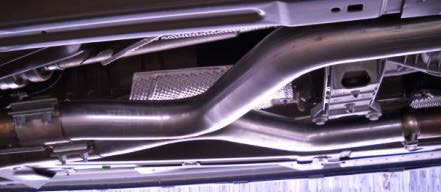
5. Once loosened, remove the stock H-pipe. You will want to free the converter side of the H-pipe first and then slide the rear section of the H-pipe towards the front of the car. Below is a picture of the underside of the car with the H-pipe removed. You will want a jack stand to support the rear mid-pipes.
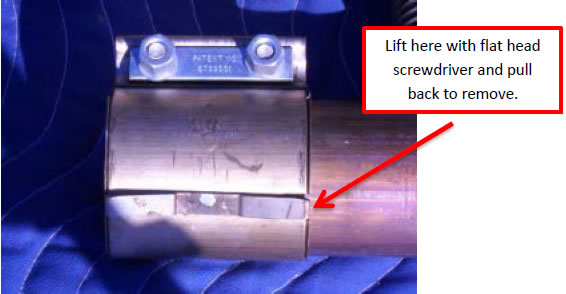
6. Once you have the factory H-pipe out from the car, you will need to remove the factory clamps from the H-pipe. Use a flat head screwdriver to lift the tab securing the clamp and slide the clamp off of the H-pipe. Repeat on other side.
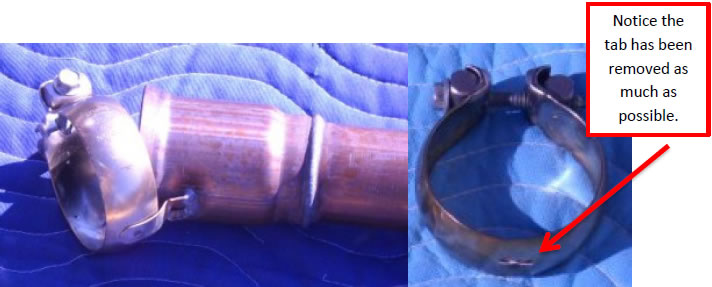
7. You will also need to reuse the stock clamps from the converter side of the H-pipe for the new X-pipe. I just bent each clamp back and forth until the tab broke. Repeat on other side.
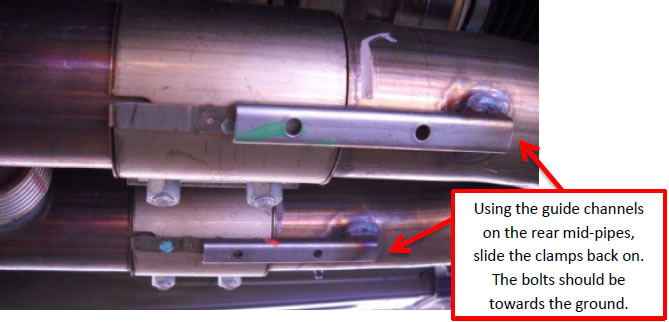
8. Now, gather your factory clamps and new Ford Racing X-pipe. Slide the rear factory clamps on the rear mid-pipes.
9. Now insert the new Ford Racing X-pipe. Start with the rear clamps first, do not tighten at this point.
10. Now place the front factory clamps onto the pipes coming from the converters, then align the front side of the X-pipe to the converter pipes. Begin to tighten the front clamp on either side until the clamp is tight. Do this for each side using a 13mm socket and ratchet. 11. Move to the rear of the X-pipe and tighten the (4) clamp bolts until each clamp is tight.
11. Recheck all of your work and ensure all bolts are tight for a leak free fit.
12. Now make sure everything is clear from under the car and lower the car carefully back to the ground.
13. You will want to start the car once it is back on the ground and listen for any exhaust leaks. If you hear any, you should be able to tighten the bolts up without having to lift the car back up.
Completed install!!
Installation Instructions written by AmericanMuscle customer McCallum Callahan 12.16.11

