 FREE 1 to 3-Day Delivery on Orders $149+ Details
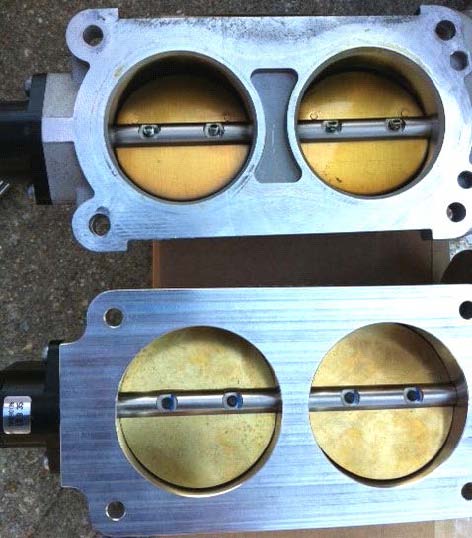
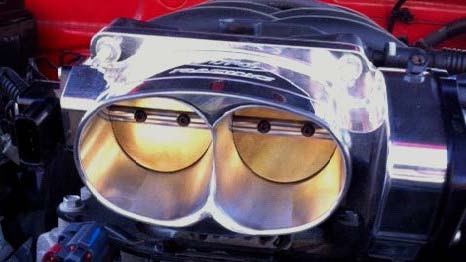
How to Install a Ford Racing Twin 62mm Throttle Body on Your 2005-2010 GT Mustang
Installation Time
2 hours
Tools Required
- 1/4" or 3/8" Socket Wrench
- 6" Extension
- 8mm Deep-Socket
- 10mm Deep-Socket
- Throttle-body/Carb. Cleaner (optional)

Shop Parts in this Guide
Installation
*Pre-Install: It is a good idea to check that the return spring is loaded correctly before attempting install. To do this, simply push the throttle plates so that they rotate and release them quickly. They should snap back until they are almost closed.
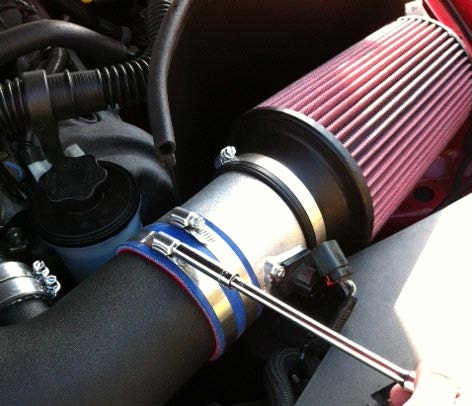
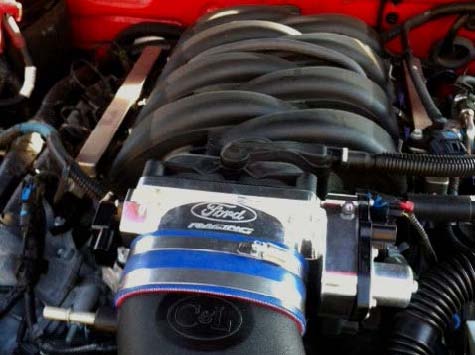
*Note: This guide is written with the assumption that the factory intake is still in place on the vehicle. Install was performed on a 2010 GT with a C&L Cold Air Intake.
Installation Instructions:
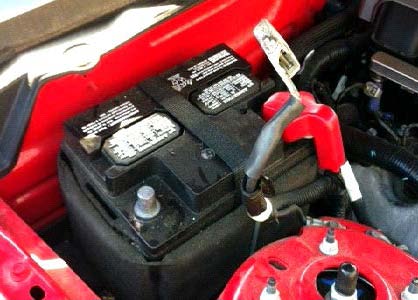
1. Begin by disconnecting the negative (-) battery cable from the battery. Make sure it is positioned as to avoid accidental contact during the install.
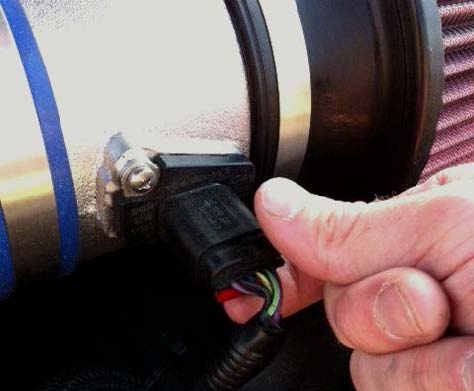
2. Disconnect the Throttle-Position Sensor (TPS) from the passenger side of the throttle body by sliding the red clip towards you. Press down on the black tab now visible where the clip had been. Wiring clip should easily pull free of the sensor.
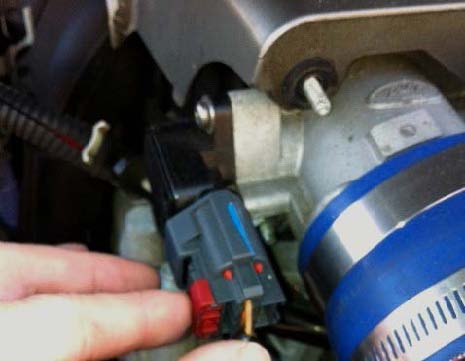
3. Disconnect the throttle motor harness on the driver side of the throttle body. Again slide the red clip back and press on the black tab to pull the harness free of the motor housing.
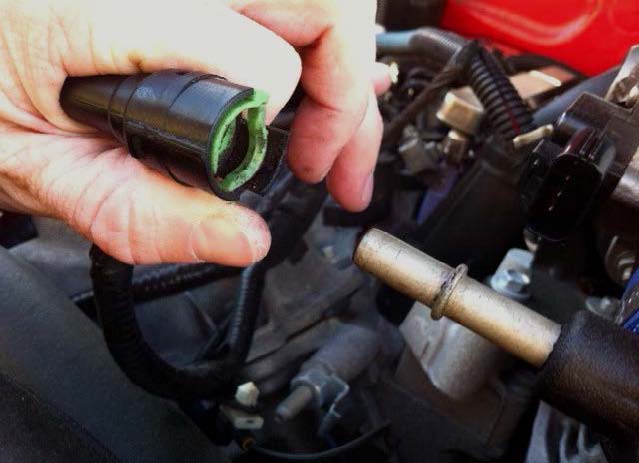
4. Undo the Positive Crankcase Ventilation (PCV) line from the passenger side of the factory air hose by sliding the green clip away from you while pulling the line off.
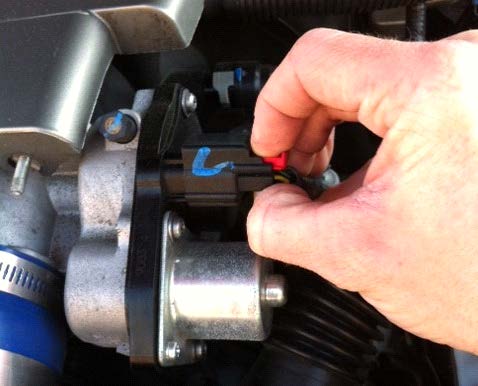
5. Remove the Mass Air Flow Sensor (MAF sensor) in the same manner as the TPS and Throttle Motor Harness. The MAF sensor is located on the factory air hose near the air box.
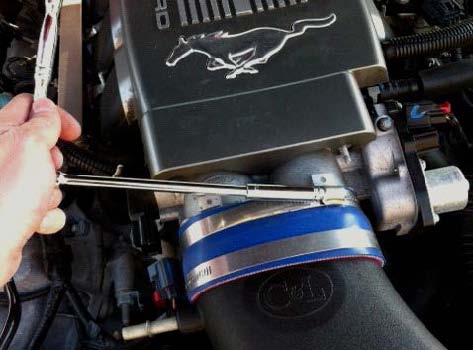
6. Using an 8mm deep-socket, loosen the hose clamps where the intake hose meets the air box and throttle body. The clamps do not need to be completely removed from the hose.
7. Pull the air hose fittings free of the throttle body and air box; set the air hose aside.
*NOTE: If the vehicle is a 2010 Mustang, the factory air hose is equipped with an auxiliary sound hose leading to the vehicle cabin. It is not necessary to disconnect this from the air hose; there is enough clearance provided for throttle body removal by simply positioning the air hose away from the throttle body.
8. Using an 8mm deep socket and extension, loosen the (2) studs from the top corners of the stock throttle body. Do not remove them yet.
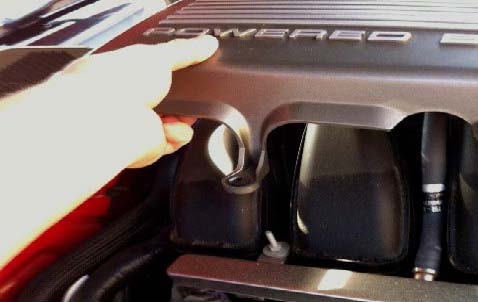
*If the vehicle is equipped with an engine cover, this must be removed by (2) 8mm nuts on the top studs of the throttle body. Pull the rear of the cover off the (2) studs near the fuel rails. Pull forward and slide the cover off the throttle body studs.
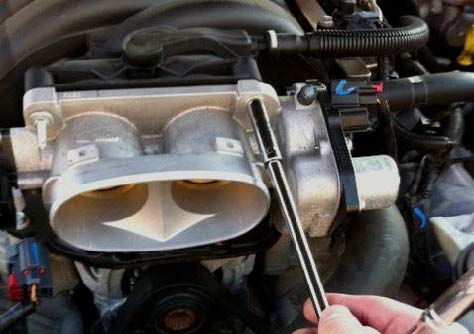
9. Loosen and remove the (2) 10mm nuts from the bottom corners of the throttle body. Warning: These are not studs like the top two; use extra caution so that these nuts are not dropped while being removed! The driver side will allow use of an extension; the passenger side is more cramped due to the coolant tank and will not.
10. With one hand holding the throttle body, remove the top (2) studs from the manifold. Pay close attention so they are not lost. The throttle body should easily pull free of the manifold.
11. Optional: At this point, it may be a good idea to spray a bit of Throttle Body/Carb Cleaner into the Ford Racing Throttle Body. Wipe any debris or dirt away with a clean lint-free cloth or rag – one that does not leave little hairs or residue).
12. Slide the FR throttle body onto the lower manifold studs. Reinstall and hand-tighten the 8mm top studs.
13. Reinstall the 10mm lower nuts firmly using a socket wrench. Be sure not to over tighten them.
14. Finish by firmly tightening the top 8mm studs. Re-check the bottom nuts for tightness.
15. Slide the air hose fitting onto the new throttle body. It may require a little bit of effort but it should fit snugly. Do the same with the air hose and the air box opening.
16. Tighten both clamps on both ends of the hose with an 8mm socket. Do not over tighten.
17. Reconnect the Mass Air Sensor, Throttle Position Sensor, and Throttle Motor Harness to their respective clips. The TPS and Throttle Motor Harness should fit exactly as they did on the stock throttle body.
18. Reconnect the PCV line to the air hose by pushing it onto the fitting and sliding the green clip back into place.
19. Reconnect the negative (-) battery cable to the battery.
20. If you have handheld tuner with custom tunes for your new throttle body setup already on hand, install your preferred tune now, before attempting to start the vehicle.
21. After the tune is downloaded and the tuner removed from the vehicle, start the engine and confirm that no check engine or failsafe lights are present on your dashboard.
Installation Instructions written by AmericanMuscle customer Henry Bobotek 4.13.12

