 FREE 1 to 3-Day Delivery on Orders $149+ Details
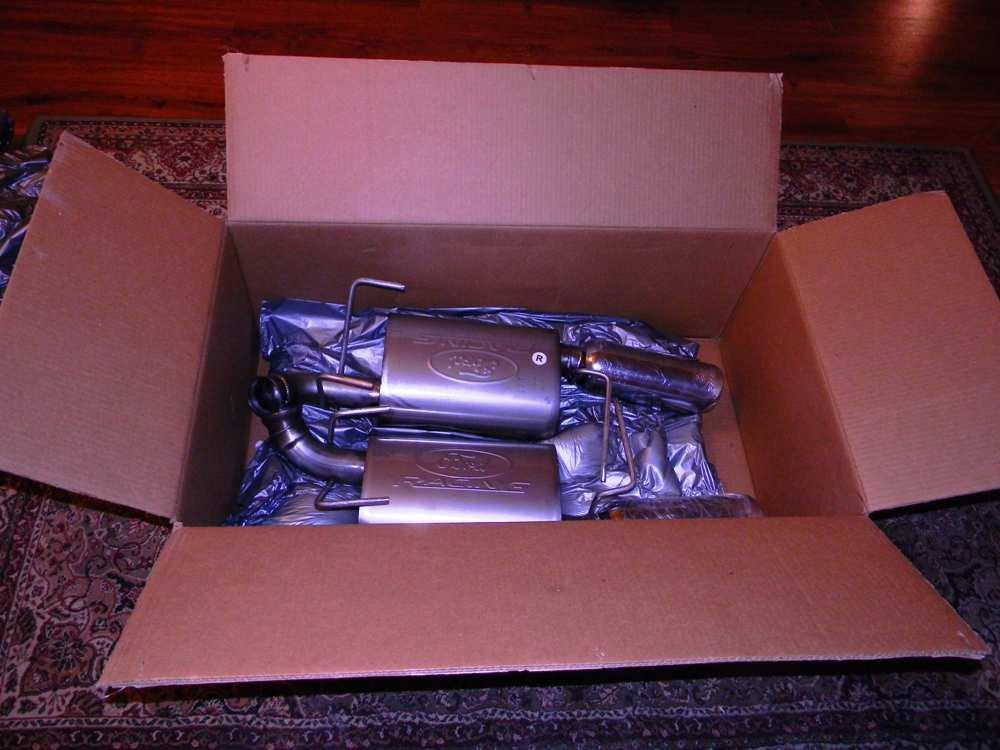
How to Install a Ford Racing Axle-Back Exhaust for 2011-2012 Mustang V6
Installation Time
90 minutes
Tools Required
- Jack Assembly
- 1 Set Car Ramps or Jack Stands (Recommended) Torque Wrench
- 3/8 Inch Ratchet Drive
- 3/8 Ratchet Drive Extension
- 13MM Socket (Exhaust Coupler)
- 15MM Socket (Upper Panhard Rod Support Bar)
- 1 Can of Penetrating Oil (For the Rubber Exhaust Hangers, Optional)
Installation
Raise the rear of the car (A hydraulic lift is not necessary)
Use ramps, a jack, or jack stands.DO NOTrely on a jack by itself. When using ramps be sure to set the emergency brake and block the front wheels.
Position yourself under the car to access the old stock exhaust system, inspect the work area and position your tools for easy access.
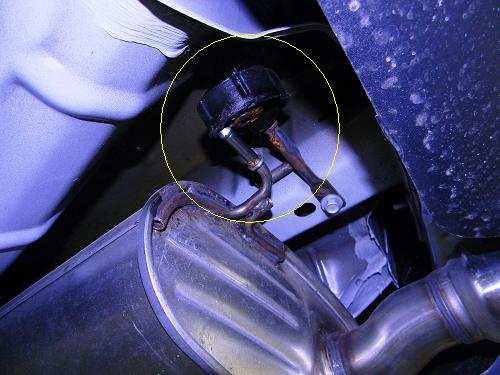
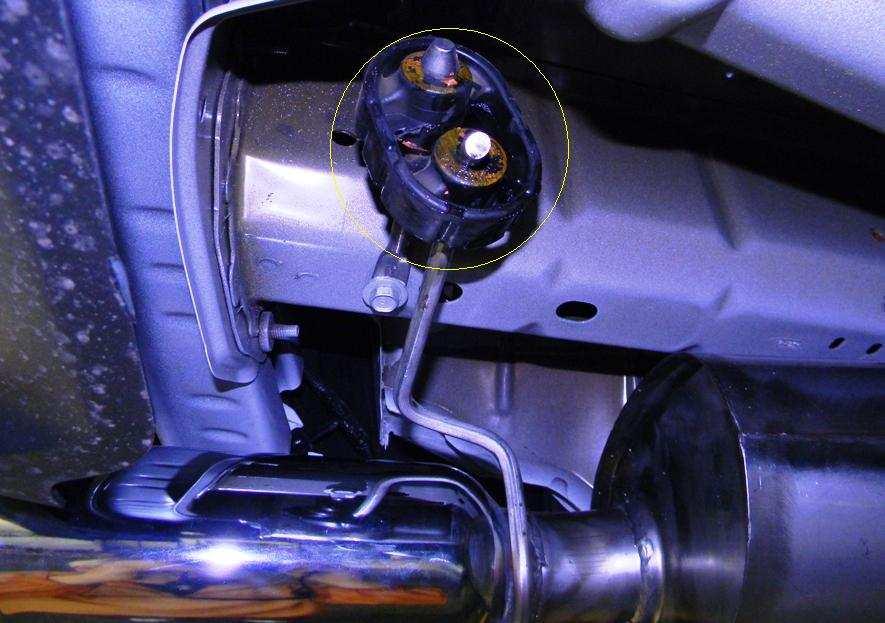
Apply a coat of penetrating oil to the rubber exhaust hanger grommets. There are three (3) grommets, per side. There is one (1) grommet in the front and two (2) grommets in the rear of the old stock muffler. (Optional).
Working on one side at a time, un-hinge the front hanger from the stock exhaust grommet. Do not remove the hanger mount from the car frame. Leave the rear hangers in place to support the weight of the old stock exhaust system.
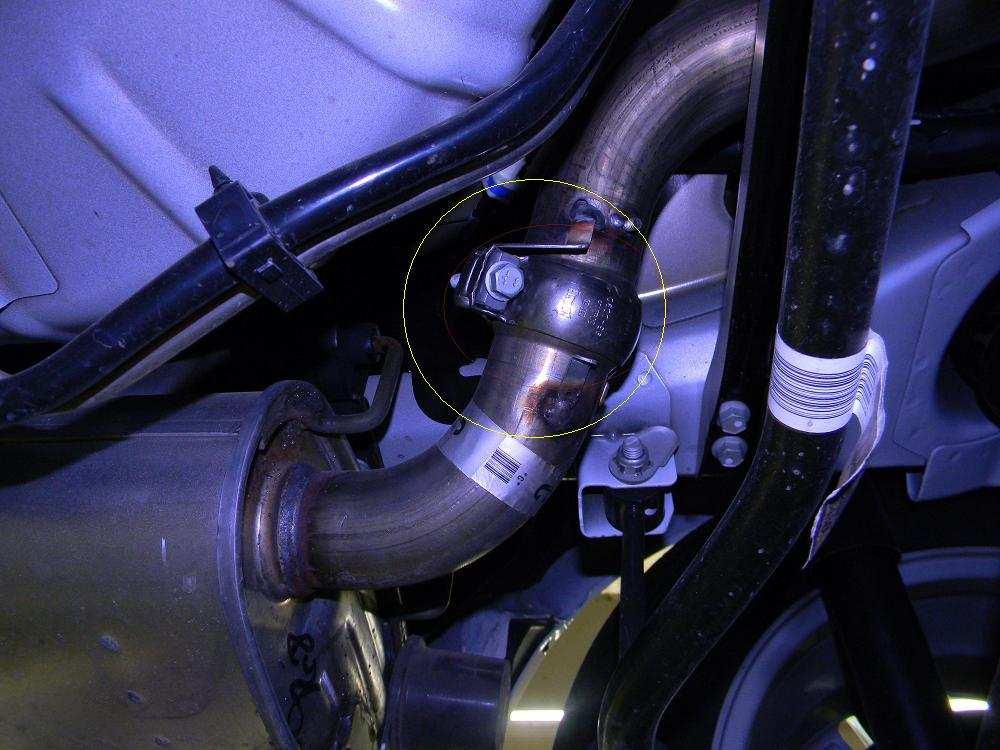
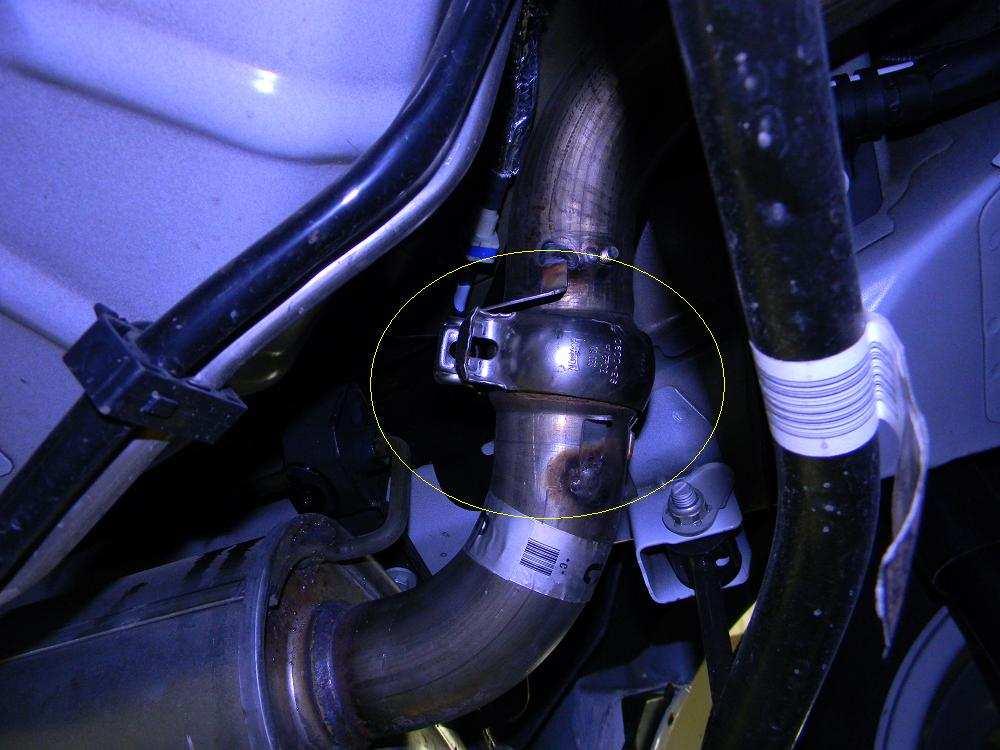
Unbolt the coupler from the stock exhaust pipe. If necessary, use penetrating oil and moderate force to remove the bolt.
Now remove the rear exhaust hangers from the rear hanger grommets.
Gently slide the old stock exhaust system towards the front of the car. The stock exhaust pipe is retained. Do not remove.

Remove the coupler from the old stock exhaust. You will need to cut the factory mounting tab to remove the coupler. You can use a Dremel tool or other cutter. It is not necessary to weld the coupler onto the new FRPP muffler system.
Repeat these steps and remove the other side of the old stock exhaust system.
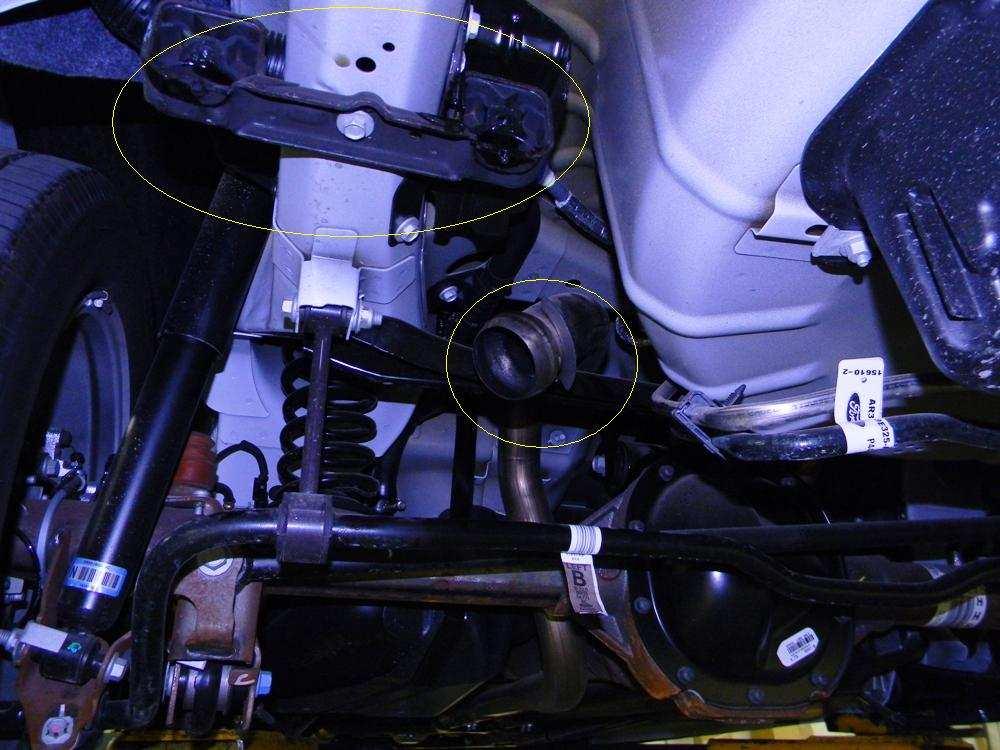
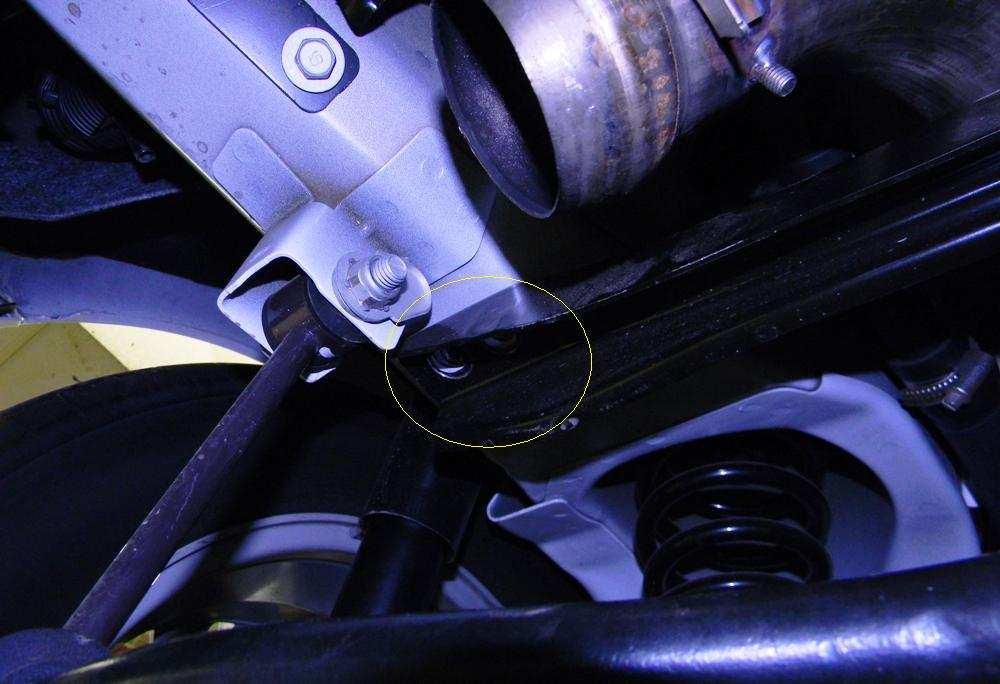
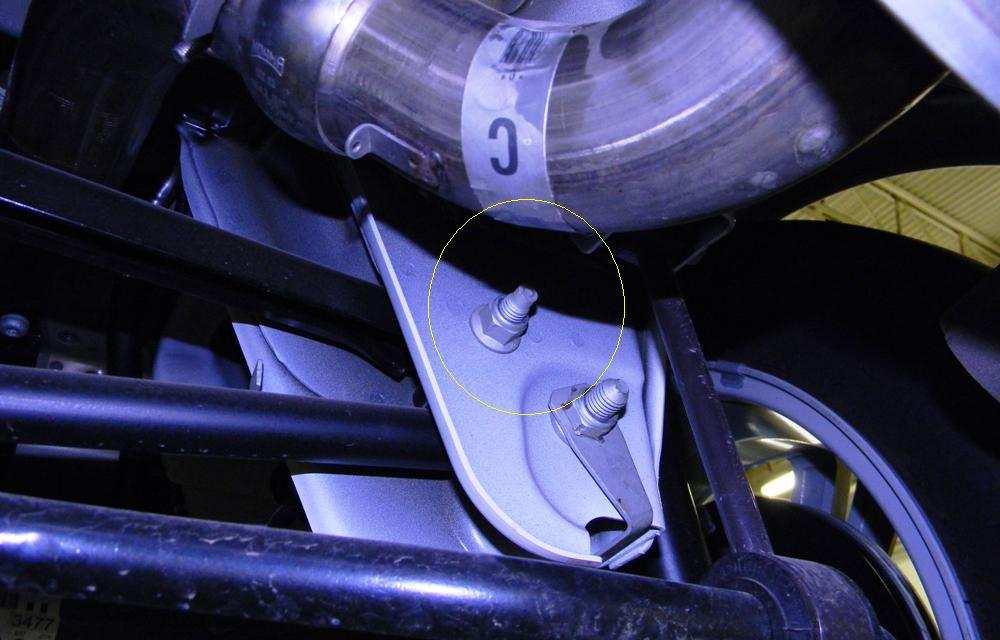
Now remove the two (2) bolts from the upper panhard rod support bar, located behind the driver side rear wheel.
Loosen the top bolt on the other end of the upper panhard rod support bar, located behind the passenger wheel. Do not remove.
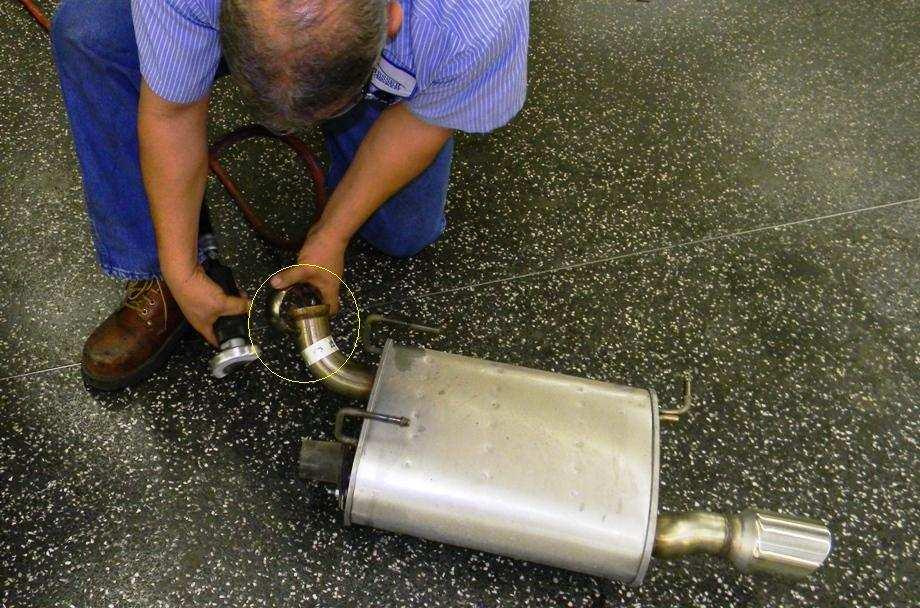
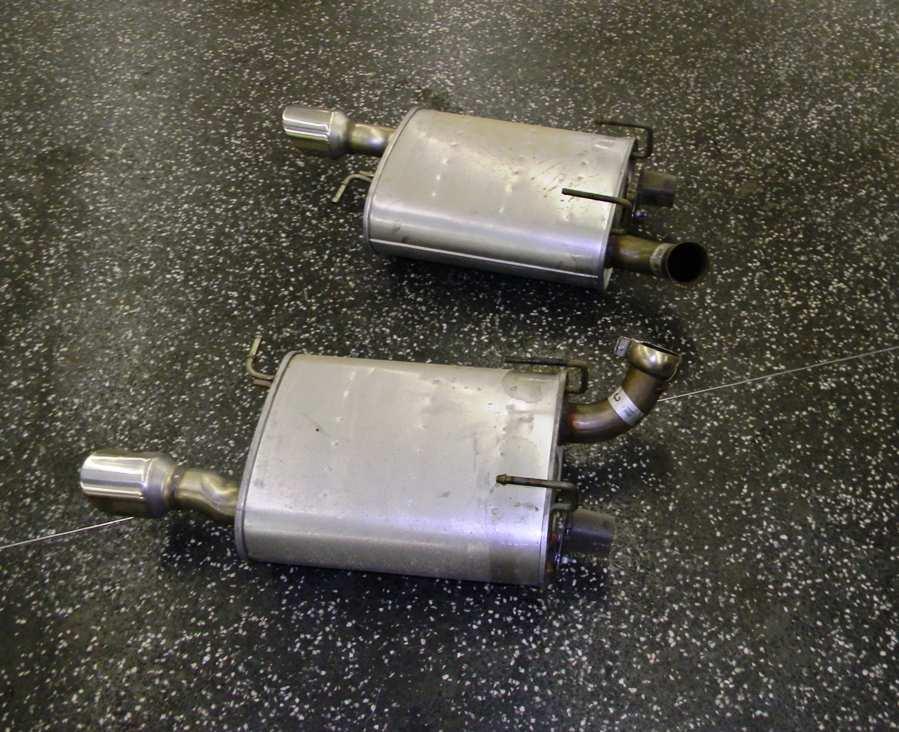
The new FRPP exhaust is ready to install. Place one (1) coupler onto each side of the new exhaust mufflers. Use something soft to cover the new exhaust tips to prevent scratches during the installation. Insert the front exhaust hanger into the rubber grommet, supporting the weight of the new FRPP exhaust system.
Slide the muffler towards thefrontof the car; insert the two (2) rear hangers into the rear grommets. Slide the muffler to therearof the car to fully support the new exhaust system. It may be necessary to manually adjust the new FRPP exhaust hangers to fully insert them into the rubber grommets. Adjust as needed, being careful not to break loose the new welds.
Position the new FRPP exhaust system into the old exhaust pipe and couple the parts together.
Hand-tighten the coupler bolt and align the new exhaust system. Once you are satisfied with the alignment, fully tighten the bolt. (Torque to 35lbs. – Optional)
Repeat this process for the other side.
Re-position the upper panhard rod support bar. Re-install the two bolts. Fully tighten these two bolts and then fully tighten the bolt on the other end of the panhard rod support bar. (Torque to 125lbs. – Optional)
Double check all of the hangers, couplers, bolts and the panhard bar to ensure the system is fully installed.
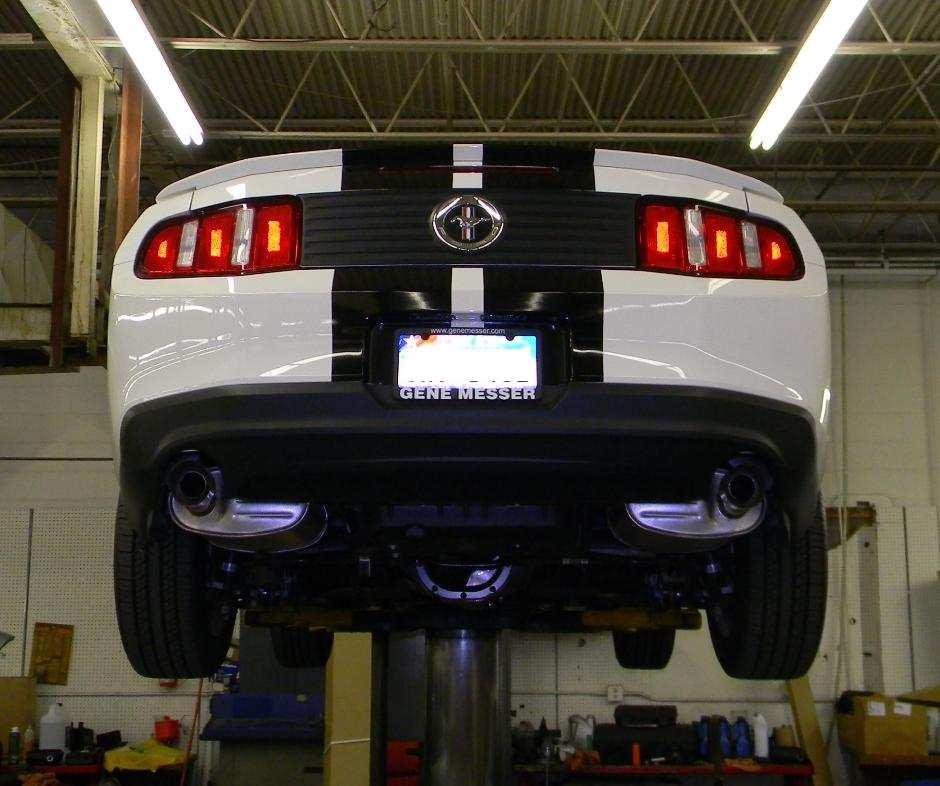
Lower the car and visually check your exhaust tip alignment. It is difficult to accurately check alignment until the car is on the ground. Adjust as needed.
Start the car and check for leaks.
Enjoy your new FRPP Exhaust System.


Related Guides
-
Installation
-
Installation
-
Installation

