 FREE 1 to 3-Day Delivery on Orders $119+ Details
Best Sellers


How to Install a Hurst Shifter for 2005-2010 Mustang GT
Installation Time
60 minutes
Tools Required
- Ratchet
- Extension
- Flat blade screwdriver
- 10mm deep socket
- 10mm short socket
- 13mm short socket
- 15mm wrench
- 7/32 hex wrench
- Floor Jack
- Jack Stands
Shop Parts in this Guide
Installation
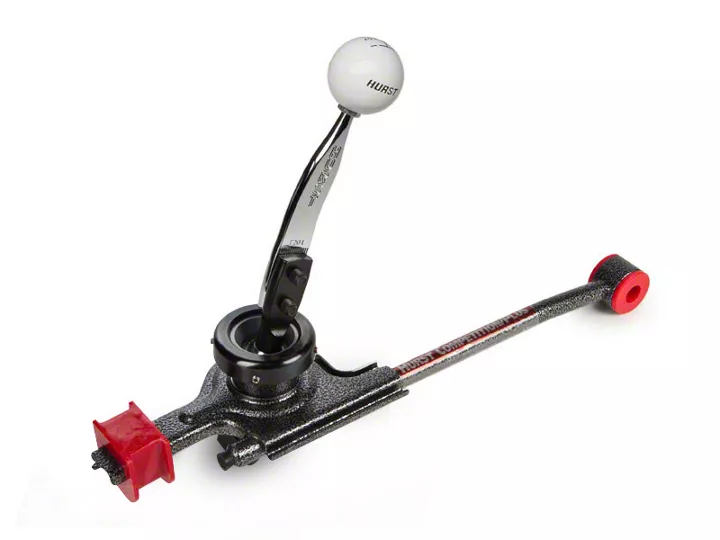
Step 1: Lay out all parts and make sure all are present.
- (1) Shift knob
- (1) Shift knob nut
- (1) Hurst shifter arm
- (1) Shifter assembly
- (2) Shifter arm mounting screws
- (2) Shifter arm mounting washers
- (1) Boot support grommet
- (2) Neoprene isolators
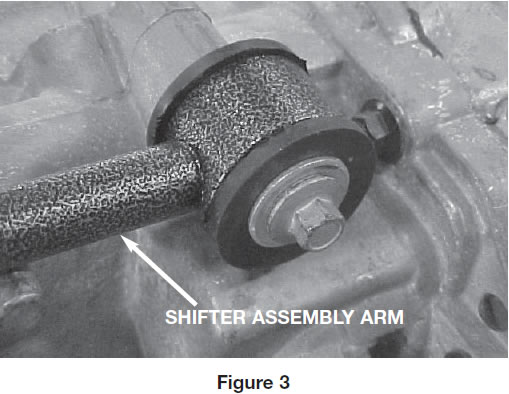
Step 2: Move shifter to neutral position and make sure parking brake is applied. Start by removing the stock shift knob and boot. The knob twists off (counter clockwise.) The boot pulls up out of the console and will likely come up with the knob. Remove the knob by slipping the boot out of the groove on the bottom of the knob.
Step 3: The lower rubber boot can be pulled out of the console next.
Step 4: Raise the vehicle using your proffered method, always use jack stands for safety. Remove the 13mm nut that secures the transmission linkage rod to the bottom of the shifter handle and set aside. Pull linkage out of shifter assembly.
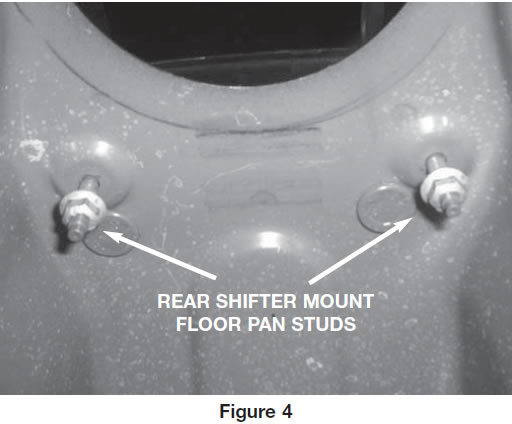
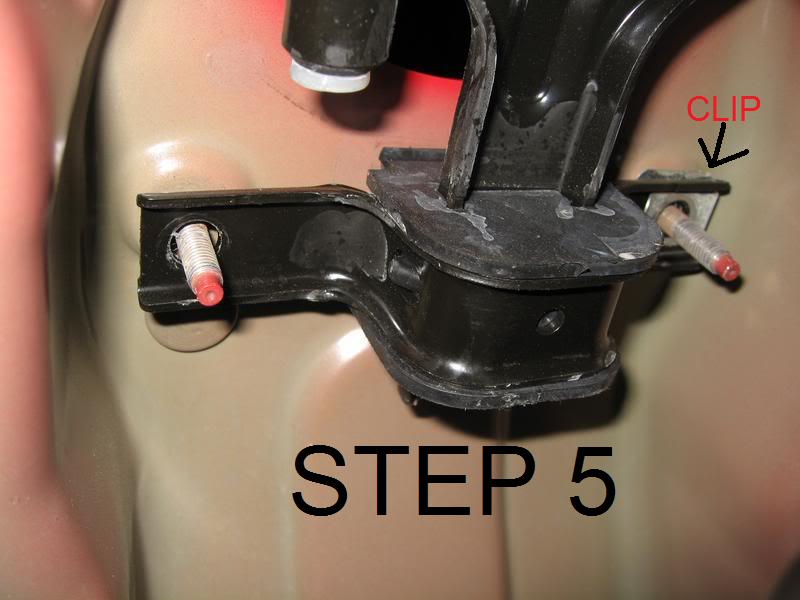
Step 5: Remove (2) 10mm nuts that secure the rear mount of the shifter assembly to the body and set aside. Remove metal bracket and rear rubber mount and set aside.
Note: Some mustangs contain a clip on one or more of the studs making the bracket difficult to remove. Carefully remove the bracket by working it from side to side until it is removed. DO NOT force the bracket down the studs because the clips can damage the threads. If two clips are present it is not necessary to remove both of them. Simply remove the bracket from one stud only and you will be able to remove the stock mount bushing.
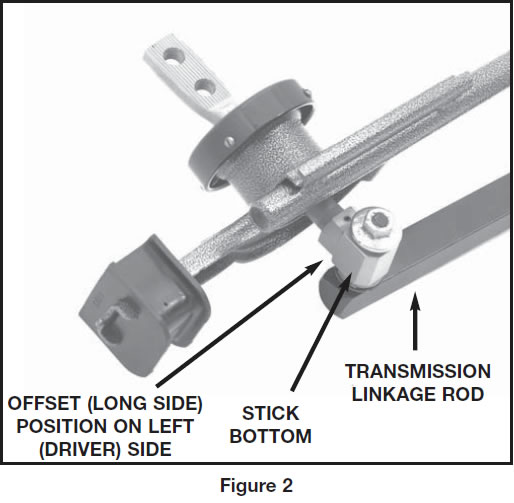
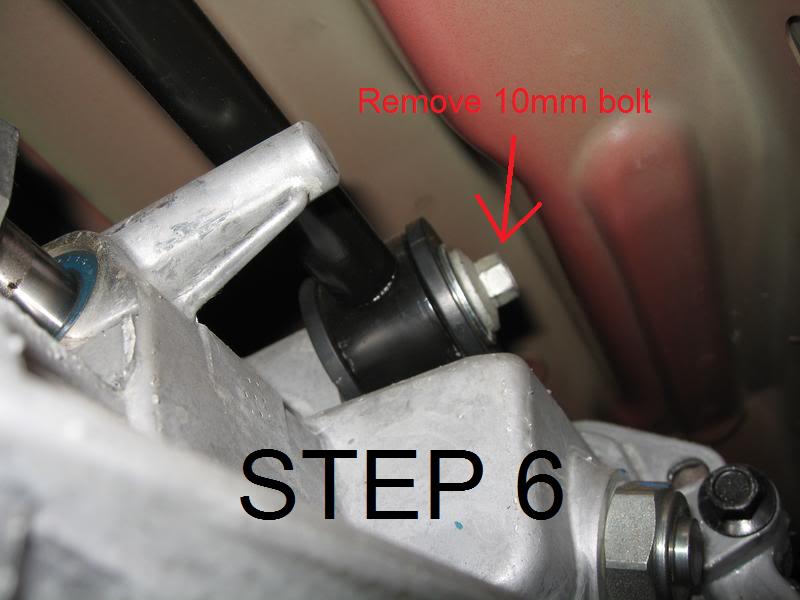
Step 6: Remove the 10mm bolt holding the front side of the shifter assembly but be cautious because the bolt will have little clearance when being removed.
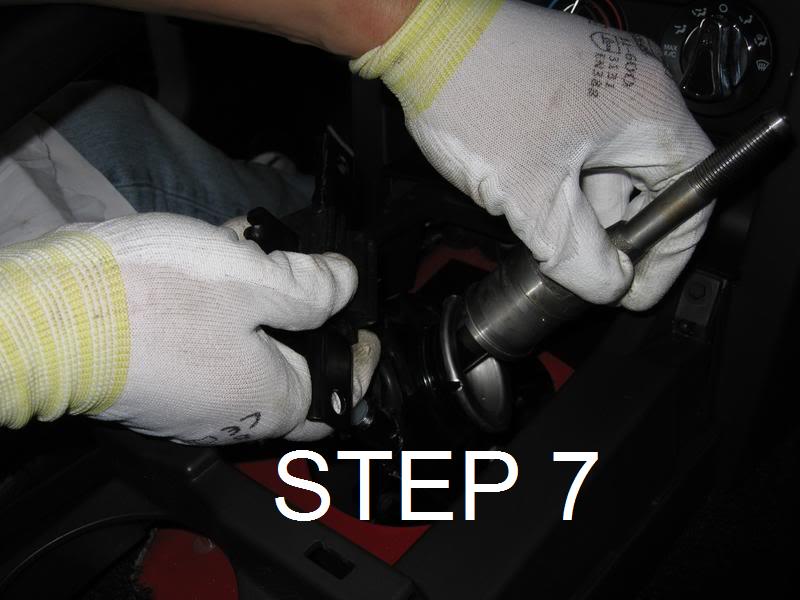
Step 7: Now the shifter assembly is ready to be removed from the vehicle. You can choose to either remove it through the inside of the car or under the car. If removed from under the car, the driveshaft must be dropped. I chose to remove it from the inside of the car. It came out easily with finesse.
Step 8: Place the stock shifter assembly on a workbench. Remove the two flanged metal sleeves from the front rubber bushing on the shifter arm. And transfer onto new shifter assembly.
Step 9: Remove the two plastic bushings from the bottom of the shifter arm and transfer onto the new assembly. I would not recommend using tools to get these bushings out for the risk of damaging the bushing.
Step 10: Now your new Hurst shifter assembly is ready to be installed. Slip the shifter through the tunnel from inside the car. First insert the 10mm bolt removed in step 6 into the front side mount of the new shifter. Hand tighten to hold it in place
Step 11: Attach the rear bracket to the new Hurst bushing. Make sure the new bushing seats in the bracket. Then tighten bolts.
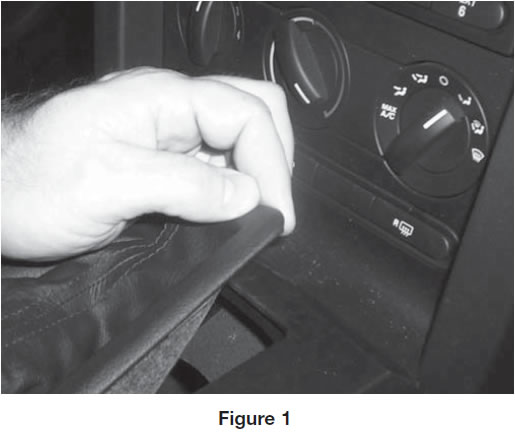
Step 12: Re-attach shifter bottom to linkage rod making sure the bushings are still in place. The 13mm nut should be on the passenger side of the car and linkage inserted on the other. Now tighten the 10mm at front of the shifter assembly.
Step 13: Carefully lower vehicle. From inside the vehicle attach the Hurst upper stick to the lower stick with two mounting washers and two 7/32 hex screws then tighten.
Step 14: Reinstall the rubber boot removed in step 3. Move through the gears with shifter to check for proper engagement and operation. Make sure all gears engage and move side to side freely in neutral.
Step 15: Install shifter boot grommet and slide into shift boot.
Step 16: Attach the knob nut onto Hurst stick and thread down as far as possibly without forcing it. After screw on the hurst knob all the way down until it contacts the knob nut, then back it off until the orientation of the shift pattern/logo is correct. Then with one hand holding the knob in the correct orientation, use the other hand to tighten the knob nut up against the knob
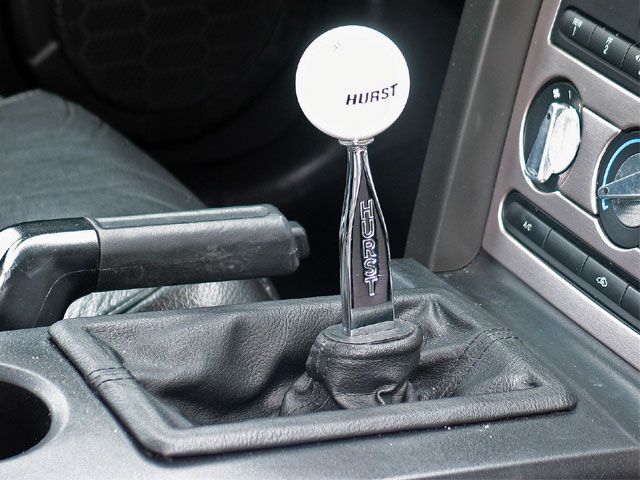
Enjoy your new Hurst shifter!!!
