 FREE 1 to 3-Day Delivery on Orders $149+ Details
Talk to a Mustang Sales Tech
1-877-887-1105
M-F 8:30A-11P, Sat-Sun 8:30A-9P
How to Install a JLT Oil Separator on Your 2011-2012 Mustang GT
Installation Time
30 minutes
Tools Required
- Long flat screwdriver (only if you have large hands and cannot reach one of the clips)
- Towel for catching/wiping any residue from old lines after removal
Installation
Overview:
This guide will walk you through the installation of your new JLT Oil Separator for you 5.0 Mustang. Please read through the entire guide before beginning to ensure you have everything you need.
The box should have included the oil separator canister with two hoses already fitted. Note: the two fittings at the end of the hoses are supposed to be facing the same direction, so do not try to “fix” this by twisting the lines.
Prep:
- If your Mustang does not have the strut tower brace, remove the engine cover to ease access to the proper fittings.
- If your Mustang does have the strut tower brace, you can just loosen the cover by lifting the front two (2) retainers to allow some room underneath to reach the fittings.
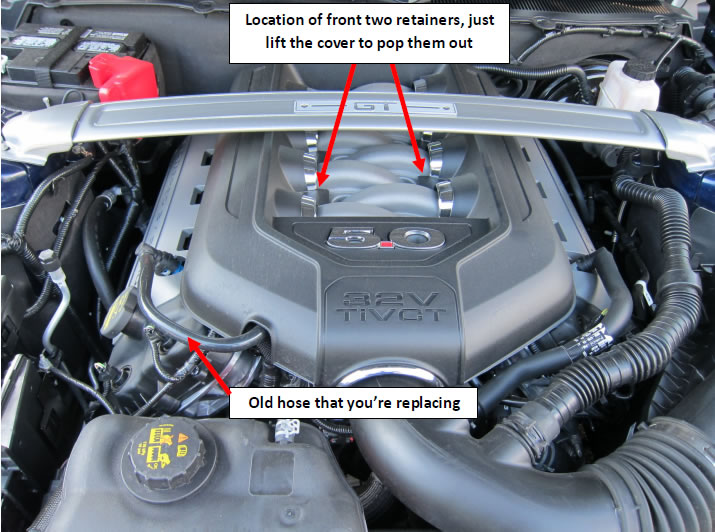
Removal of old hose:
- I recommend removing the end of the hose that’s on the valve cover first, as this will allow some play in the hose to make more room for your hand under the engine cover.
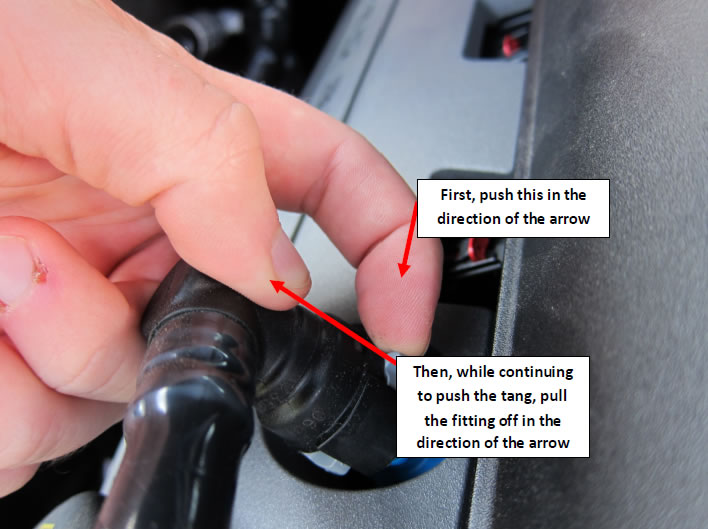
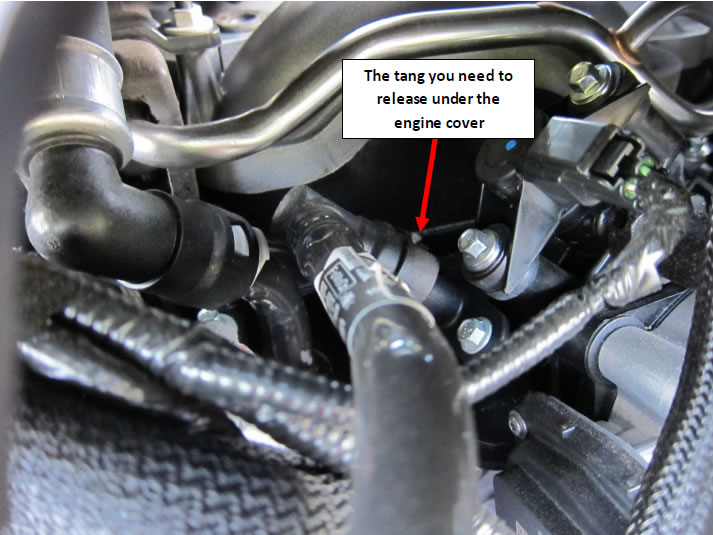
- To release the factory hose, push the grey plastic tang and pull on the fitting. You may need to wiggle the hose a bit to get it to slide off, but it should not require much force. If you’re pulling hard and it’s not coming off, double check that you’ve fully released the tang.
- Once you have removed both fittings, you can discard (or keep) the factory hose.
Installation of new hose:
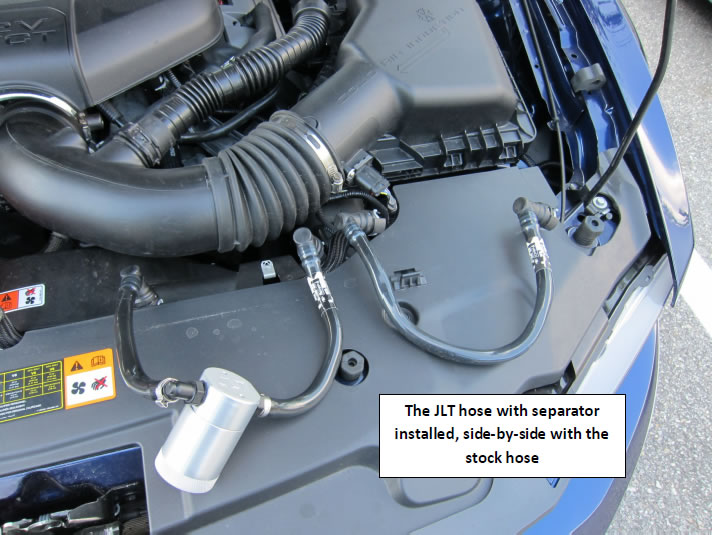
- Orient the new hoses so that the label marked “to intake” is facing towards the intake, not the valve cover. The proper orientation is shown in the comparison photo above.
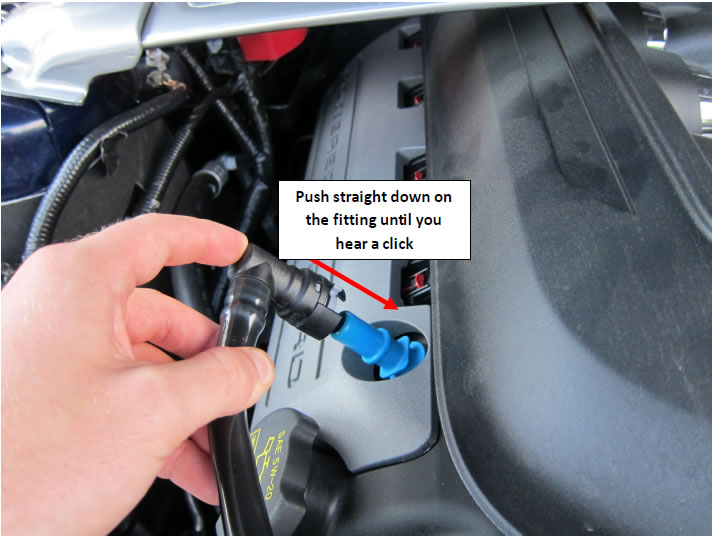
- Snap the new fittings onto the barbs in the reverse order, first connecting the hose under the engine cover, then the one on the valve cover.
- You should only have to exert a minimal amount of force before hearing the tangs click into place. If you find yourself pushing excessively, check for obstructions and make sure you’re lined up with the barb.
Finally, check to make sure your installation was successful:
- First make sure both fittings are secure by giving a gentle tug at both ends. Neither fitting should move.
- The hose leading from the valve cover is supposed to be resting on the oil fill cap, so do not worry if they’re touching.

- The oil canister should be above any radiator hoses, and be well clear of the coolant reservoir, as shown here:
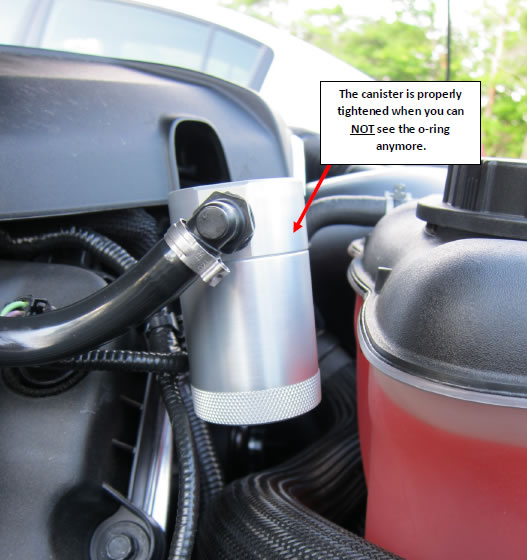
- Check to make sure the oil catch can is securely threaded onto the cap, sealing up to the o-ring to prevent leaks. When tightened, the black o-ring should not be visible, as indicated in the picture above.
- Once you’ve completed these steps, you’re finished! Don’t forget to check the catch can for oil every 1,000 miles or so and empty it if it’s getting full.
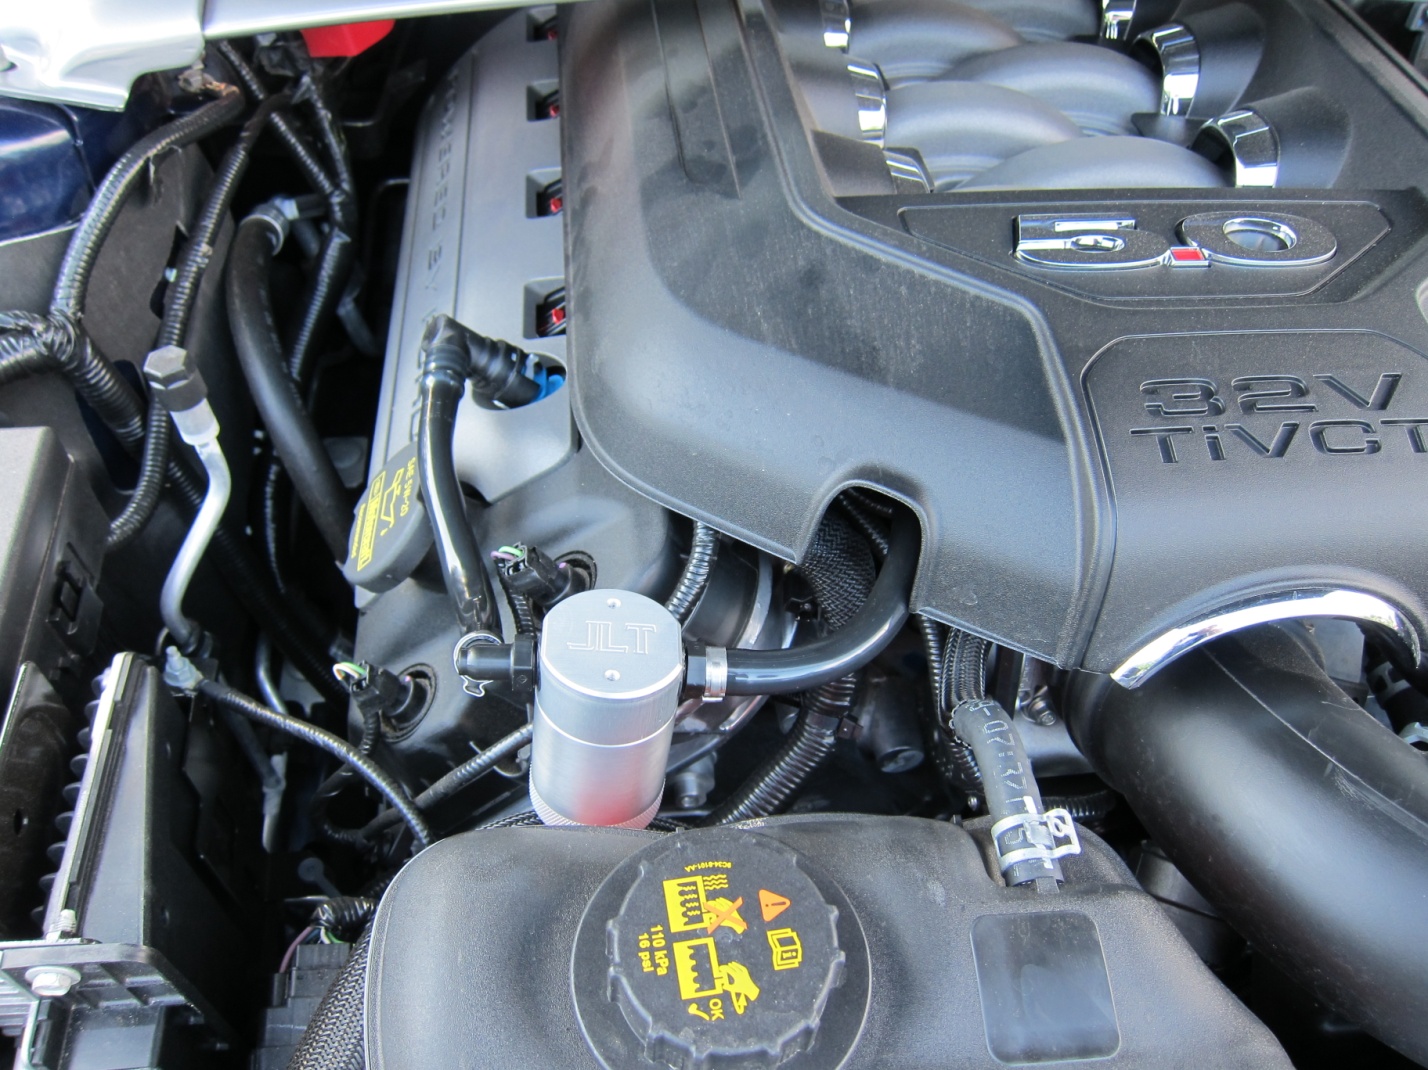
- Snap the engine cover back on, and the final result should look like this:
Installation Instructions provided by AmericanMuscle customer Jason Brodsky 8.10.11
Related Guides
-
Installation
-
Installation
-

