 FREE 1 to 3-Day Delivery on Orders $149+ Details
How to Install a Magnaflow Competition Catback Exhaust on Your 2011-2012 GT
Installation Time
2 hours
Tools Required
- Ratchet
- 15mm deep socket
- Penetrating Fluid
- Car lift almost certainly needed
Installation
Removal of factory exhaust:
- Raise car in the air by using a car lift.
- Start by removing the stock exhaust by loosening the nuts that hold the inlet pipes to the stock H-pipe, shown in the pictures below.
- Loosen these (4) nuts in order to slide both inlet pipes out.
- Keep the clamps as they will be re-used again.
- Move to the back of the vehicle now. Loosen the nuts that hold the stock resonators to the inlet pipes where they go over the axle (both driver and passenger side; see pictures below)

- Loosen this bolt shown above for both the passenger and driver side resonators. These will not be re-used again.
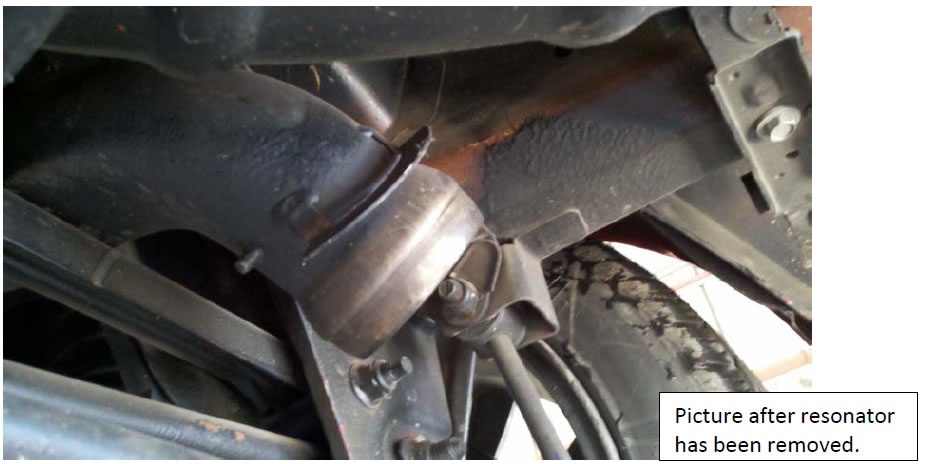
- In order to remove the stock resonators more easily, take the bolts out of the one side of the crossbar, going from the left to right side on the rear of the car. Lowering this out of the way makes it much easier to get the resonator off.
- Spray penetrating fluid into the rubber grommets where the brackets for the resonators slide into and it will make it easier for sliding them out.
- Here is where the car lift is needed in order to get the long inlet pipes out.
- The pipes go over the rear axle. In order to get them out, you need to drop the front of the inlet pipe straight down and then work the over-axle portion towards the front of the car until it clears.
- You can lay it out of way and then remove the second inlet pipe the same way as you do the first.
- Now re-insert the (2) bolts that hold the crossbar up in the rear of the vehicle and tighten them up. It does not affect the installation of the Magnaflow resonators.
Installation of Magnaflow System:
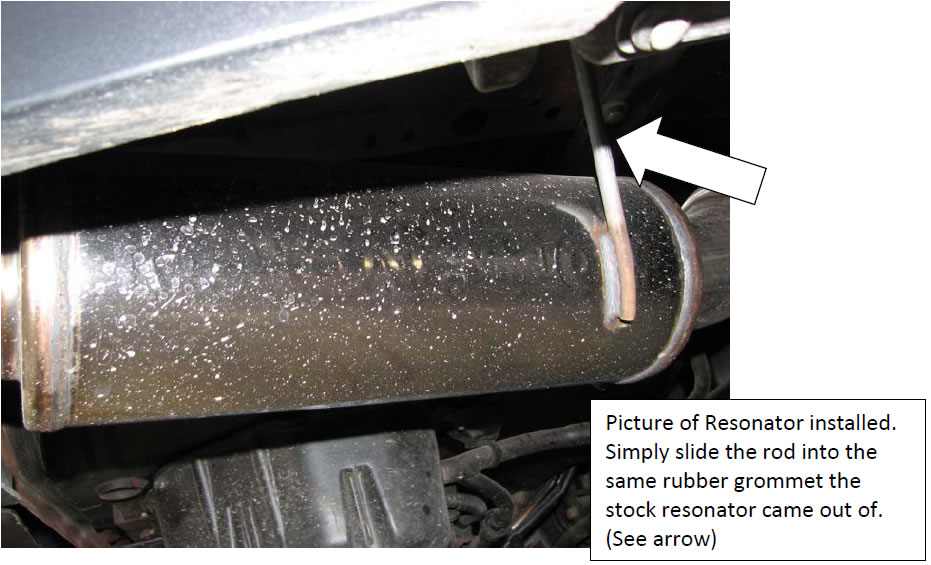
- Start by installing the resonators first. Doing so makes it easier to get the new inlet pipes to line up.
- If you install inlet pipes first, it’s possible to get the new resonators in the brackets but proves to be much more difficult. (See picture below)
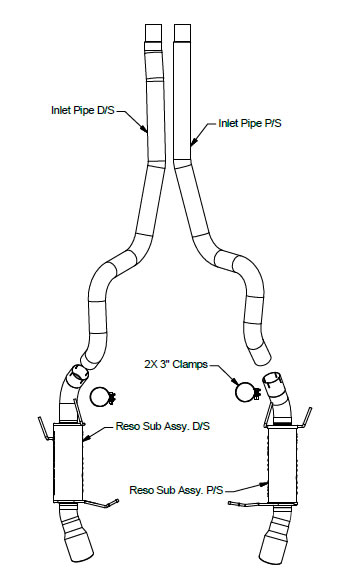
- Make sure to identify the difference between the driver side and passenger side resonators.
- Driver side resonator has the inlet pipe connections facing inward towards middle of car.
- Passenger side faces the same way with the hanging brackets of the resonators on the top side.
- Once you have both Magnaflow resonators installed in their rubber brackets, slide on the clamps that will hold the resonators to the inlet pipes. This way when you insert the inlet pipe into the resonator, they can easily slide into place and be tightened down.
- Start with the passenger side inlet pipe: this pipe goes over the axle and bends towards the passenger side of the car to meet with the resonator. Route over the axle by carefully working it back and forth until it clears and sits in place.
- Fit inlet pipe into resonator. Slide the clamp that was previously placed on the resonator into place and lightly tighten down to allow for later adjustment.
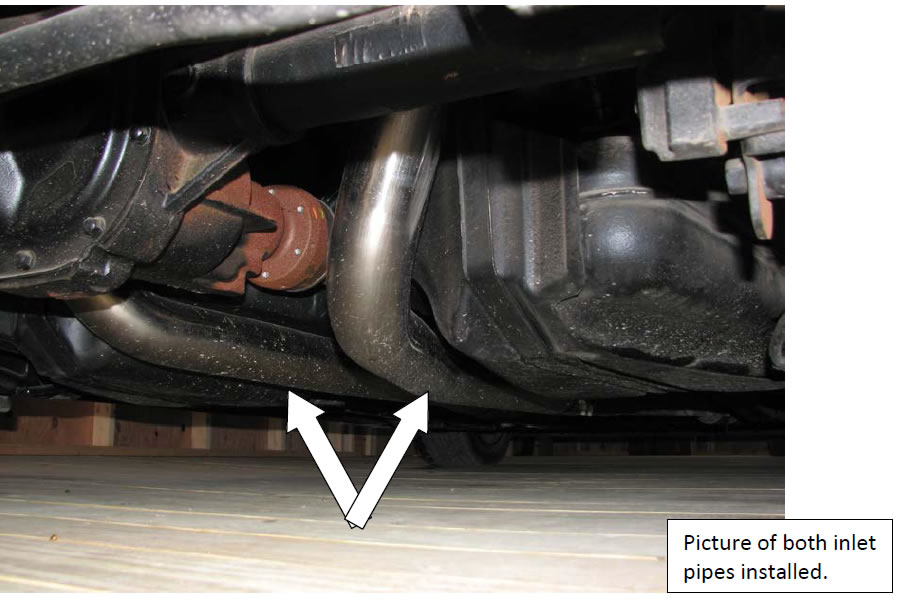
- Fit the front part of the passenger inlet pipe into the stock H-pipe that re-uses the stock clamp. In some cases, you may have to slide the clamp forward and out of way so the inlet pipe can slide into place. Again, lightly tighten to allow for later adjustment. (See picture of inlet pipes below)
- Repeat previous procedure for the driver side: route over the axle carefully, fit into the resonator, lightly snug down, fit front of inlet pipe into place with the H-pipe and lightly snug down.
- Once both sides are installed, check the clearance of all new components as nothing should be rubbing.
- Check the exhaust tip placement in the rear of the car. Adjust the tips so they are resting in the middle of the bumper exhaust cutouts.
- After ensuring that there are no rubbing issues and all is aligned properly, tighten all nuts down. Make sure nothing has too much play in it.
- Remove the bubble wrap off the resonators and that completes the installation of your new cat-back exhaust system, ENJOY!
Installation Instructions written by AmericanMuscle customer Kyle Fisher 9.14.11
Related Guides
-
Installation
-
-
Installation

