 FREE 1 to 3-Day Delivery on Orders $149+ Details
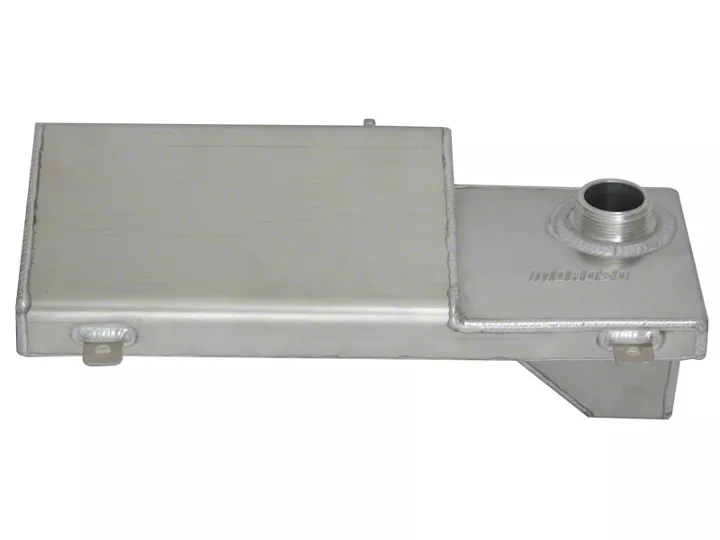
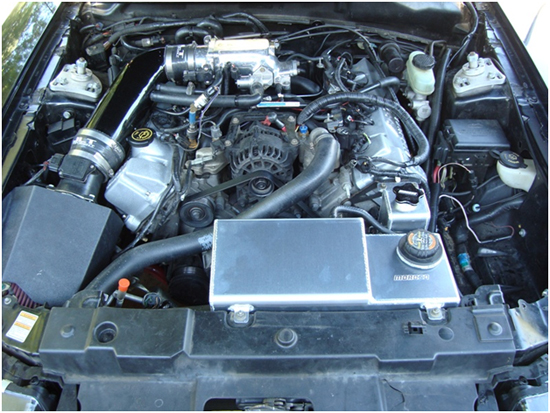
Moroso Mustang Aluminum Coolant Expansion Tank ('96-'04) - Installation Instructions
Installation Time
2 hours
Tools Required
- Drive Ratchet
- 10mm drive socket
- 6 drive extension
- Standard pliers (Pliers specific to Spring style hose clamps are commercially available )
- Catch pan
Shop Parts in this Guide
Installation
1. Due to proximity, disconnect positive battery cable to avoid any electrical hazard.
2. Remove factory fill cover and drain the coolant into an appropriate container. If raising the vehicle is necessary, use an appropriately rated hydraulic jack and jack stands. Dispose of coolant according to your local and state guidelines. Reminder: Antifreeze is deadly to pets and other animals. DO NOT leave exposed antifreeze in areas that can be easily accessed by pets and other animals.
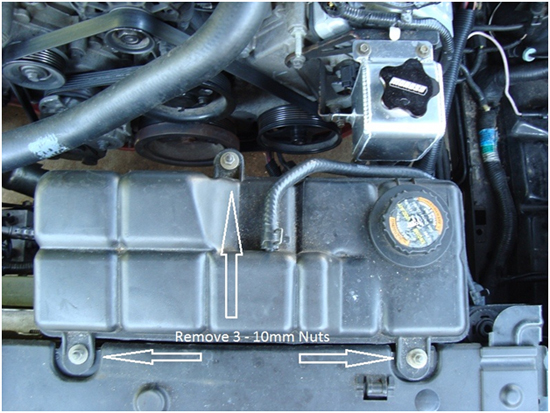
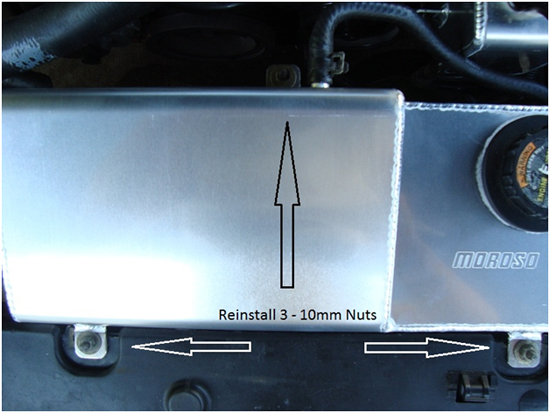
3. Now that the overflow tank is empty we can begin removal of the factory tank. Using the ¼” drive ratchet, extension, and 10mm socket remove the 3 – 10mm nuts that hold the factory tank in place.
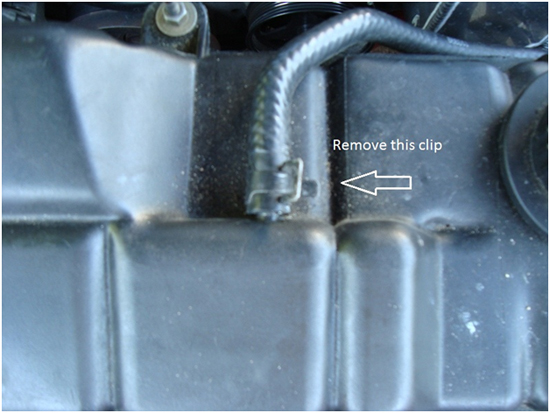
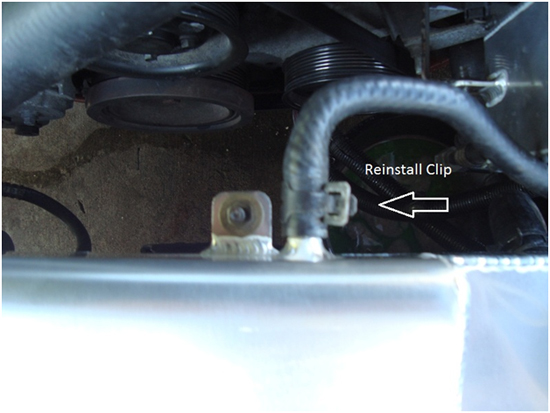
4. Next use the pliers to remove the factory spring style hose clamp at the overflow hose. I reused the factory clamps. You can replace them with appropriate sized screw style hose clamps.
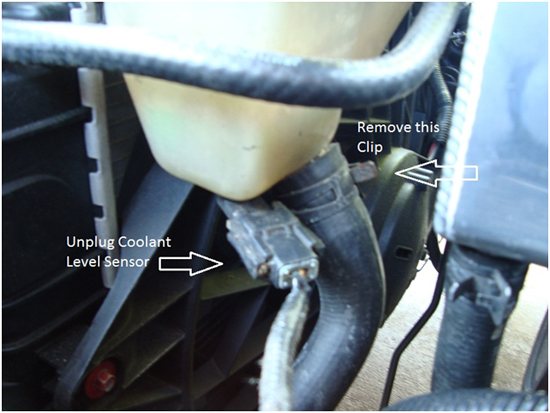
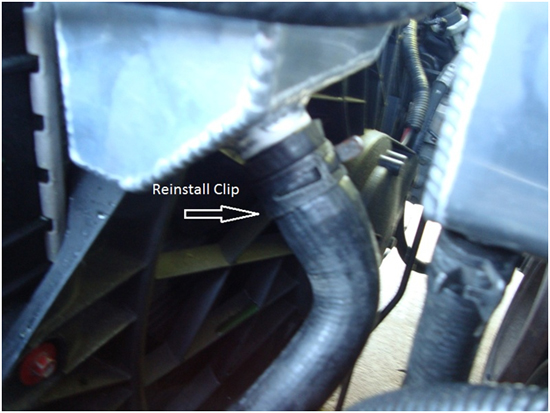
5. After removing the overflow hose use the pliers again to remove the spring style clamp at the lower radiator hose. Once again I reused the factory clamp but you can replace it with the appropriate sized screw style hose clamp. If the hose difficult to pull off rotate hose breaking loose any corrosion holding it in place. At this point the hose should pull off easily. At this time you can also disconnect the coolant level sensor.
6. After removing the clamps, disconnect the overflow and lower hoses from the factory tank and remove the tank from the vehicle. You will now have an empty space begging for the new tank.

7. Place the Moroso expansion tank in place of the factory tank reusing the factory 10mm nuts.
8. Reinstall overflow hose using factory spring style hose clamp or screw style hose clamp.
9. Reinstall lower radiator hose and clamp in place using factory spring clamp or screw style hose clamp. The coolant level sensor cannot be reinstalled in the Moroso expansion tank. The plug can be left disconnected and will not affect the coolant level warning light, the light will remain off.
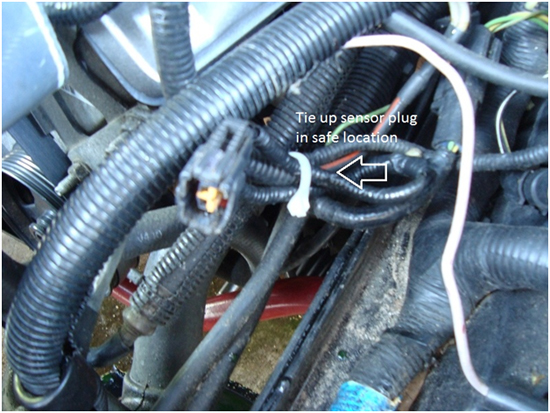
10. Find a safe location to tie up the coolant level sensor plug. I used one wire tie to tie the level plug to the factory harness.
11. Using the factory recommended antifreeze to water ratio, refill the coolant expansion tank and replace the factory radiator cap. I recommend filling the expansion tank to within 1” of the top of the tank to allow room for safe expansion of coolant under normal operating conditions. Reconnect the positive cable and start the engine and allow it to reach operating temperature. Any air trapped in the system will bleed off once vehicle reaches operating temp and the thermostat begins to cycle coolant through the radiator. Check coolant level in tank and add as necessary.
12. Installation of the Moroso coolant expansion tank is now complete. Bearing in mind that the coolant level sensor is no longer operational, routinely check the level of coolant in the expansion tank for safest operation.
13. For ongoing maintenance and greatest aesthetic pleasure, I recommend routine use of your favorite brand of aluminum metal polish. For improved aesthetics you can use American Muscle item # 41157 – Chrome Radiator Cap Cover. Enjoy!!!
Installation instructions provided by AmericanMuscle customer Devin Burdge 7.9.10

