 FREE 1 to 3-Day Delivery on Orders $149+ Details
How to Install a Front Bumper Cover - Unpainted on Your 1999-2004 Mustang GT & Mach 1
Installation Time
3 hours
Tools Required
- Offset Phillips screwdriver
- Ratchet
- 5/16" socket
- 7/16" wrench
- Fastener removal tool
- Floor jack
- (2) jack stands
- Blanket or drop cloth
- A helper (optional)

Shop Parts in this Guide
Installation
Removal of stock bumper:
1. Raise and secure hood with hood prop. Remove negative battery lead using a 5/16” socket and move lead away from battery.
2. Raise and secure the front of your car onto jack stands. Be sure the rear wheels are chocked, the emergency brake is on and transmission is in gear (for automatic transmissions - park).
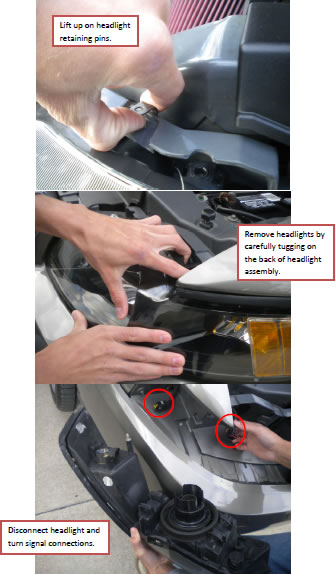
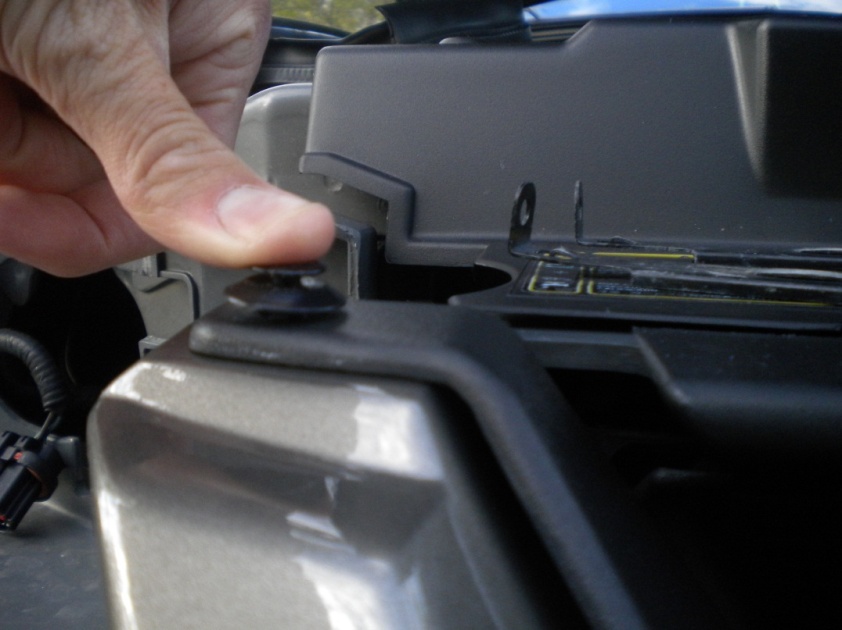
3. Begin by removing headlights. Remove (2) pins on back side of each headlight by lifting straight up.
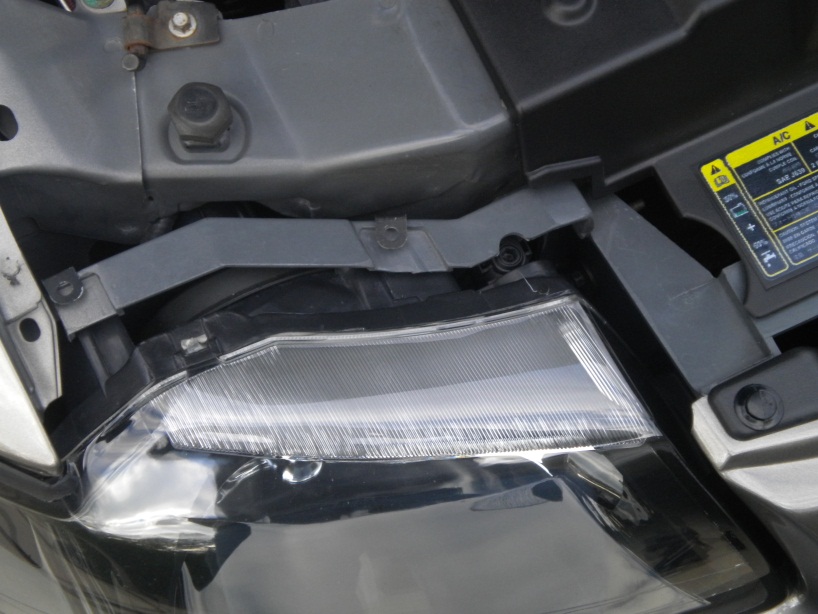
4. Once pins are removed, tug on headlights to pop them out of place. This may take some coaxing. Once headlight has popped loose, disconnect the corner signal light and the headlight connector.
5. Put blanket or drop cloth under front bumper.
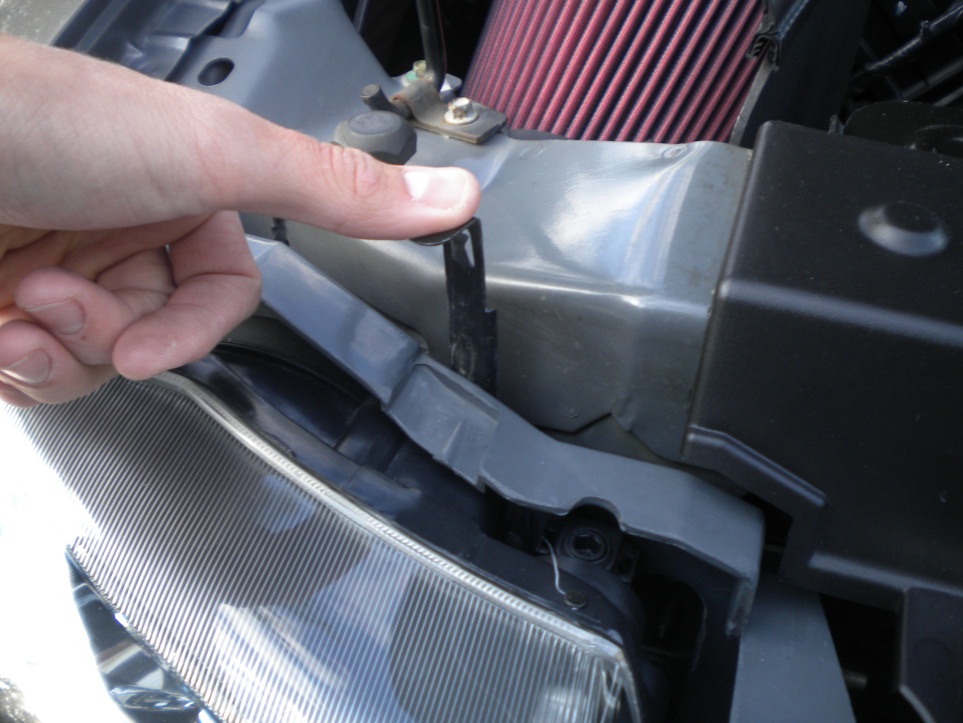
6. Remove (2) plastic fasteners connecting the grill using fastener removal tool.
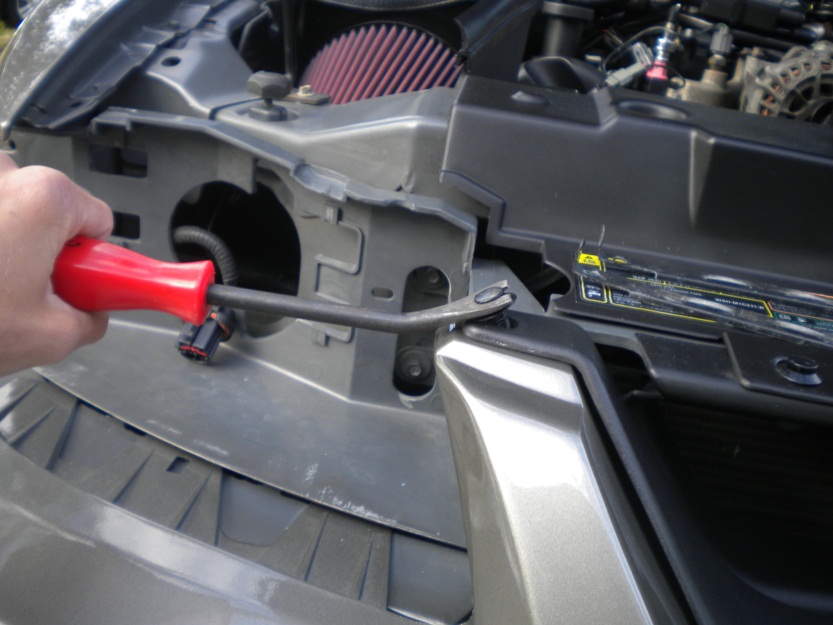
7. Remove (2) plastic fasteners from under the front bumper, securing front bumper to radiator support using fastener removal tool. Also while under the car, remove both fog light connections.
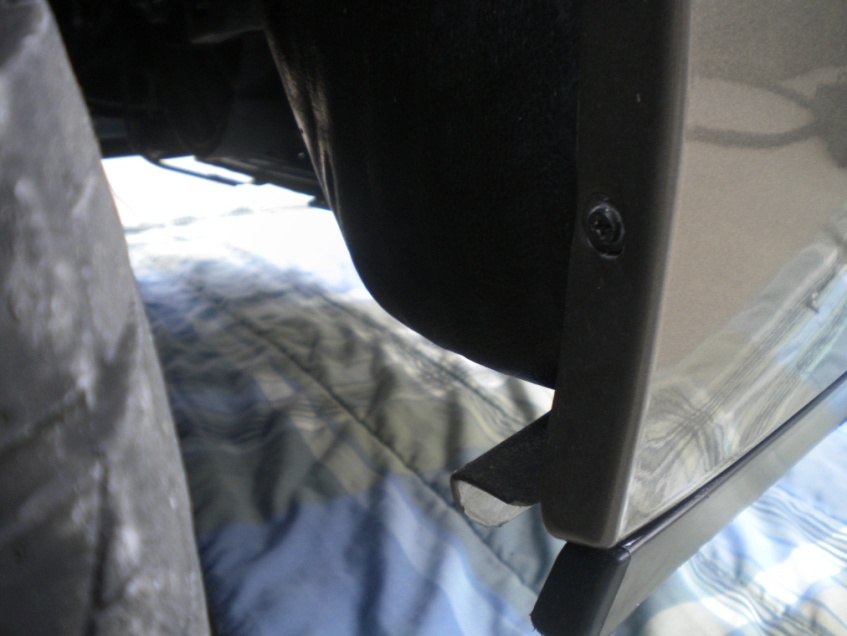
8. Using the offset Phillips screwdriver, remove (1) screw on each side of the car retaining the plastic fender-well to the front bumper.

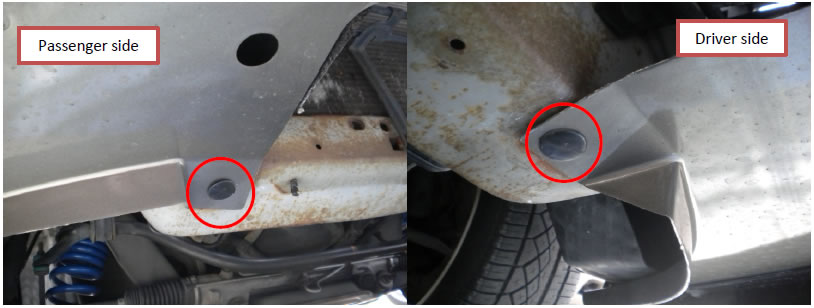
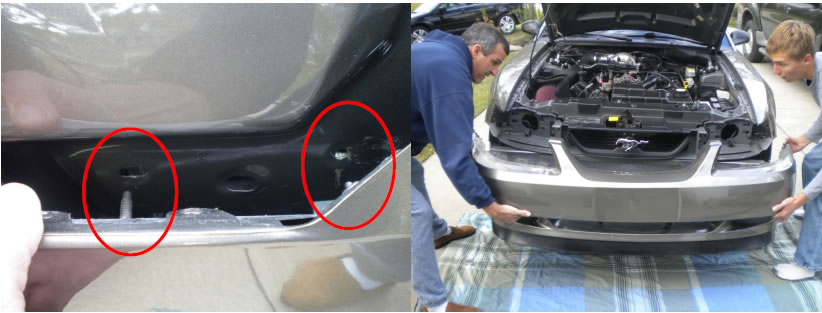
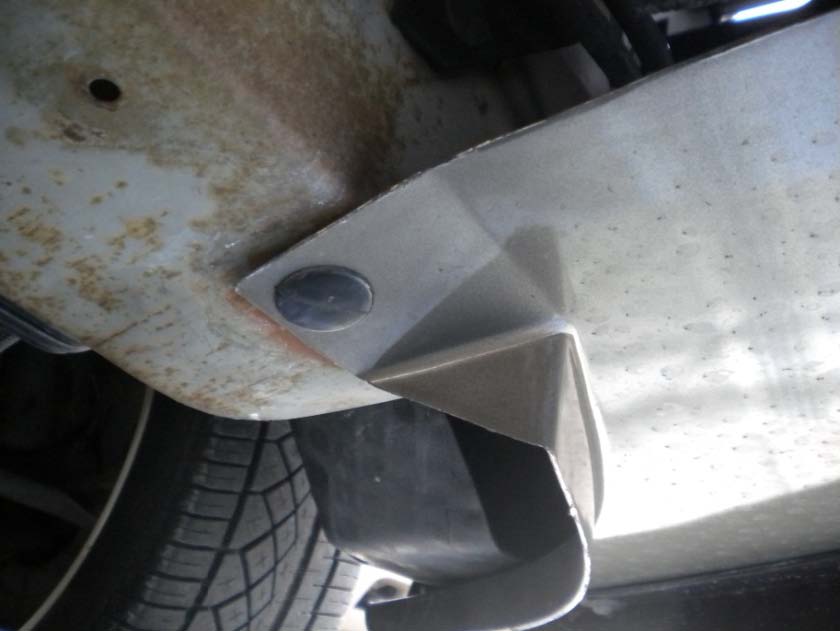
9. Lying under the front of the car, look up into the front bumper (left and right sides) for the final (4) nuts holding the front bumper in place on the front quarter panel. Once located, use a 7/16” wrench to remove the (2) nuts from each side.

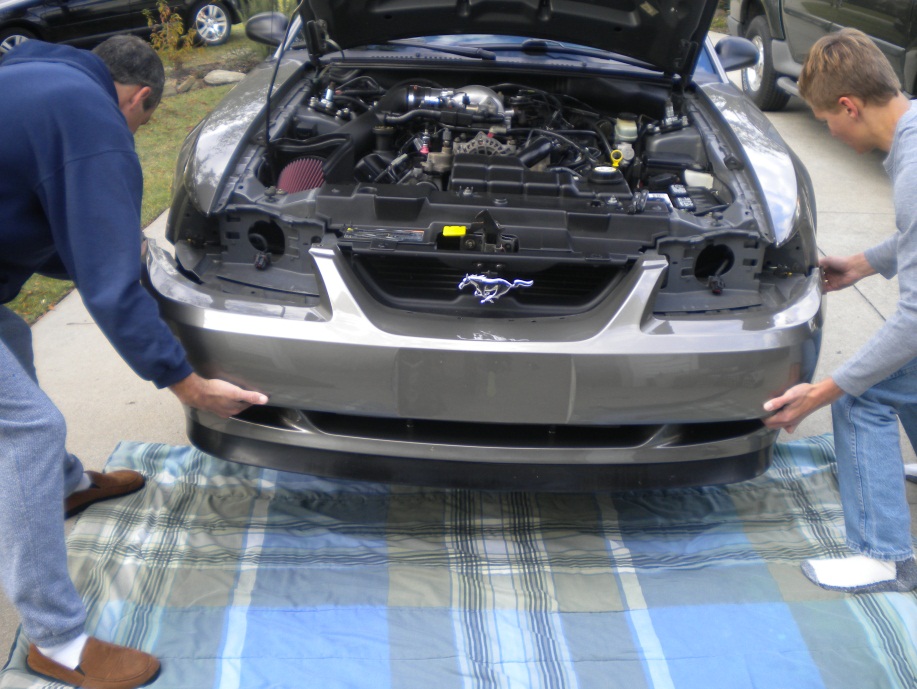
10. Remove front bumper from car. (An extra set of hands in useful in this step). When removing the bumper, be sure to pull on each side of bumper, allowing studs to clear their holes for a smooth removal.
Installation of new bumper:
1. Begin by lifting the bumper onto the front of the car. Be sure bumper clears the bumper’s studs and then guide them to their respective holes. Also, be sure to orient the (6) bumper guides (3 on each side) underneath the grill frame. (A helper can be useful in this step). NOTE: Bumper installed with Mach 1 Chin Spoiler as well; not included with front bumper purchase.
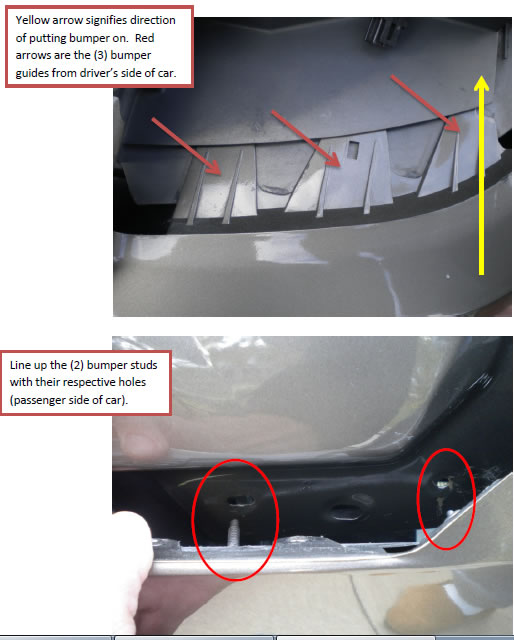
2. Once the front bumper is securely in place on the car, start under the car by reinstalling the (4) 7/16” nuts holding the bumper to front quarter panels (2 on each side).
3. Also, while under vehicle, re-connect the fog light wires on each side and reinstall the (2) plastic fasteners securing the front bumper to the radiator support.
4. Reinstall (2) screws (1 on each side) holding the fender-well to the front bumper using an offset Phillips screwdriver.
5. Reinstall the (2) plastic fasteners securing the front grill.
6. Re-install both headlight assemblies. Begin by plugging in the headlight connection and turn signal connection. Then to put headlight back in place, line their studs up with their holes and give each headlight assembly a firm push to set the studs. Then press the (4) retaining pins back into their positions (2 on each side).
7. Carefully raise vehicle off jack stands and then lower car back to ground slowly.
8. Re-connect the negative battery cable using 5/16” socket.
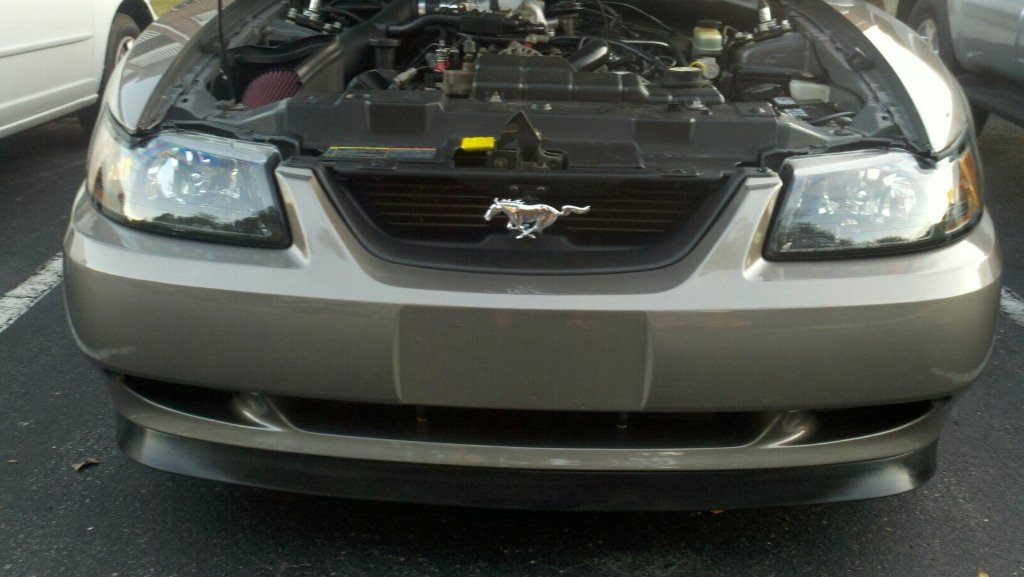
Finished Product!!
Installation Instructions written by AmericanMuscle customer John Collmann 11.3.11
Related Guides
-
Installation
-
Installation
-
Installation
