 FREE 1 to 3-Day Delivery on Orders $149+ Details
How to Install a Rear Bumper Cover - Unpainted on Your 1999-2004 Mustang GT
Installation Time
3 hours
Tools Required
- Ratchet
- Socket extension
- 7/16" deep well socket
- 7/16" wrench
- 5/16" socket
- Fastener Removal Tool
- Offset Phillips screwdriver
- Extendable magnet (optional - used to retrieve nutsthat have been dropped into tight places)
- A blanket or drop cloth
- A helper (optional)
Installation
Removal of stock bumper:
1. Open and secure hood. Remove negative battery cable from battery using 5/16” socket and push battery lead away from battery post.
2. Open trunk and spread a blanket or drop cloth under back of car.
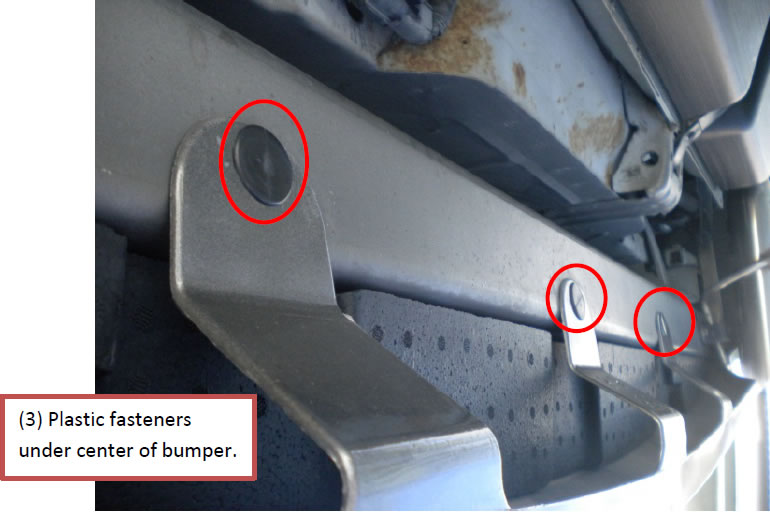
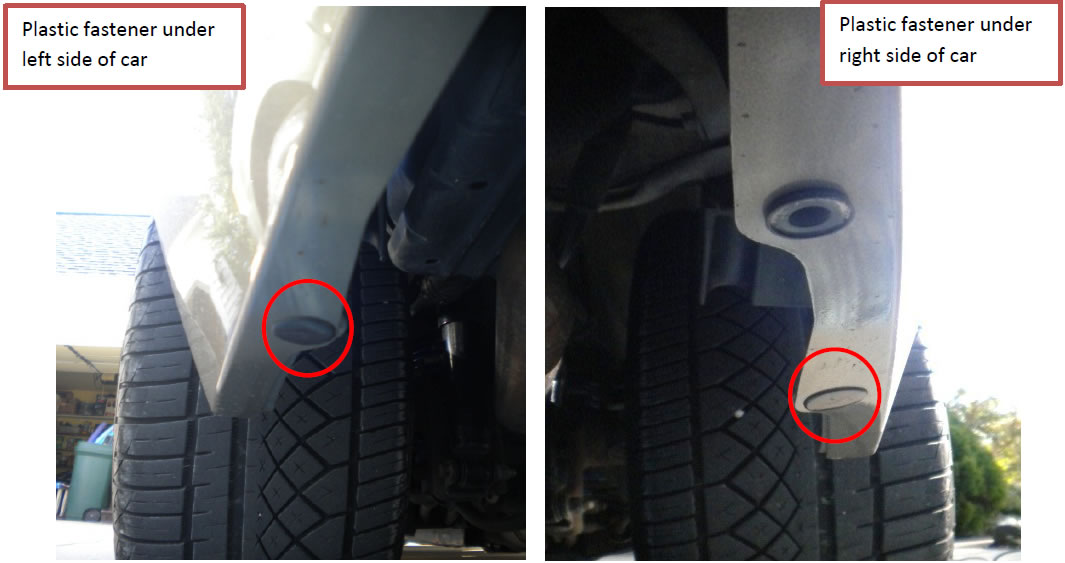
3. Beginning under the car, remove the (5) plastic fasteners holding the rear bumper to vehicle’s sub-frame using the fastener removal tool. Three (3) of the fasteners are located underneath the center of the vehicle and the remaining (2) fasteners are located underneath either side of the bumper.
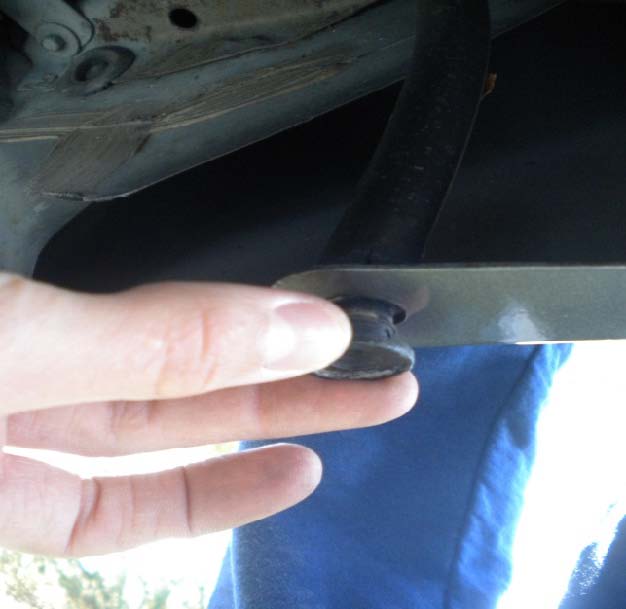
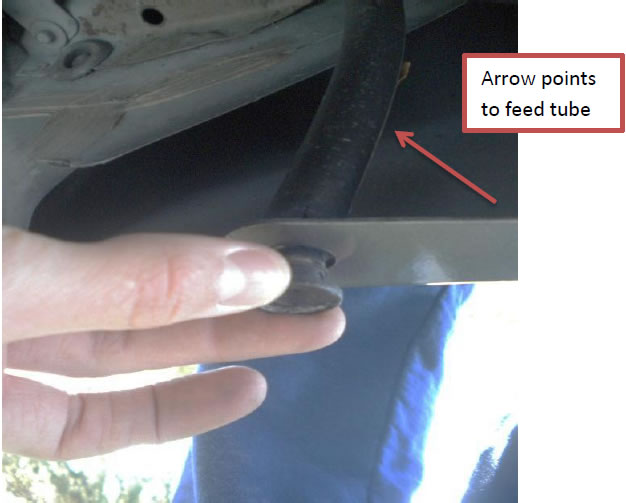
4. While still underneath the car, remove the fuel overflow plastic fitting on right side of vehicle by simply pulling straight down.
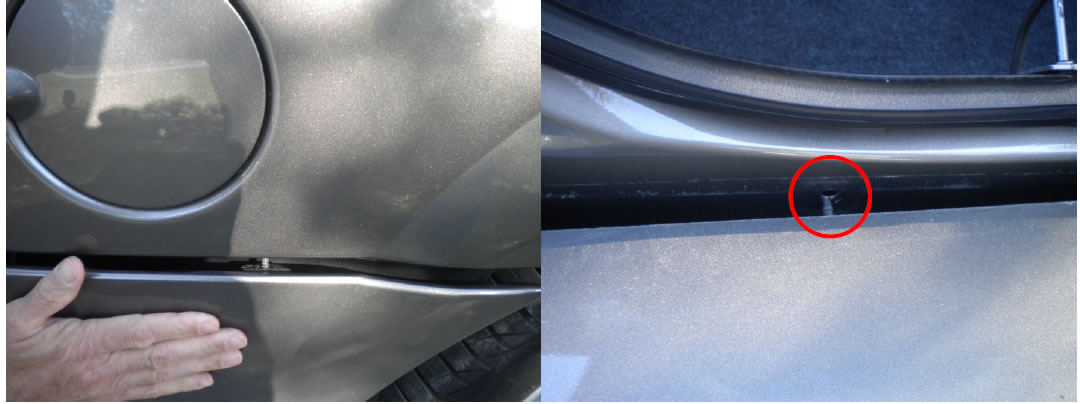
5. Using an offset Phillips screwdriver, remove the (4) screws (2 on each side) holding the rear bumper to fender-well.

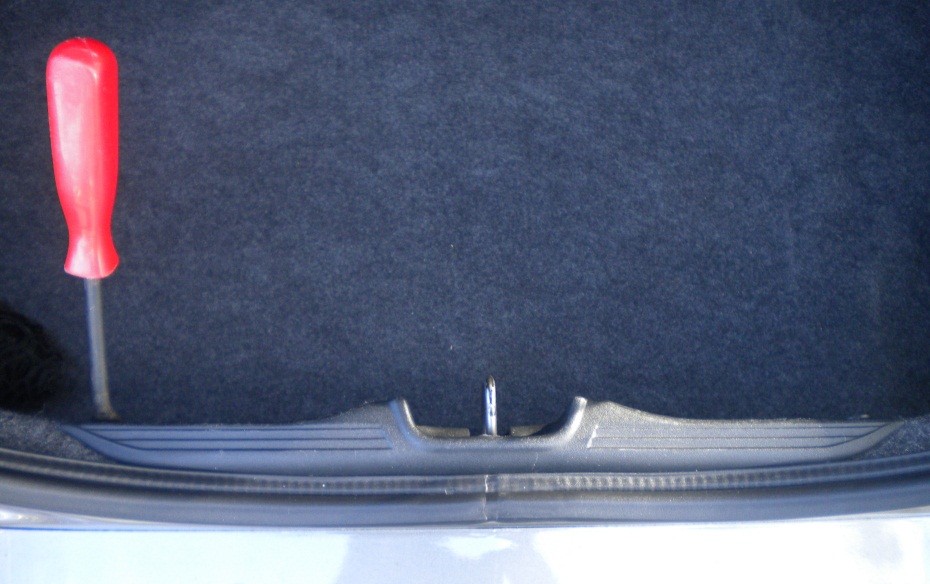
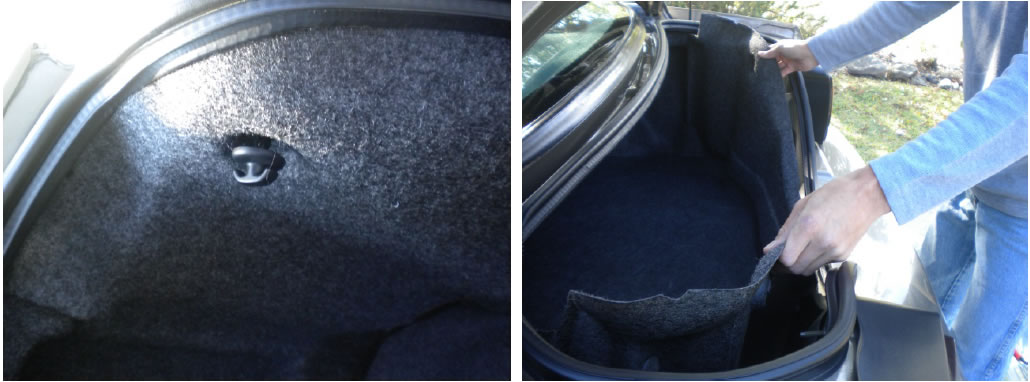
6. Moving to the trunk, start by removing the (4) plastic fasteners from the trunk latch trim cover using fastener removal tool. Remove trunk latch trim cover.
7. Remove (2) grocery net hooks located on either side of the trunk by unscrewing them by hand.
8. Remove the back truck lining from the vehicle.
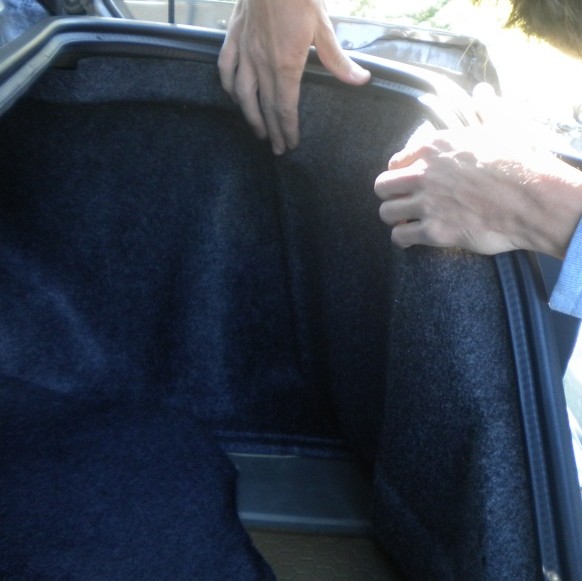
9. Unsecure left and right side trunk trim panels. These do not need to come out; however, they will need to be unsecured so the nuts behind them will be accessible.
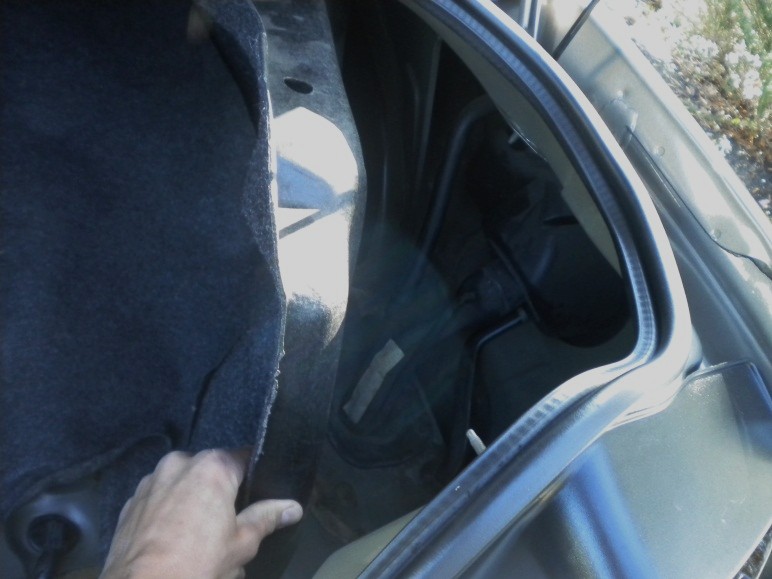
10. Using a 7/16” inch deep-well socket and ratchet extension (and 7/16” wrench when necessary), remove the (7) nuts securing the rear bumper to the car by starting on one side and working your way to the opposite side (pictures below show working from the passenger side of the car to the driver side).

11. After all the nuts are removed, start by working the center of the bumper up and down to loosen the bumper on the car. Then on each side, work the sides of the bumper down to get the studs out of the holes. This might take a little coaxing. Once each side is freed, the bumper can then be pulled straight off. (An extra set off hands is useful in this step).

bumper:
1. An extra set of hands is useful in this step as well. With one person on each side, starting by lining up the studs on the sides of the bumper with their respective holes, using an upward motion get them in there. Then, work your way around the bumper, ensuring all studs are matched up with the correct holes.
2. Beginning on one side of the bumper, start hand-tightening nuts onto the (7) studs. Once all nuts are hand-tightened, go back and snug all nuts using 7/16” socket or wrench.
3. Reposition right and left side trunk panels.
4. Reinstall the rear trunk lining and screw on the (2) plastic grocery hooks to secure the rear trunk lining by hand.
5. Reinstall the trunk latch trim cover and press the (4) plastic fasteners into their respective places.
6. Press the (5) plastic fasteners into the underside of the vehicle that secure the rear bumper to the sub-frame.
7. Reinstall the fuel overflow plastic fitting by pushing it straight up into its feed tube.
8. Reinstall the (4) screws (2 on each side) holding the rear bumper to the fender-well using offset Phillips screwdriver.
9. Reconnect negative battery cable using the 5/16” socket.
Installation Instructions written by AmericanMuscle customer John Collmann 11.2.11
Related Guides
-
Installation
-
Installation
-
Installation
