 FREE 1 to 3-Day Delivery on Orders $149+ Details
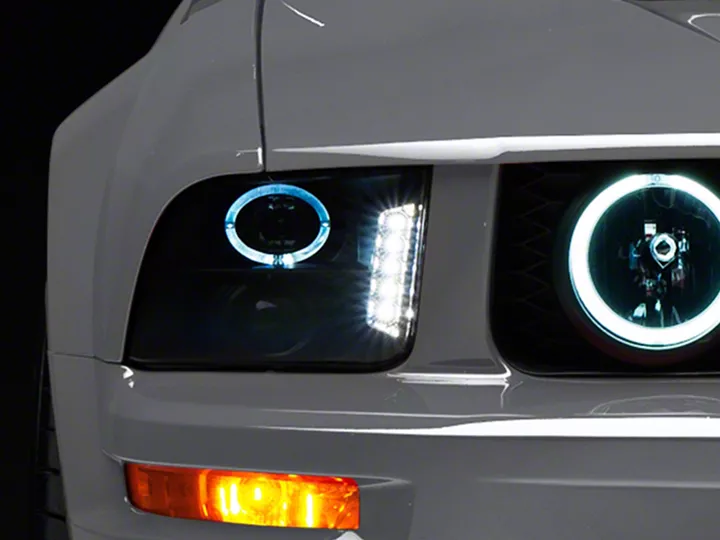
2005-2009 Mustang Projector Headlight Wire - Installation Instructions
Shop Parts in this Guide
Installation
1. After sealing your headlights with clear RTC sealant to further help water from getting into the lens, you will want to do the following to properly wire your halo to the parking lights:
2. Using a volt meter, start by determining which wire coming from your factory wire harness that plugs into the headlight’s pigtail is your positive parking light. This can be done by turning on just the parking lights with the headlights uninstalled and using the volt meter to probe each wire until you see a result around 14 volts. The NEGATIVE probe for your volt meter should be directly touching your NEGATIVE battery terminal while your positive probe is stuck into the insulation casing around your wire. Label that wire “hot” or “positive” for later use.
3. Next we need to determine your headlight/parking light ground wire. Leaving your volt meter connection on the NEGITIVE battery terminal, with the parking lights still on, probe the other wires until you find one with 0.00 or 0.XX volts this will be your ground wire. Again label that “ground”, repeat for each side.
4. At this point you are done testing and should disconnect your battery for safety. From this point forward you will be working with exposed wire.
5. Now we will check the wires on the back of the headlight housing to ensure they are ready for connecting to the power and ground sources. Start with the single Red and Black wires that will be separate from the plug in connector. These are your power and ground wires for the Halo and parking light. They will be connected separately so they function independently of the headlight blub. Be sure that the ends are clean and stripped between ¼ and ½ of an inch from the wire casing. This will insure a good connection and maximum brightness.
6. You will see two positive wires spliced into one, if not please splice the parking light wire into the halo light wire/LED wire to create one positive connection before proceeding to the next step.
7. Once you have established your positive and negative connections, you will want to use the supplied (or ones from any from a local parts store) quick splice connectors to tap into our headlights power and ground sources. Starting with the power wire simply take the splice connector and close it around your factory wire harness casing and all. Do not remove any wire casing from around the wire as this may cause an electrical short due to excess exposed wire. The splice connectors will cut through the casing and your wire to create a connection point for your halo’s to get power. Repeat the same steps for your ground wire, then again repeat for the other light.
8. Next we will take our new light housings and place the exposed and clean twisted wire ends into the splice connectors open side and close this around the wire end. Tug moderately on the connection to be sure that it does not pull out, if so use a new section of wire and try again. Do the same for your ground wires and repeat for the other side. Once completed, you should have just one large clip on each light that attaches directly to the factory wire harness. Plug them both in, reconnect the battery, and before reattaching the lights and bumper (if you choose to remove that) test the lights to be sure everything illuminates. Run a check as follows:
9. Turn car to “ON” position
10. Remember you should see the no light at all with the lights turned off.
11. Try each turn signal and then flashers. Your blinkers should still flash independent of everything else.
12. Turn on the parking lights, you should see your side bulbs (parking lights) and the Halo ring. Please remember this is a single LED bulb that is very visible at dusk and at night but will be washed out by sunlight and headlights. It is best to test this in a shaded area or shield the light as if looking into a tunnel if testing is done in a well lit area. Try your blinkers with the parking lights and halo’s on. The Halo should remain solid while the blinker is active.
13. Next turn on your headlights and check that all bulbs are working and that the high low beam function is operational.
14. If all lights are operational you are set to finish the install of your lights and any body panels you removed before your first test drive! Please check that the lights are adjusted properly and if needed, make any adjustments to height with the silver set screw located at the bottom right of each light housings engine compartment side.
15. *If at any point you find one or more lights not working start by checking each place where a wire is spliced together. With your lights all turned on use your volt meter to test for power just like in the steps above on to check for where power is getting disrupted.
Troubleshooting:
My Halo Bulb will not light up at any time. What do I do?
After checking for loose connections take your volt meter and probe with the lights on starting closest to the factory harness check the power wire for voltage. You are looking for around 14 volts, keep moving closer to the light housing section bisection until you see a 0.XX volt reading. If so your loss of power is within that section of wire and it should be checked for breaks, cuts, or bad connecting ends. If there is power from end to end and all grounds are connected securely, then a new LED bulb may be needed.
My Halo only lights up when my headlights are on. What is wrong?
Check your connection at the quick splice in connectors you installed. Your problem will stem from having your Halo power supply coming from your headlights and not parking lights. Use your volt meter to re-determine which wire is “hot” or has power by turning on just the parking lights and retest. Once you find the proper wire simply re-splice into that using a quick slice connector.
Related Guides
-
Installation
-
Installation
-
Installation

