 FREE 1 to 3-Day Delivery on Orders $149+ Details
Redline Tuning Quicklift Mustang Hood Struts ('79-'98) - Installation Instructions
Installation Time
60 minutes
Tools Required
- Power Drill
- 5/32", 3/16" and #11 Drill Bits (3/16" can be substituted for #11 if #11 Index bit is not available)
- 5/16" Socket and Socket Wrench
- Fine Permanent Marker or Felt Tip Pen
- Masking Tape and Tape Measure
- Hammer and Center Punch
- Rivet Gun, Capable of 3/16" Rivets (Most brands can handle this size) - Only use rivets supplied in QuickLIFT system

Shop Parts in this Guide
Installation
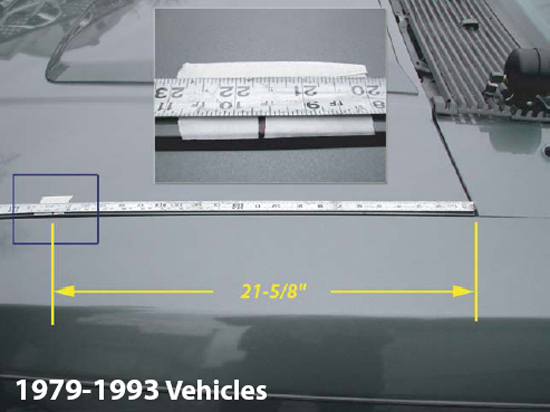
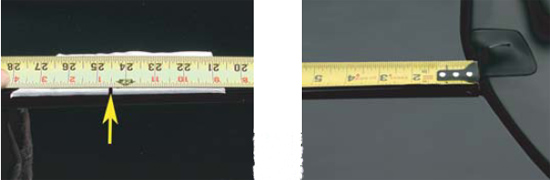
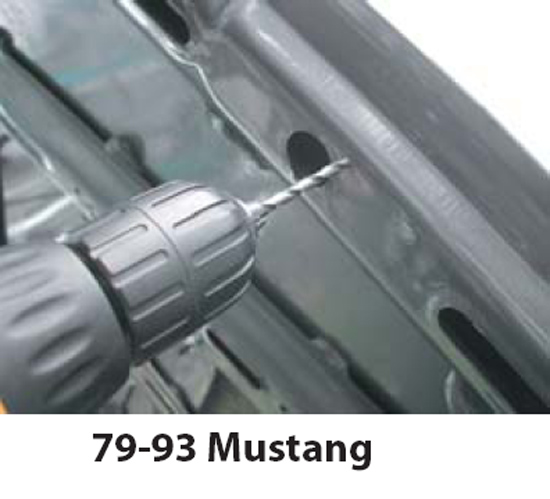
1. FOR 1979-1993 VEHICLES:Place a 3" piece of masking tape on the edge of the hood as shown below. Run the tape along the edge of the hood centering around 21" from the hinged corner of the hood. Place a mark at exactly 21-5/8" on the masking tape from the hinge corner of the hood as shown. Mark both sides the same way and verify your measurement. NOTE: If you have an aftermarket hood, place a mark at 23-1/2" - this will slightly lower the raised height and allow the hood to open fully without interference.
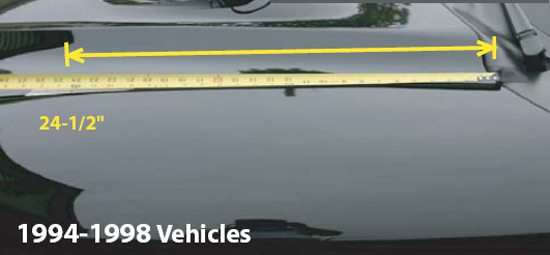
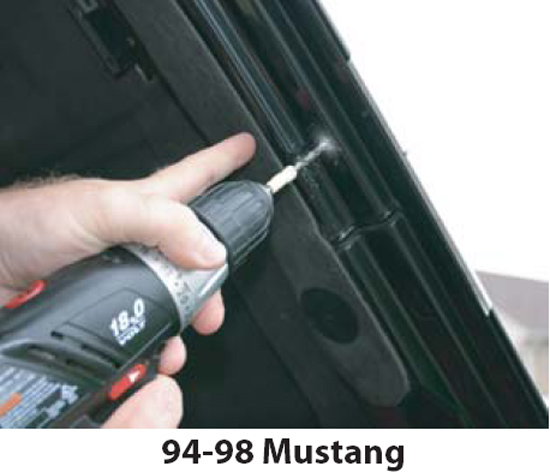
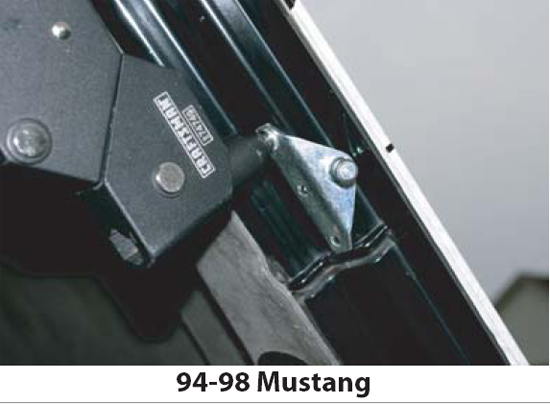
2. FOR 1994-1998 VEHICLES:Place a 3" piece of masking tape on the edge of the hood as shown below. Run the tape along the edge of the hood centering around 24-1/2" from the hinged corner of the hood. Place a mark at exactly 24-1/2" on the masking tape from the hinge corner of the hood as shown. Mark both sides the same way and verify your measurement.
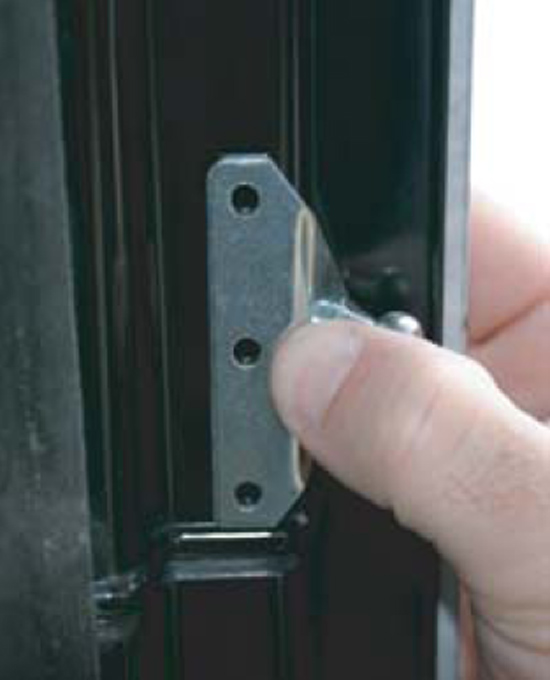
3. Hold hood bracket such that the ball stud faces out and away from the vehicle and bracket is tucked up over the hood frame as shown to the right.
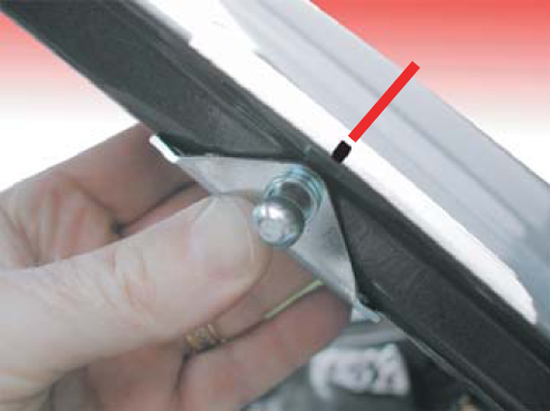
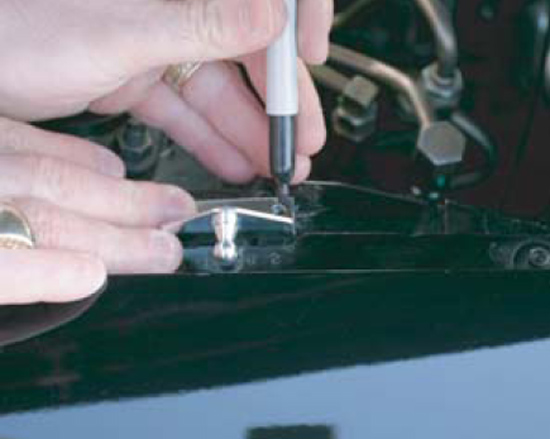
4. Using a marker, place a dot at the center of the upper hole once the centerline of the ball stud is lined up with your mark.
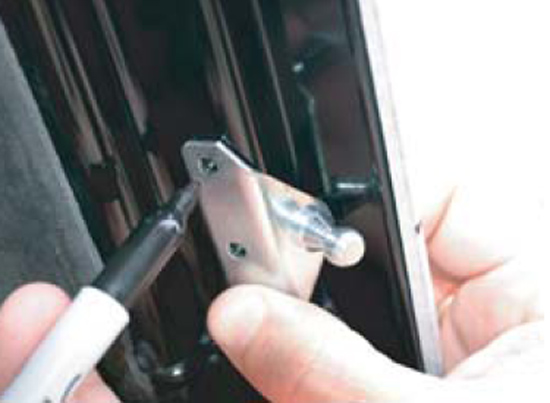
5. Using a center punch and a hammer, tap the center of the dot you just made (this indention will help guide the drill bit and keep it from wandering. Place bracket back in place to be sure it is still centered where it should be before moving to Step5.
6. Carefully drill the upper bracket hole as shown to the right using a (#11 indexed bit) or (use 3/16" bit if #11 bit is not available).
7. If you do not have a #11 indexed bit, you can use the 3/16" bit, however you may have to test fit the rivet and slightly ream hole until rivet fits tightly through bracket and hole - 3/16" is slightly smaller than the #11 bit. Do not use any other drill bit sizes! *** Place a piece of tape around the drill bit 1/4" past the tip! This will help prevent the drill bit from passing through and denting the hood skin!***
8. Hold the bracket in position.
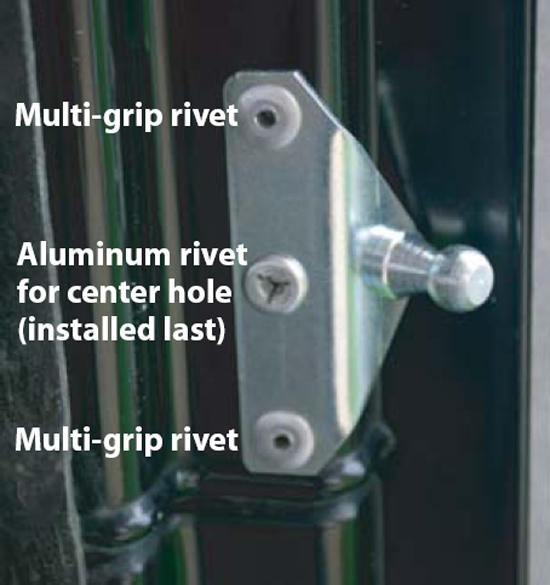
9. With the bracket lined up again, place the multi-grip rivet through the bracket and hole with the long stem sticking outward. The rivet may require a few twists while pushing it in.


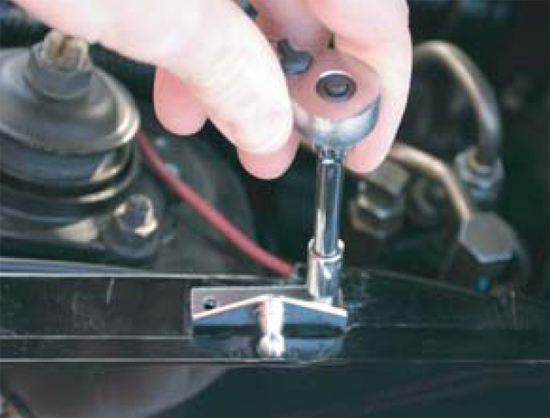
10. Check to be sure your rivet gun has the 3/16" rivet head installed, then slide rivet gun onto rivet. While applying force to the rivet and bracket, firmly squeeze riveter handle multiple times until rivet gun pops and snaps off the rivet stem. Be careful when rivet stem snaps off.

11. Reposition and align bracket into the proper position against hood lip.
12. With the bracket snugged up against the hood frame, use the center punch to tap the center of the lower hole. Then, carefully drill the hole through bracket hole and hood frame. Rivet lower hole using 2nd of four multi-grip rivets (steel shaft, not aluminum).
13. Carefully drill center hole between - be careful not to drill through hood. Then rivet the Aluminum rivet (longer rivet, 2 included) into this hole. This rivet helps stabilize the bracket and should be installed last. This rivet will not fit all the way in the hole - just keep pressure on the riveter and start riveting. As you rivet, the base will sit tightly against the bracket and it will install properly.
14. The Mustang hood has a symmetrical hood frame. Repeat Steps 1-13 to install the upper passenger side hood bracket. Take your time and verify the measurements using the bracket you just installed.
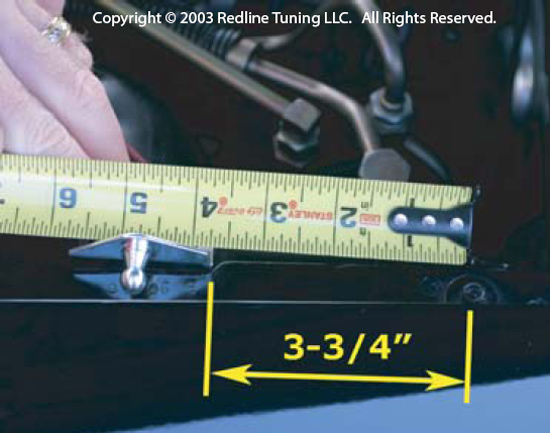
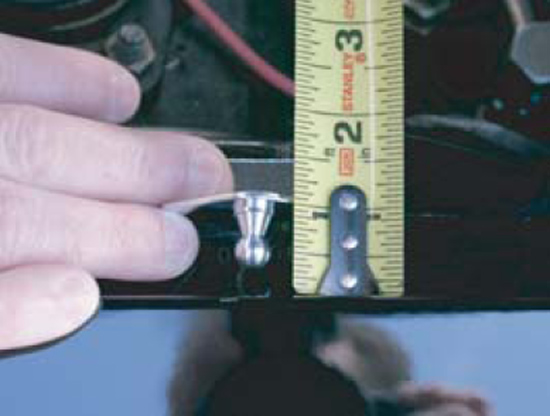
15. Hold the bracket in position as shown to the right. The ball stud should be pointing away from the vehicle and approximately 3-3/4" from the centerline of the fender bolt shown to the edge of the ball-stud bracket. Also verify that the bracket is 1"from the fender to edge of the bracket. Right front corner of bracket should rest at or near angled fender lip.
16. Verify measurements and then mark right hole using a fine permanent marker.
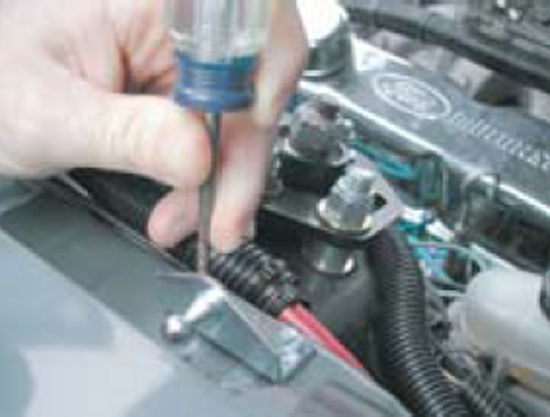
17. Using a center punch and a hammer, tap the center of the marked hole. This will help guide the drill bit and keep it from wandering.
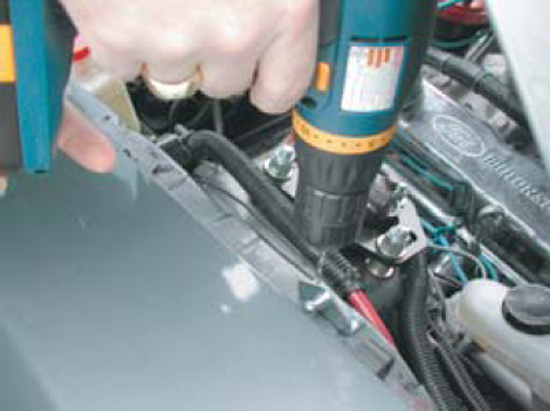
18. Drill the right hole at the marked position using a 5/32" drill bit. Do not ream or over drill the hole.
19. Using a color matching paint, touch up the area where you just drilled the hole.
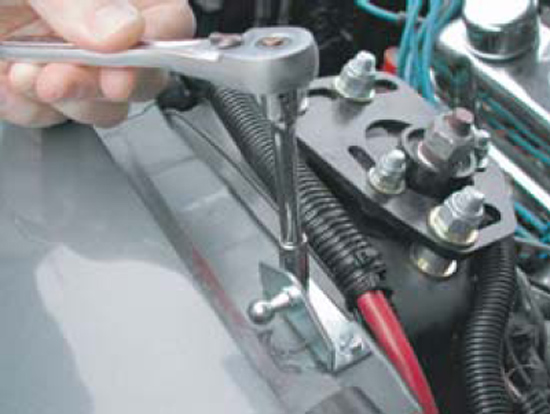
20. Using a 5/16" socket and wrench, screw the right screw into the fender using the supplied sheet metal screw. Apply adequate pressure while screwing the sheet metal screw in - you will be creating threads in the fender and it will require force.
21. Using a permanent marker, mark the left hole of the fender bracket. Be sure the bracket is parallel to the fender. Twist to align if necessary.
22. Using a center punch and hammer, tap the center of the marked hole. This will help guide the drill bit and keep it from wandering.
23. Drill the second hole through the bracket hole using a 5/32" drill bit.
24. Attach the bracket using the same 5/16" socket and wrench.
25. Repeat Steps 14-24 to attach the passenger side fender bracket. The vehicle is symmetrical so the same locators can be used. Feel free to measure off of key areas to ensure a symmetrical installation.
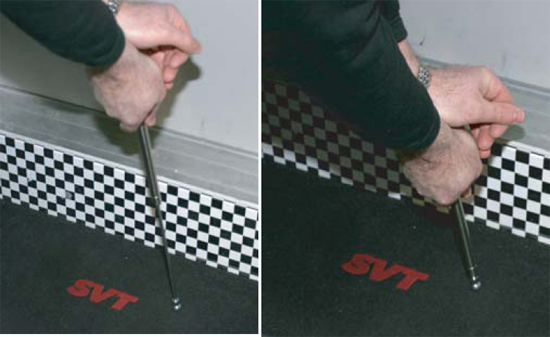
26. CYCLE EACH GAS SPRING BEFORE INSTALLING - firmly hold a gas spring with both hands by the thick cylindrical end - firmly press down on the floor or carpet and compress the spring. Do this to both gas springs a few times to lubricate the shaft before installing them.
27. Have a friend hold the hood up. Remove the stock prop rod assembly
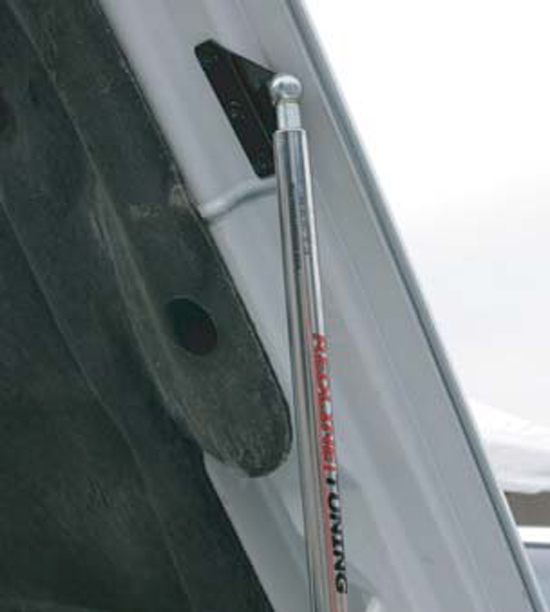
28. Install the driver's side gas-spring with the cylinder at the top (large end up and connected to the hood ball stud). Be sure that the gas spring sockets snap securely onto the ball studs. Continue holding the hood until Step 18 is completed. This procedure is most easily completed if the upper ends are snapped onto the ball-studs first and attach the lower ends last. Do one at a time.
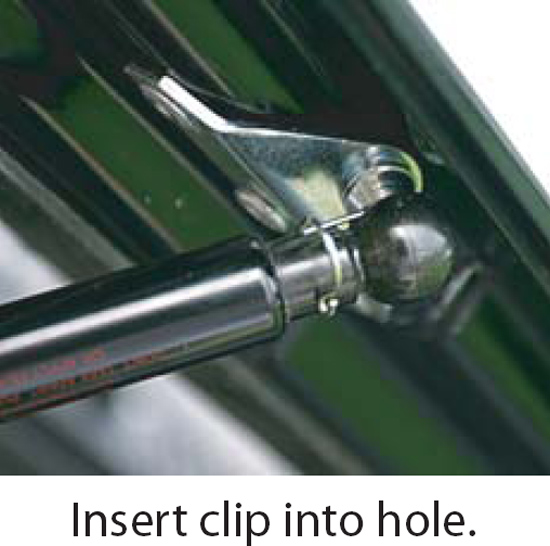
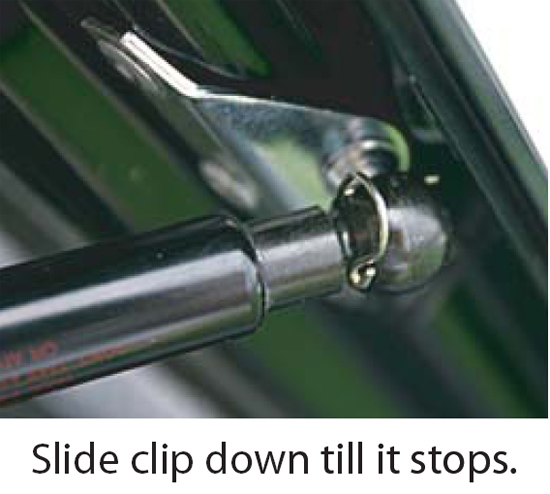
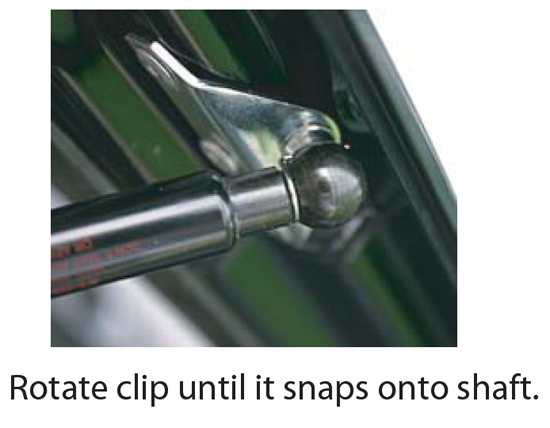
29. Insert the gas-spring locking clips as shown below. You will find it easier if you first install the hood end of the gas springs, including locking clips, and then move to the lower fender ends last.
Installation instructions provided by Redline Tuning

