 FREE 1 to 3-Day Delivery on Orders $119+ Details
How to install a Steeda Chromoly Steel Lower Control Arms on your 2005-2012 Mustang
Installation
1. Follow all safety rules and use caution whenever working on any vehicle. It is best to consult a shop manual for your vehicle before beginning this project. Failure to do the job correctly could result in serious injury. Read all of the instructions before you start. Have the job done by an experienced technician if you are not sure you can complete it correctly.
2. Raise the vehicle by supporting it on a lift or stand so that the rear suspension is loaded (wheels in contact with surface). Note: Do one side at a time.
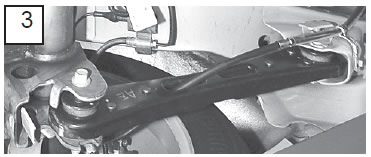
3. Remove the stock rear control arm bolts. Next remove the rear brake cable that is routed through the arm itself.
4. Inspect the new Steeda control arms. The bushings and center sleeves should be in place. If anything looks out of place please call your Steeda distributor before proceeding.
5. Grease the outside edges of the bushings with the supplied grease. Do not skip this step or the bushings may squeak!
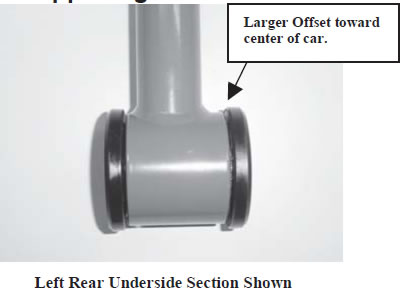
6. Install the control arms with the thicker shoulder at the axle end. Then the larger offset of the axle end shoulder point towards the center of the car. Also the supplied washers are used on the front Mounts facing towards the outside of the vehicle.
7. Lighten the front and rear control arm bolts and torque to factory specs. (129 ftlbs)
8. Repeat steps 2 through 9 on the passenger side trailing arm.
9. Use the supplied zip ties to secure the parking brake cable away from the tires.
10. Re-check all bolts and make sure everything is secured properly.
Take a short test drive and re-inspect the installation.

