 FREE 1 to 3-Day Delivery on Orders $149+ Details
How to Install Tokico Adjustable Struts and Shocks for 2005-2010 Mustang
Installation Time
2 hours
Tools Required
- Floor Jack
- Jack Stands
- Spring Compressor (available from most local auto parts stores)
- An impact wrench (optional)
- Torque wrench
- 22mm open end wrench
- 19mm open end wrench
- 18mm socket
- 18mm open end wrench
- 18mm deep well socket
- 17mm open end wrench
- 15mm open end wrench
- 13mm deep well socket
- 10mm socket
- 10mm open end wrench
- 8mm open end wrench
- 7mm open end wrench
- 1/4, 3/8, and/or 1/2 inch drive ratchets (depending on the drive size of your sockets)
Installation
Time Required:1.5 Hrs (rear) and 2.0 Hrs (front)
Installation: (Front first)
- Start by either getting the car in the air on a 4 point lift or jack up the front and rear and rest the car firmly on the jack stands. Remember, safety is paramount.
- Remove the lug nuts and then the wheels.
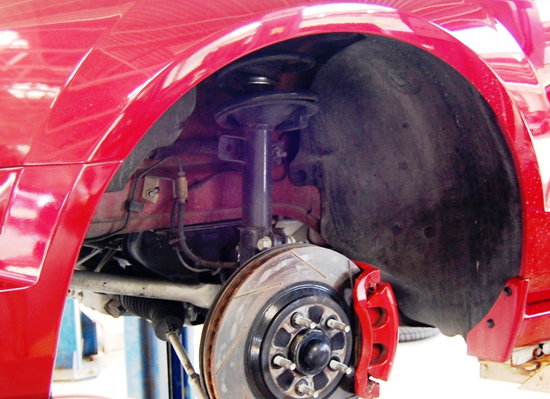
3. With the car safely supported, work can begin in the front with removal. Start by using the 10mm socket to remove the small bolt holding the brake line and ABS bracket to the strut.
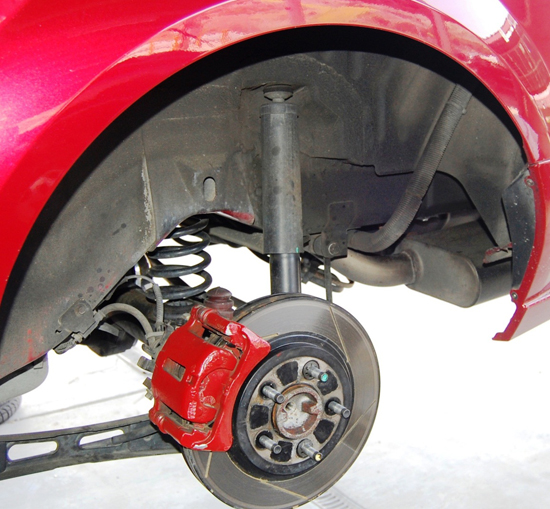
4. Next, use an 18mm deep well socket and a large ratchet or breaker bar to break loose the nut holding the front sway bar end link ball joint to the strut. Then use an 18mm open end wrench and an 8mm open end wrench to remove the nut. It is necessary to prevent the bolt from spinning with the 8mm wrench while loosening the nut with the 18mm wrench. Alternatively, this is where an impact wrench could come in handy.
5. With the sway bar end link and brake line bracket disconnected and out of the way, use an 18mm deep well socket and a large ratchet or breaker bar to break loose the large bolts that hold the steering knuckle/brake assembly to the strut. (Again, an impact wrench speeds things up here.) When the bolts are removed, be prepared to support the weight of the assembly so it does not strain the brake line. It is necessary to keep it supported until it is bolted back up to the strut, so place a jack (or even bricks, wood, etc.) under the lower control arm to support the weight.

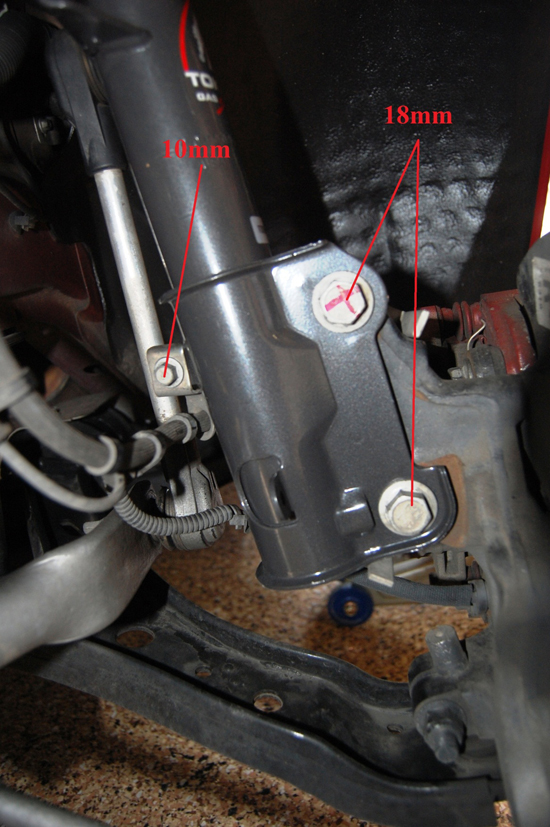
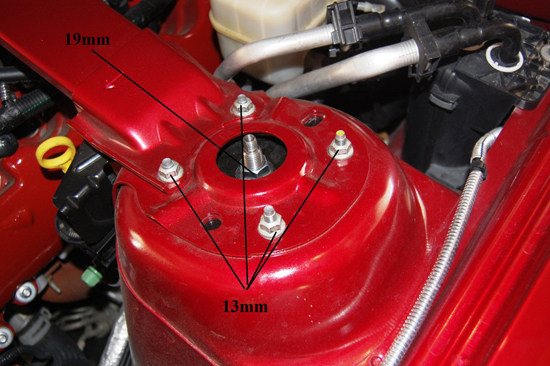
6. Now it’s time to remove the strut from the car. (A second set of hands may be helpful here to hold the strut underneath the car while the bolts are removed from the top, although it is possible to reach into the wheel well and hold the strut with one hand while removing the topside bolts with the other.) With the strut supported, use a 13mm deep well socket to remove the four bolts that hold the top of the strut into the strut tower, and then remove the strut from the car.
7. With the strut out of the car, it’s time to remove the spring from the assembly. Use a spring compressor per the tool’s instructions to compress the spring. It’s important to compress as many coils of the spring as possible, so grab onto the uppermost and lowermost coils the jaws of the tool will fit around.
8. With all the pressure relieved from the upper strut bearing, use a 22mm open end wrench and a 10mm open end wrench to remove the nut holding the top of the bearing down onto the strut.
9. Remove the upper bearing, lift off the spring, and slide the dust cover and bump stop off the piston rod.
10. Installation is the opposite of removal. Slide the bump stop and dust cover back onto the piston rod of the new Tokico strut, then drop the spring onto the new strut and top it with the upper bearing.
11. Finger tighten the new nut (provided with the kit). Then torque the nut down to 38-49 ft/lbs using a 19mm open end wrench.DO NOTuse an impact wrench to tighten this nut, as it is possible to break the top of the piston rod.
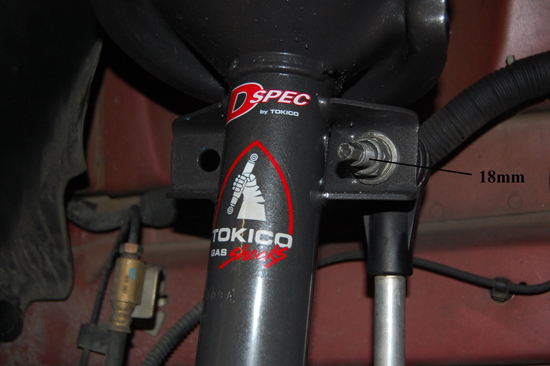
12. With the strut reassembled, position it back in the shock tower (more hands may be helpful here) and tighten the four topside nuts to 26 ft/lbs using a 13mm deep well socket.
13. Raise the steering/braking assembly back into position and insert the 2 large bolts. Torque these to 148 ft/lbs.
14. Reconnect the sway bar end link and tighten the nut to 85 ft/lbs with an 18mm open end wrench and an 8mm open end wrench.
15. Reattach the brake line bracket to the new strut with a 10mm socket.
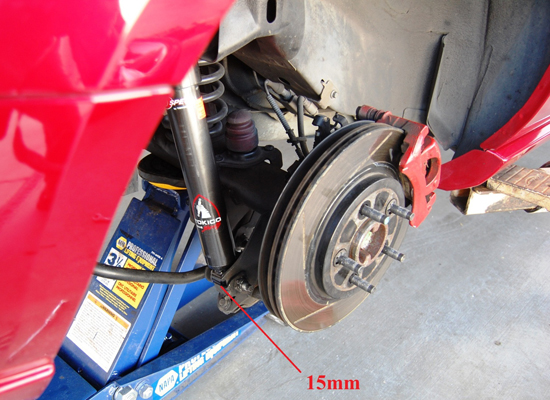
16. The rear suspension is a little easier. Support the axle tube with a floor jack. Start by removing the lower shock mounting bolt using a 15mm open end wrench
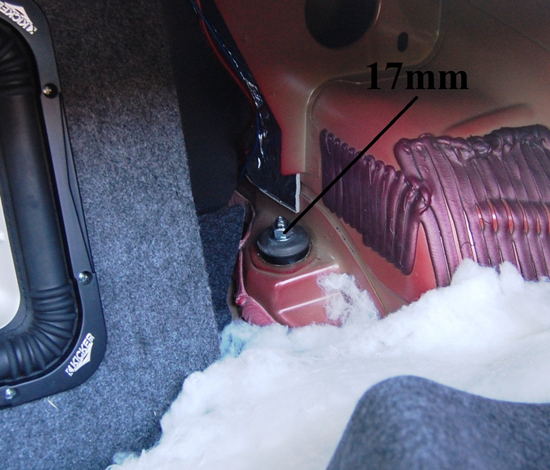
17. Move inside the trunk and locate the upper shock mounting bolt by pulling back the trunk lining. Use a 17mm open end wrench and a 7mm open end wrench to remove the upper mounting nut
18. The shock is now fully disconnected. Lower the axle tube and simply pull the shock down and out of the car.
19. Install the new shock by reinserting the lower bolt into the shock (tightening to 85 ft/lbs using a 15mm open end wrench) and aiming the top bolt of the shock up through the hole in the chassis.
20. Now, using the floor jack, jack the axle tube up into position thereby forcing the rubber upper shock insulator into the hole in the chassis.
21. Go back inside the trunk and place the rubber bushing and top washer over the new shock bolt protruding into the trunk, and then finger tighten the new nut (provided).
22. Using a 7mm open end wrench and a 17mm open end wrench, tighten the new nut to 25-32 ft/lbs.
23. Reinstall the trunk lining.
24. Check all connections, make sure all bolts/nuts are tightened properly, and remount the wheels.
25. Lower the car, and run the steering wheel through a couple full lock to lock rotations to check for abnormal noises. Re-check security of all fittings if anything does not sound rock solid.
26. Take it for a test drive and have fun messing with the wide range of adjustments on the Tokico D-Spec Shocks and Struts!
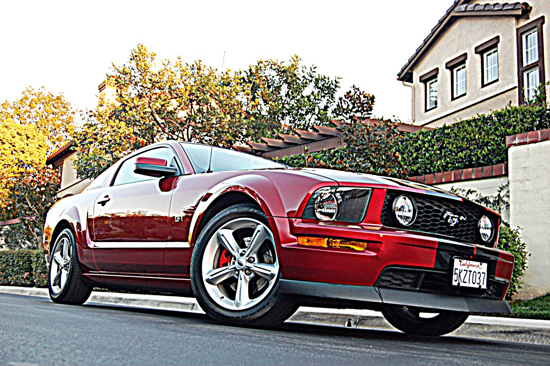
All work done on a 2005 Mustang GT coupe.
Related Guides
-
Installation
-
Installation
-
Installation

