 FREE 1 to 3-Day Delivery on Orders $149+ Details
How to Install a ZEX Remote Bottle Valve Opener on Your 1979-2012 Mustang

Shop Parts in this Guide
Installation
Installation Instructions
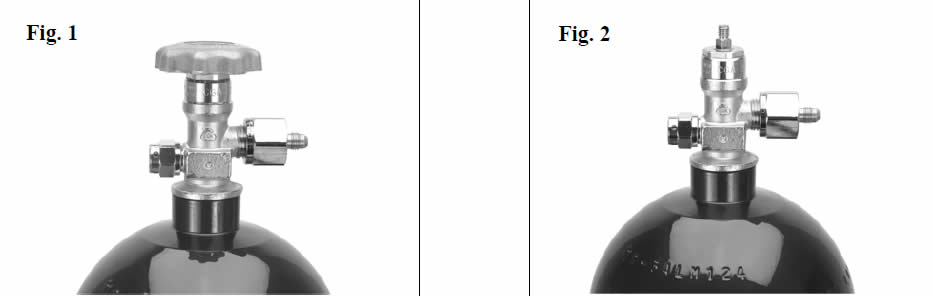
1. Remove bottle from the vehicle (Fig. 1).
2. Using a socket, remove the nut holding the hand wheel to the top of the nitrous bottle valve (Fig. 2).
3. Remove the hand wheel and place it in your glove box or toolbox. While the drive gear that is used in place of the hand-wheel is normally sufficient for manually opening and closing the valve, you may want to use the hand wheel when you take the bottle in for refills.
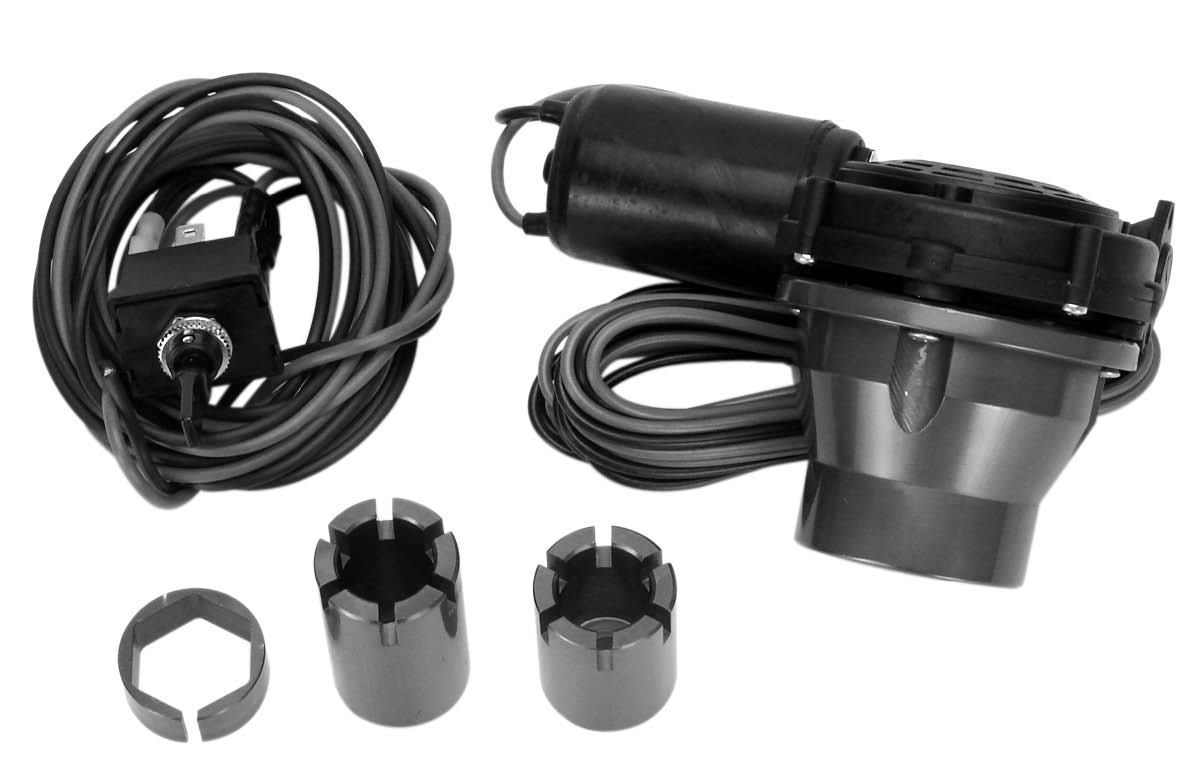
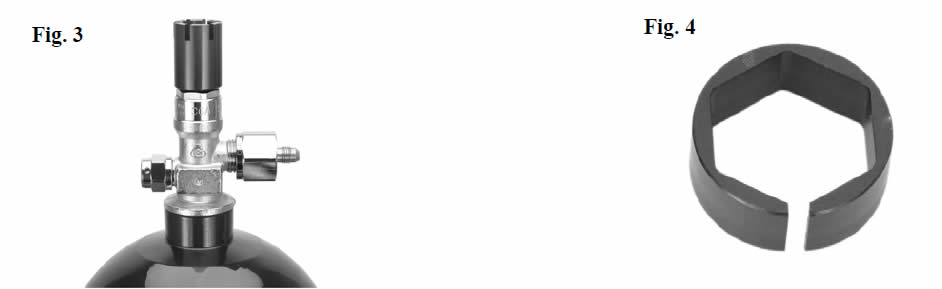
4. Two different drive gears are included with the kit, install the gear over the square brass stem that properly fits the bottle valve you have (Fig. 3). Some valves may also require the use of the included hex collar for proper fitment (Fig. 4). Reinstall and tighten the nut onto the stem.
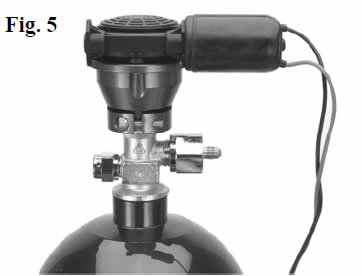
5. Slip the opener over the bottle valve and drive gear, making sure the drive gear properly meshes with the motor gear and the unit is aligned straight on the valve (Fig. 5).
6. Tighten the opener’s main clamping screw to securely lock the opener in place.
7. The ZEX™ Remote Bottle Valve Opener motor and switch assembly come pre-wired for easy installation. First, connect the RED wire from the toggle switch harness to 12volts; preferably at the battery positive terminal. Then, connect the BLACK wire from the switch harness to a good chassis ground.
8. Take the RED wire from the opener and connect it to POST #5 on the toggle switch. Take the BLACK wire from the opener and connect it to POST #2 on the toggle switch.
9. Once all the wiring connections have been made, find a suitable location for the opener switch. Ensure that it is within easy reach while seated in the driver’s seat. Drill a 15/32 in. hole and tighten the switch into place.
10. Reinstall your nitrous bottle in the vehicle and reconnect the nitrous feed line. By toggling the control switch, you can open or close the bottle valve. To open the nitrous bottle valve, hold the switch open for at least 2 seconds, likewise, if you want to close the nitrous bottle valve, hold the control switch in the opposite position for at least 2 seconds. Once the valve opens or closes all the way, the motor will still turn as long as you hold the switch down, but a clutch that’s attached to the motor will slip when these endpoints are reached.
11. Carefully check the operation of the opener to ensure that the bottle valve is opening and closing properly in both directions.
12. Read the Additional Installation and Maintenance Information section at the end of these instructions.
Additional Installation and Maintenance Information
1. The bottle opener motor assembly is equipped with an adjustable clutch mechanism that has been factory pre-set for correct operation. With normal use, over a period of time, some adjustment may be needed. If the nitrous bottle valve starts to “stick”, either open or closed, it often means there is too much force being applied by the clutch mechanism since the grease used for lubrication spreads out and friction increases.
2. To adjust the opener motor’s clutch, start by removing the motor assembly from the aluminum housing. Remove the four screws that hold the plastic motor housing together. Remove the vented cover and observe the clutch mechanism with the lock-nut in the center (Fig. 6). Using a Phillips screwdriver to hold the clutch mechanism screw from turning, loosen the lock-nut counter-clockwise ½ turn and then reassemble; check for proper operation. While normally an opener needs to be loosened up for it to return to proper operation, you may in your circumstance need to tighten it instead. Either way, repeat the loosening or tightening procedure until normal opener operation returns.

Related Guides
-
Installation
-
Installation
-
Installation

