 FREE 1 to 3-Day Delivery on Orders $119+ Details
Best Sellers


Mustang Convertible Styling Bar - Charcoal ('05-'09) - Installation Instructions
Installation Time
45 minutes
Tools Required
- Portable Drill
- 1/8 Drill Bit
- 11/4 Hole Saw
- Ratchet with 10mm socket or 10mm wrench
- Spare Hacksaw Blade or Utility Knife
- Die Grinder or Dremmel Tool (recommended)
- Center Punch
- Flashlight
Installation
1. The trim panels are attached with retaining clips from the underside. Lift up on the panel from the seatbelt opening to remove.
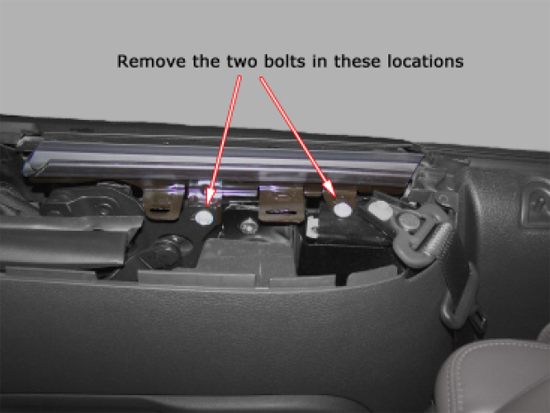
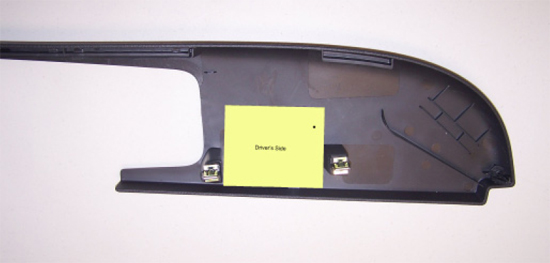
2. Using a 10mm socket or wrench, remove the 2 bolts holding the rail in place. See the diagram for locations. Be very careful not to drop the bolts down into the side body of car.
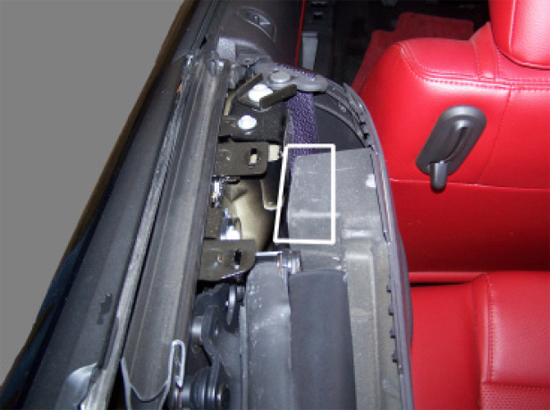
3. Using a spare hacksaw blade or a utility knife, trim the side stabilizer foam. You will only need to remove a 2” wide section from the corner of the foam to allow clearance for the mounting bracket. Use Caution When Cutting This Foam. Do Not Damage The Speaker or Wiring Below the Bracket.
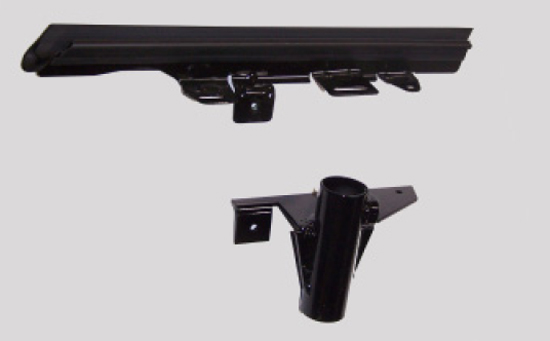
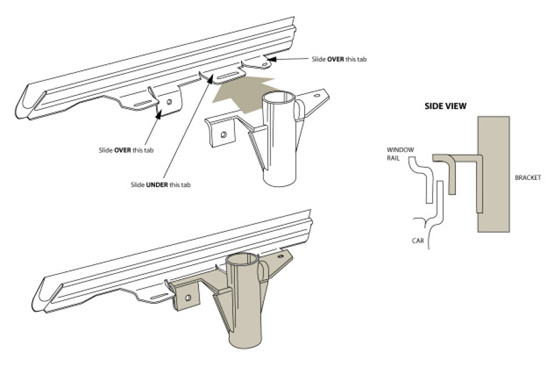
4. Place together the bracket and the window trim rail using the diagram below, lining up the bolt holes in the mounting bracket with the holes on the window rail, and set it in place in the car. Make sure to start the bolts by hand. Start with the bolts to the rear of the car first. This will make starting the bolt easier. Then start the bolt at the front. Once both bolts have been started by hand, use the 10mmsocket or wrench to tighten them up. Do not over tighten the bolts or you may strip the threads. Repeat on the opposite side of car.
5. Using the included templates, mark the location for the center drill on the under side of each trim panel using a center punch. You can also use a fine tip marker for this.
6. Drill out the center hole using the 1/8" drill bit
7. Use the 1 ¼" hole saw to enlarge the hole.
8. Due to slight variations on the location of the mounting bracket, trim panels, and other interior alignment, we suggest using a utility knife, die grinder, or a Dremmel tool to enlarge the opening of the hole. This can be done while the panel is on the car. This will ensure that the hole will not show after the bar is installed.
9. Once the 1" hole is drilled, place the trim panels back on the car. Look through the hole at the mounting bracket, and using a marker or chalk, mark the areas that need trimming. The hole only needs to be the size of the inside diameter of the tube on the mounting bracket.
10. After the trimming is done, install the trim panels back onto the car securely.
11. You may need a friend to help set the bar in place. It must be lined up with the mounting brackets, and slide down evenly.
12. Once the bar is in place, use the supplied ¼” Allen wrench to secure the bar. Insert the Allen wrench in the slot of the seatbelt opening. You may need a flashlight to see the set screw on the mounting bracket.
13. Hold the bar down to get the best possible look at the area where it meets the trim panel. Do not push down on it too much, because it could distort the edge of the bar facing outward.
14. Tighten the set screws that hold the bar in place.
15. Clean up your mess, and go show off the new look of your Mustang.
Installation instructions provided by Aeroform
Best Sellers
Related Guides
-
Installation
-
Installation
-
Installation
