 FREE 1 to 3-Day Delivery on Orders $149+ Details
SLP Modular Muffler Installation Guide
Installation Time
2 hours
Tools Required
- 9/16 inch Deep Well Socket
- 15 mm Deep Well Socket
- Socket Ratchet
- Car Jack
- Jack Stands
Shop Parts in this Guide
Installation
1. Raise your car with a car jack.
2. For safety, position jack stands underneath the side of the car you are working under.
Tip: WD-40 a few Mins before you work can make a big difference. Lube up the nuts and bolts you will work on.
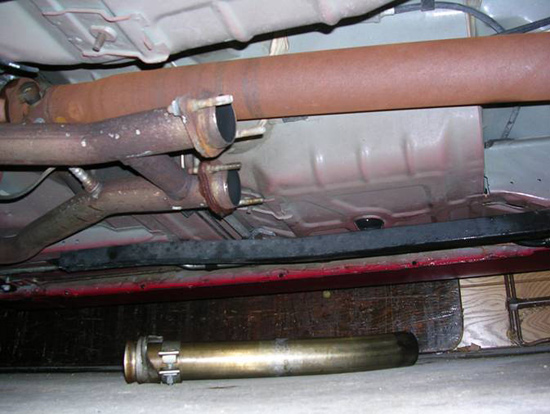
3. First, you need to remove the old muffler from your exhaust system. To do this, there are three connection points to work on: mid-pipe connected to front exhaust tube, front exhaust tube connected to muffler, and muffler connected to rear exhaust tube. A connection point is where one piece of the exhaust system fits into another.
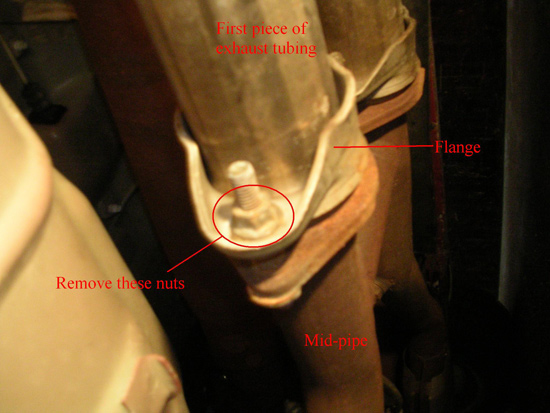
4. Using a 9/16 inch socket, remove the nuts behind the flange connecting cat-back to the mid-pipe. Although this is not necessary to change out the muffler, you will find it helpful to remove this first piece of exhaust tubing so you have room to slide the muffler out.
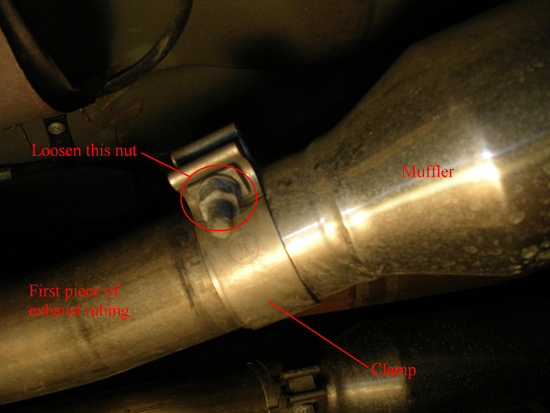
5. Now move to the other end of this first piece of exhaust tubing, where it connects to the muffler. You will notice a clamp holding the tube and muffler tightly together. Loosen this clamp with a 15 mm socket. You do not need to completely remove tent on this clamp. Just loosen it up enough so the clamp can be slid off the connection point and the tube and muffler can be separated.
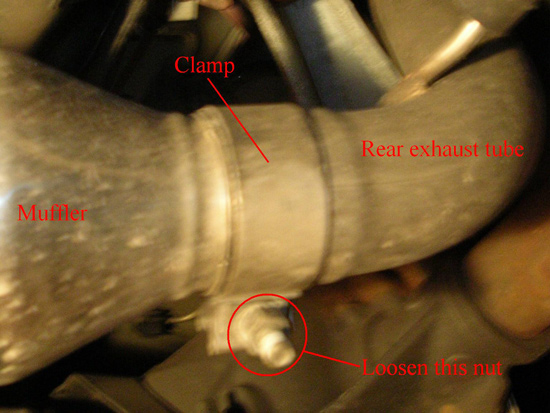
6. Similar to the above step, you need to loosen the clamp holding the muffler to the rear exhaust tube, which goes up and over the axle. Again, do not remove the nut completely form the clamp. Just get it loose enough that you are able to remove the muffler.
7. Next, remove these two pieces of the exhaust system, front tubing and muffler, by playing them around until they can be taken off.
8. After you have removed the muffler off the side you are working on, repeat steps 4 through 7 to remove the muffler on the other side of the car.
Note: Some will find it easier to lower the car back to the ground, and jack it up on the other side for more room to work underneath the car. However, if you are comfortable enough with the room you have on the lower side, it can be done.
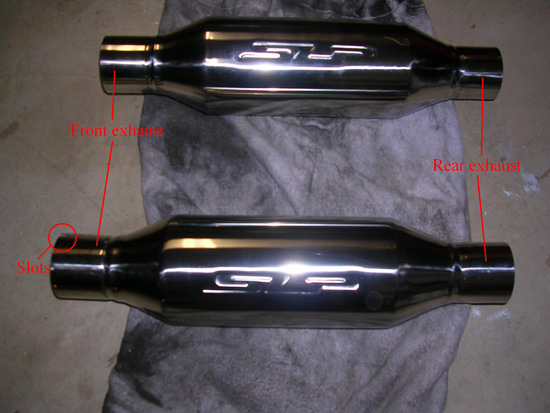
9. Once you have removed both old mufflers, it is time to put the new ones on. Start by attaching the new muffler to the rear exhaust tube that goes over the axle. You will notice that the ends of the muffler are different. One has two slots, and one does not. The end that has no slots, closer to the “P” in SLP is the end that slides into the exhaust pipe in the rear. It will take a bit of maneuvering and muscle to slide the muffler into the exhaust tubing, so be patient.
10. When you have the muffler in the back exhaust tube, slide the exhaust clamp over the connection point. Snug the nut up to a point where the muffler will not fall when you take your hand down, but is loose enough to be able to slide it in and out with a little bit of force.Once you have the exhaust back together, this will allow you to make adjustments.
11. Now, slide the front exhaust tube into the muffler end with the two slots, the “S” side in SLP. Again, it will take a little bit of muscling into place.
12. Move the exhaust clamp over the connection point, and snug up the bolt. Bring it to a tightness that will allow it to be moved, but not fall.
13. You need to attach the front exhaust tube (already attached to the muffler and the rest of the exhaust) to the mid-pipe. The front of the exhaust tube widens up to fit over the back of the mid-pipe. You will probably have to rotate the exhaust tube so the bend in the exhaust tube is close to the ground. This will make it easier to get a good fit onto the mid-pipe.
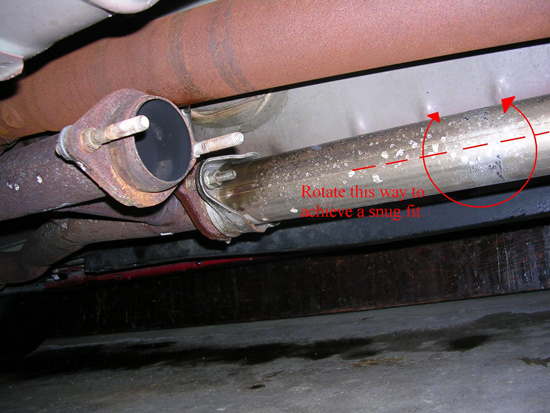
14. Once you have the exhaust tube connected to the mid-pipe, rotate the exhaust tube back so it bends out and away from the driveshaft. This will make a more snug fit, and will reduce the chances of the exhaust banging against the ground while driving.
15. Slide the flange that connects the exhaust tube to the mid-pipe in place, with the two bolts from the mid-pipe going through the holes in the flange. Attach the nuts and snug them using the 9/16 inch socket, not too tight.
16. Once you have this half of the exhaust in place, but not tight, you can make adjustments as necessary to get the best fit. Try to keep the entire exhaust parallel to the bottom of the car so it does not bottom out. When you are satisfied with your fit, tighten the clamps and nuts using the appropriate sockets.
17. Repeat steps 9 through 16 to attach the other side of the exhaust. Make sure both sides are tight to the point they will not vibrate loose while driving.
18. Remove the jack stands and lower the car back to the ground. After cleaning up your workspace and more than likely your hands, go out and enjoy the sweet new tone of your American muscle car!
Installation instructions provided by AmericanMuscle customer Andrew Starrenburg

