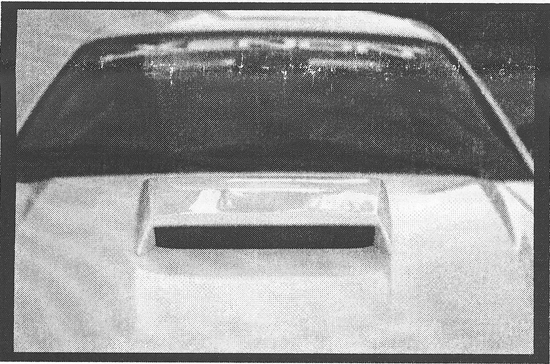
Xenon Mustang Hood Scoop ('99-'04) - Unpainted - Installation Instructions

Shop Parts in this Guide
Installation
Removal of Old Scoop & Test Fit :
1. Removal: If your 1999-2004 Mustang GT has a factory hood scoop it will need to be removed. After that, remove any residue marks that might be present on the hood from the factory scoop.
2. Test Fit the parts to verify excellent fit.
3. Note: Urethane parts might seem to slightly distorted upon test fit. If so, place them in the sun topside down (if a warm day) or in a warm area, approximately 70-80 degrees F, for 2-3 Hrs and it will return to its original shape and become more flexible.

Prepping Part for Painting :
2. Wash the paintable surfaces with a heavy duty detergent degreaser such as Castrol Purple Stuff, Palmolive liquid dish soap, red hot, and USP90 scuff gel, using a gray scuff pad until the part is dull and then rinse thoroughly.
3. Sand across item with 400 grit or finer sand paper and check for imperfections. Repair as needed.
4. Re-wash with heavy detergent degreaser and USP90 scuff gel or Palmolive liquid dish soap using gray scuff pad to remove any residue. Rinse thoroughly and wipe dry with a lint free towel.
5. Wipe item down using SC159 plastic and anti-static cleaner with lint free towel.
6. Spray item with UPO7227 plastic adhesion promoter.
7. Spray item with P30 sealer base coat then clear coat.
8. DO NOT oven back our parts above 100 degrees F. They should be well supported during any heat cycle to avoid the flexible part from warping.

Installation of the Adhesive Tape :
1. Remove 1/2" masking tape from the backside of the part.
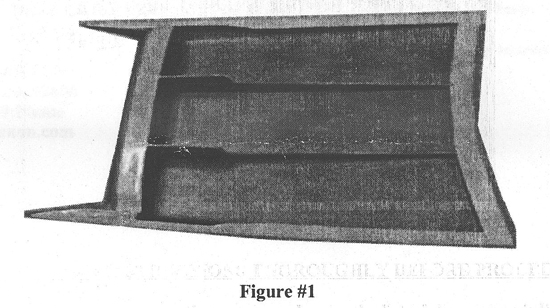
2. Looking at Figure #1 you can see that all areas where the tape is to be installed has 2 rows of 1/2" x.60 tape installed next to each other.
3. Remove any paint over spray on the tape area of the part with acetone and if needed use 3M #7447 Scotchbrite burgundy pad. After paint over spray is removed wipe tape ledge with a clean rag and acetone.
4. Clean the tape ledge on the inside of the part with MEK or acetone.
5. Rough up the tape ledge using 3M burgundy Scotchbrite pad that has been dipped in MEK or acetone and then wipe clean with the MEK or acetone.
6. Apply the provided 3M adhesion promoter, #4298, onto the part where the tape will be installed and press the tape on with the product on vehicle.
7. Allow the part to set with the tape applied for about 30 Mins - this will help the curing process, before installing the product on vehicle.
Installation of the Hood Scoop:
1. The part needs to be warm which will increase its flexibility and the ease of installation.
2. On hoods that have had the factory hood scoop installed, the location of the part from the center rear edge of the part to the rear center edge of the hood is 5 1/4". If the hood never had the factory hood scoop installed the location of the part from the center rear edge of the part to the rear center edge of the hood is 4 1/4"
3. Clean the area which the tape will contact the hood with acetone or MEK.
4. Remove the red tape backing from the inside rows of tape.
5. Pull all the ends of the outside rows of the tape red back liner outside the edge of the part so you can pull them when the part is in place.
6. Set the part in place and slowly pull the red liner from the outer rows of tape and press the part snuggly into position.
Installation instructions provided by Xenon
Related Guides
-
Installation
-
Installation
-
Installation

