 FREE 1 to 3-Day Delivery on Orders $119+ Details
How to Install DeatschWerks 340 lph In Tank Fuel Pump w/ Install Kit (99-04 All, Excluding 03-04 Cobra) on your Ford Mustang
Installation Time
3 hours
Tools Required
- A Friend
- Jack
- Jack Stands
- 2x4
- Safety Glasses
- Flat Head Screwdriver
- Ratchet w/ Extensions
- 8mm Socket
- 5mm Socket
- 10mm Socket
- 13mm Socket
- 5/16 Fuel Line Disconnect Tool (available at any parts store)
- New Fuel Filter (Part #FG1083)

Shop Parts in this Guide
Before starting make sure your tank has less than a half tank of gas inside. This is important due to the tank having to be maneuvered around to get to the pump.
Note: This guide will require the tank to be dropped, but not completely removed. You can leave the filler neck tube installed in the tank, just be careful not to break it by putting too much pressure on the passenger side of the tank.
Installation Instructions
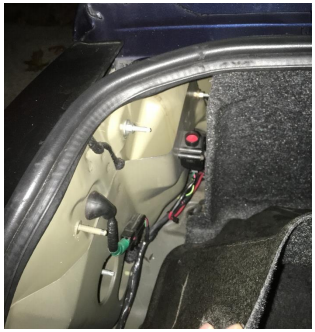
1. Relieve Fuel press by disconnecting the inertia switch located in left of the trunk carpeting behind the taillight. Attempt to start the car a few times to relieve any fuel still in the lines.
2. Disconnect the negative battery terminal using your 8mm socket
3. Jack the rear end up safely and use jack stands. Place jack stands underneath any parts of the frame that are out of the way of the tank.
4. Open you fuel door, and remove the three 10mm bolts holding the filler neck to the car.
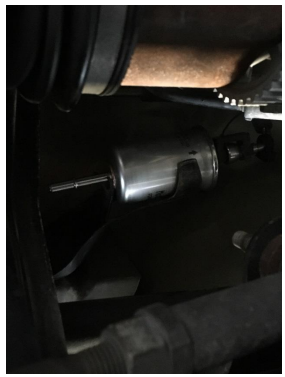
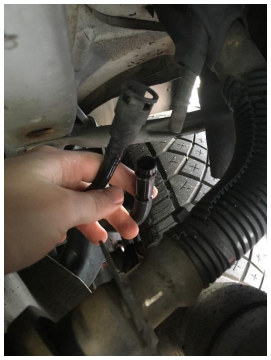
5. Crawl under the car, behind the tank, to locate the fuel filter. Begin by simply unscrewing the hose clamp holding it in place. Use your flathead screwdriver to release the two clips on each side.
6. Next, use your 5/16 fuel line disconnect tool to slide inside of the fuel line. With this tool pushed into the front of the line, pull the line away from the filter to disconnect. Repeat for the other side. (Important: Wear safety glasses as fuel will spill down from the filter)
7. Begin disconnecting the other lines and connectors holding the tank to the car: 2 lines on the left, 2 lines connected at the top of the filler tube on the right, and an electrical connector at the front of the tank behind the bumper.
(Note: 2 of these 4 lines (1 on each side) require that a C-Clip be removed, simply use a flathead to pry the clip straight out)
8. Position you jack under the tank, with a 2x4 between the tank and jack.
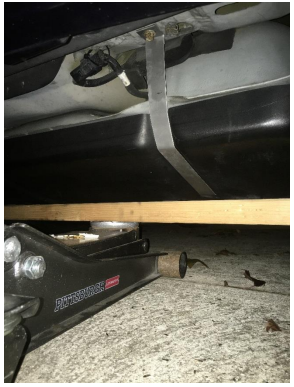
9. With the jack pressing up against the tank, crawl under and remove the three 13mm bolts holding the fuel tank straps into place.
10. Once the strap bolts are removed, you can slowly lower the tank with the jack. Be cautious as you lower, and look out for anything restricting the tank from dropping. You can push and pull the tank to maneuver it.
11. Once lowered enough, support the tank with the jack. Be careful not to put too much stress on the passenger side filler neck when lowering.
12. With the tank most of the way down, we can now remove the six 8mm bolts holding the fuel pump hat to the tank
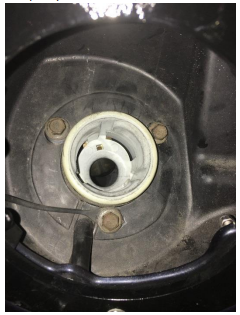
13. Carefully use a flathead to go around the hat, and pry the hat off of the tank. There is a gasket holding these together that will be re-used.
14. Now you can reach into your tank and push the two tabs on the side of the fuel pump housing to release it from the tank. Carefully pull the housing up, and be careful to make sure the float on the side of the housing does not snap, or get caught up.
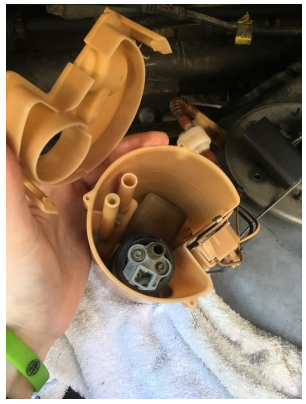
15. With the housing out, you can now remove the six 5mm screws holding the housing together. These screws are not tight at all and can be removed with just a socket. Be mindful of how the pump is assembled, and remove the lid to reveal your old fuel pump.
17. Use a flathead screwdriver to push the tab in and disconnect the plug from the old fuel pump.
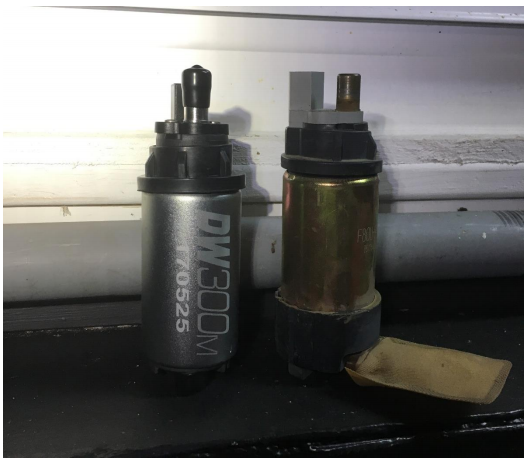
18. You can now remove the old pump from the housing. It is also a good idea to clean the inside of the basket as there will likely be some nasty stuff in there.
19. Remove your new DeatschWerks 340lph from the packaging. You will have to re-use the sock from the old pump, it will simply snap on. Your new pump comes with a new sock for the fuel basket, this will also snap right on.
20. Place your fuel pump in the basket, it can only go in one way. Place the lid on top, and begin pushing the hoses into place. You will have to hold them in place while you HAND TIGHTEN the six 5mm screws into the lid. Make sure your fuel pump connector is plugged in.
21. With the basket assembled, you will now lower it into the tank. On the left side of the tank is a space for the float to go through, while the right side has a bridge that the sock must be pushed under. Once everything is in place, you can push the basket down until you hear a loud click.
22. Re-install your six 8mm bolts for the fuel hat. Be sure to tighten them in a star pattern to avoid any bends/leaks
23. Using your jack, raise the tank up enough to reverse the process. Start with bolting down the fuel tank straps, next re-connect your fuel filter and line, and finish with the connector and vapor lines. Be mindful to check on the filler neck and make sure it is aligning correctly with the gas cap opening as you raise the tank.
24. Once you have completed the process of re-attaching the tank and lines, re-connect your negative battery cable and push in the inertia switch in the trunk.
25. Take your key and turn the car power on (engine off), this will prime the pump. Repeat this a few time to re-pressurize the system. Now you can start your car and let it idle for a few minutes to allow the computer to learn the new fuel trims.
26. Take your car for a ride, and enjoy!