 FREE 1 to 3-Day Delivery on Orders $149+ Details
Hawk HPS Brake Pads (1999-2004 Mustang GT/V6 Front Pair) - Installation Instructions
Installation Time
60 minutes
Tools Required
- Jack
- 2 Jack Stands
- 2 Bricks
- Wheel Lug Remover
- Metric Socket Wrench Set
- 2 C-Clamps or Equivalent
- Brake Cleaner
- Torque Wrench (recommended)

Shop Parts in this Guide
Installation
Removal:
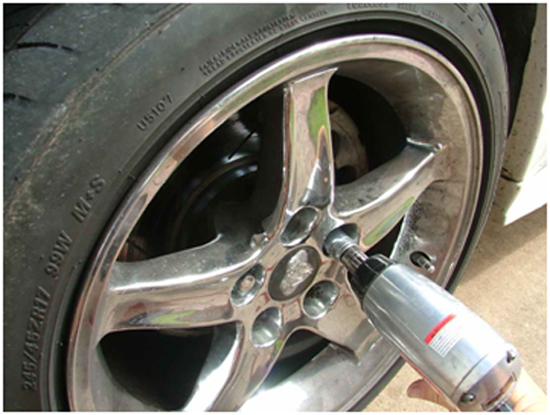
1. Before jacking up the car, be sure to loosen the lug nuts so they are easier to remove once the wheels are off the ground. If using an impact wrench this step is unnecessary.
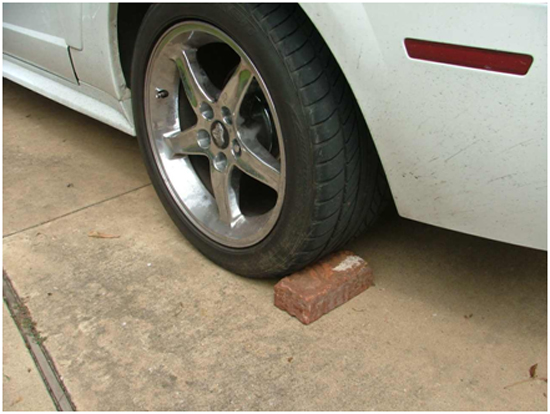
2. Place bricks behind rear wheels to prevent the car from rolling once the jack stands are in place.
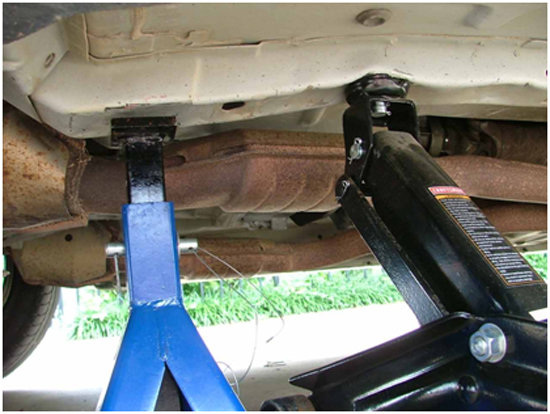
3. Jack up the car. Place jack and jack stands as shown below. Make sure there is enough room to slide the jack stand next to the jack.
4. Remove the two front wheels.
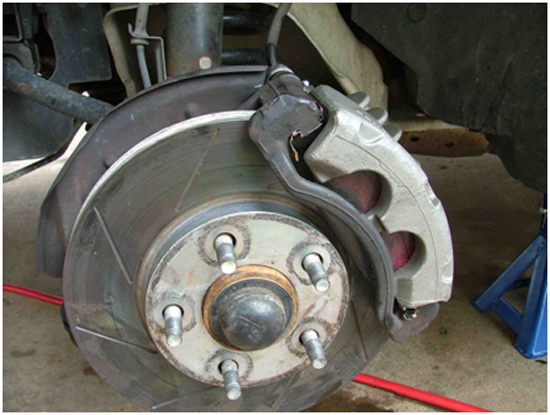
5. Inspect rotors for any brake deposits, grooves, or cracking. For deposits and grooves, the rotors can be resurfaced and reused. If cracks can be seen, the rotors need to be replaced.
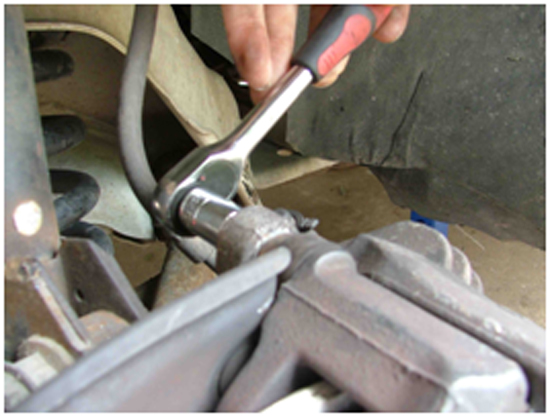
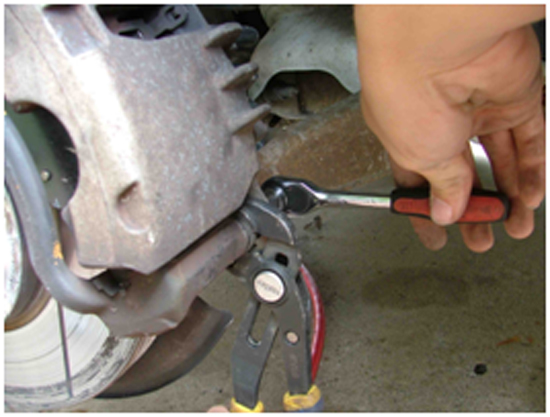
6. Using the correct size socket (make sure the size is perfect, or else you may risk stripping the bolt) remove the two bolts shown below. A hammer might be necessary - just be careful to not strip the bolts, or you will have to buy a special tool to remove them. It may also be necessary to grip the area on the other side of the caliper with pliers to prevent it from spinning.
7. Remove the caliper by sliding it out and away from the rotor. This may require prying it out with a large screwdriver. Be sure not to let the caliper hang by its brake line. You can set the caliper just behind the rotor to prevent damaging the brakeline.

8. Remove the old brake pads.
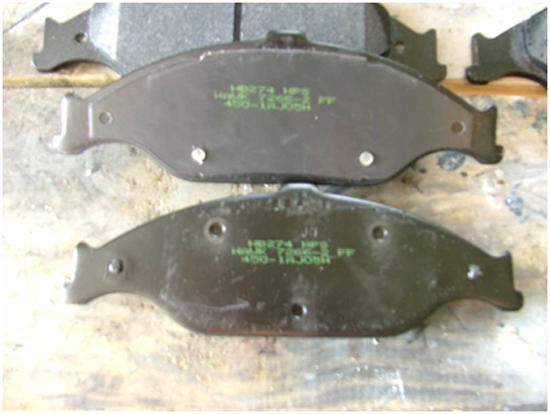
9. Make sure all four of the new pads have backing plates. I used two plates from my old pads on the new pads. In the picture below, the top pad should go on the outside of the caliper, while the bottom one should go on the inside.
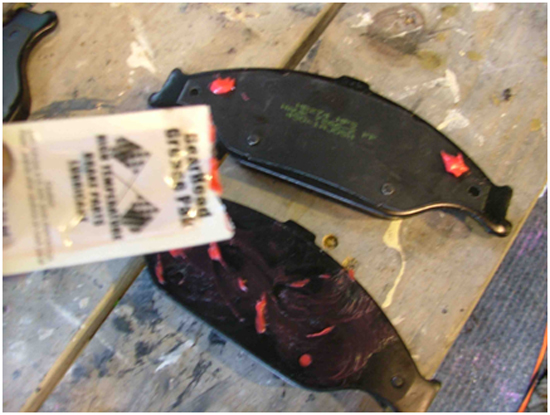
10. Spread grease over areas shown below. This should include any places where the brake pad contacts the caliper and the caliper bracket.
11. Slide in new pads.
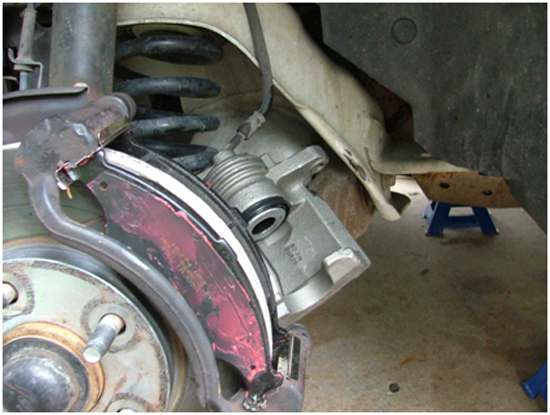
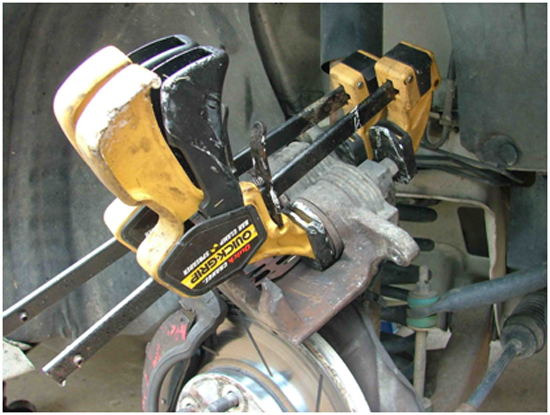
12. Compress the pistons back into the caliper as shown below. Although a c-clamp is best to use, any clamp should work.
13. Slide the caliper back over the brake pads and screw in the bolts.
14. Spray brake cleaner on any places that seem rusty or dirty - try to avoid spraying on any plastic or rubber materials.
15. Repeat steps 6 – 13 for the other side.
16. Place wheels back on the car and tighten lugs evenly before placing the car back on the ground.
17. Now carefully lower the car back to the ground.
18. If possible, torque bolts to around 75 ft/lbs. If you don’t have a torque wrench, be sure to tighten the lugs thoroughly and evenly. (tip: 70ft/lbs is equal to putting 70 lbs of pressure on a ratchet 1 ft away from the lug)
19. To break in your new brake pads, make 5-6 easy stops from about 30-35 mph. Then make 2 hard stops from about 40 mph. Then allow the brake system to cool for about 15 Mins. This lets the surface of the new brake pads transfer over to the rotors for optimal braking performance.
Installation instructions provided by AmericanMuscle customer Adam Polcha 9.29.08
Related Guides
-
Installation
-
Installation
-
Installation

