 FREE 1 to 3-Day Delivery on Orders $149+ Details
Magnaflow 'MagnaPack' ('99-'04 GT / Mach 1 / Bullitt) - Installation Instructions
Installation Time
2 hours
Tools Required
- Sawzall (with metal cutting blades)
- Wrenches/Sockets (you would be safe to have between 1/4" - 3/4")
- Lubricant (optional, but recommended)
- 2 Jackstands (or a lift)
- Floor Jack

Shop Parts in this Guide
Installation
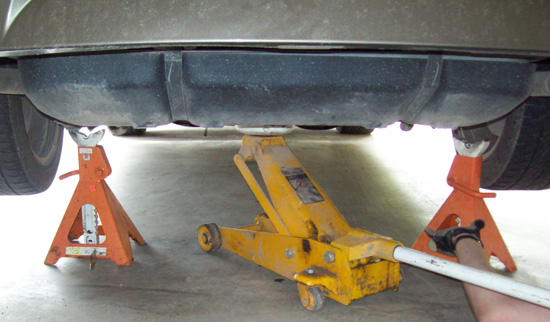
1. Use your jack to lift the differential and place your two jackstands underneath each side of the car. Put the jackstands underneath the axle on each side, this will give us more room to cut the mufflers off.
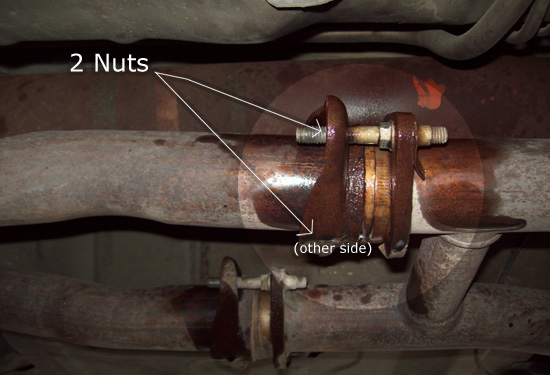
2. Underneath the middle of the car, you will find where the cat-back and mid-pipes connect. Spray some lubricant on the 2 nuts (2 per pipe) and unscrew them. Keep these nuts! You will need to reuse them.
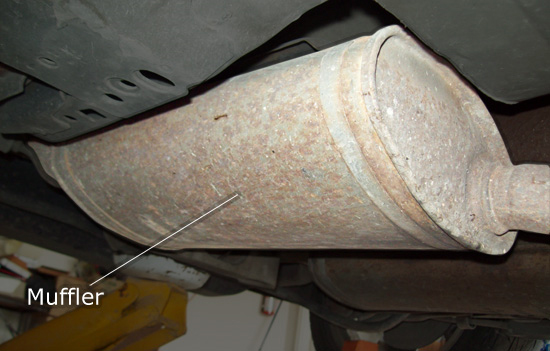
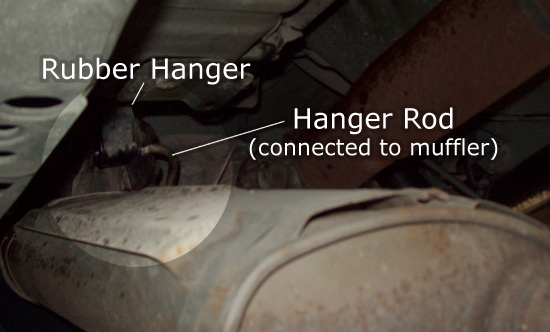
3. Find the muffler and get your saws all ready. Right behind the muffler (in between the muffler and hanger), we will need to cut through the pipe. This prevents us from having to drop the axle to remove the mufflers. You may end up breaking a few blades, so have a couple of them handy.
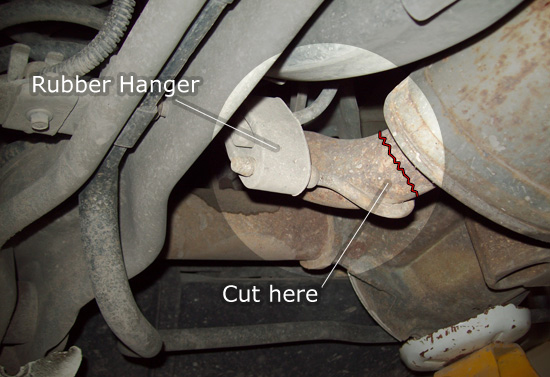
4. Now we need to pull out the muffler. Spray the rubber hangers with lubricant, then pull out the muffler from the mid-pipe so that the muffler is hanging down. After that, you pull the hanger rod out of the rubber hanger.
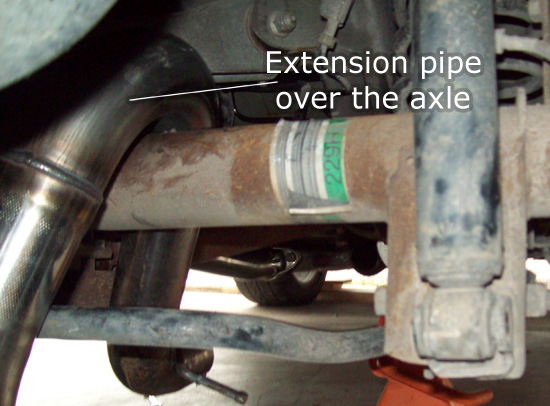
5. Move your jackstands and place them under the frame of the car so that the wheels hang (this gives us more room to work with). Remove the extension pipe by bringing it over the axle to the rear of the car. If you manage to fit it through, move on tithe next step. Otherwise, if you cannot get it to fit through, you will need to cut the exhaust pipe again, but this time behind the axle. One side of the exhaust system is now completely gone. The next steps will show you how to install the Magnaflow 'Magnapacks'.

6. Begin by inserting the extension pipe over the axle from the rear end of the car. This is the trickiest part of the entire installation as they are not easy to maneuver over the axle. Place the jackstands underneath the frame of the car so that the axle is hanging. This creates a lot more space for the extension pipe to go through. If this method works for you and you are able to get the pipe over the axle, then proceed to Step 10. Otherwise we will have to unbolt a shock and lower the axle even more, so go to the next step (Step 7).

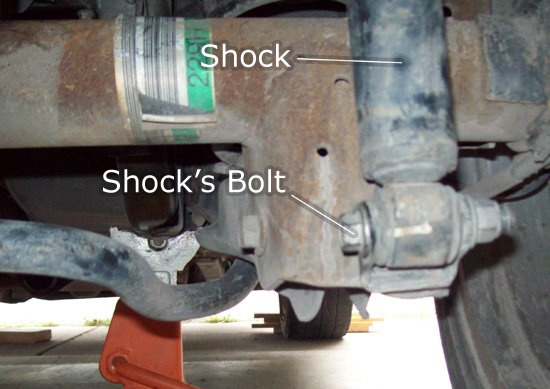
7. Now let's take off the shock. First, locate the shock and the shock's bolt. Then make sure the jackstands are on the frame of the car so that the axle hangs down. Put the jack right beneath the tire so you can lower it down slowly. Once you’ve located the bolt, unscrew it.
8. Once the bolt is removed, pull the shock towards the rear of the car so that it is not held in place anymore. Gently lower the jack (tire) down about 2-4 inches. This should give you enough room to slide the extension pipe in very easily. Now simply raise the axle back to its original height and screw in the bolt to hold the shock (as you are putting the bolt in, raise/lower the axle to make sure the bolt is going in straight and not at an angle).
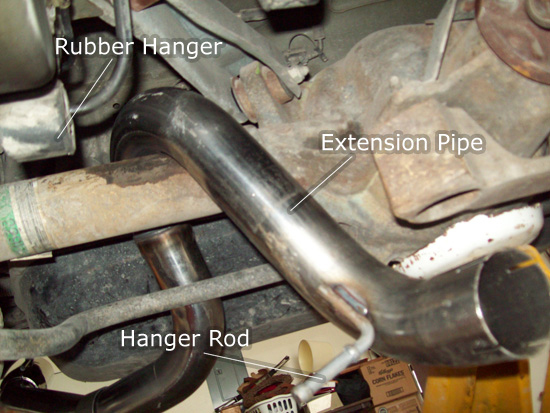
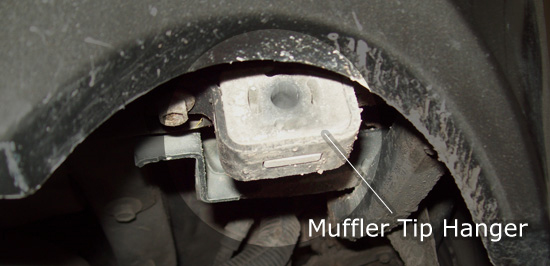
9. Now that the extension pipe is in place, we need to hang it up. Like before, lubricant helps tremendously. Push the hanger rod, located on the extension pipe, through the rubber hanger shown in the image below.
10. Slide the flange over the inlet pipe and attach it to the mid-pipe. Go ahead and put the nuts on, but do not tighten them. You want it to be as moveable as possible without falling off. This makes hooking everything together a lot easier.
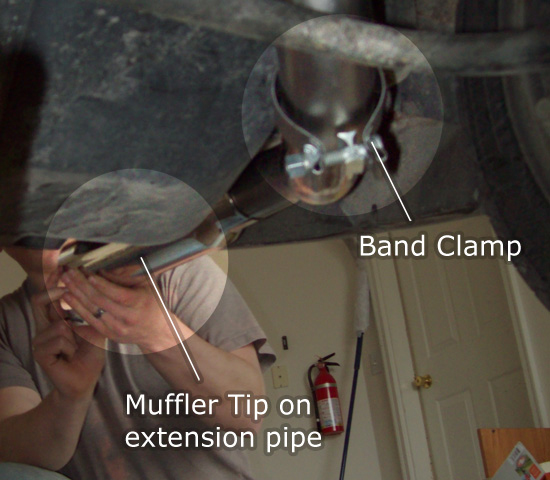
11. Get the muffler and hang it up where the previous muffler was hanging (in step 4). Then slightly insert it into the extension pipe and on the inlet pipe at the same time. By putting them in there just slightly, you will be able to twist the pipes into the correct positions a lot easier. This may take several tries to get it right. Twisting the hangers so that the pipe raises upwards can give you some more room to work with.
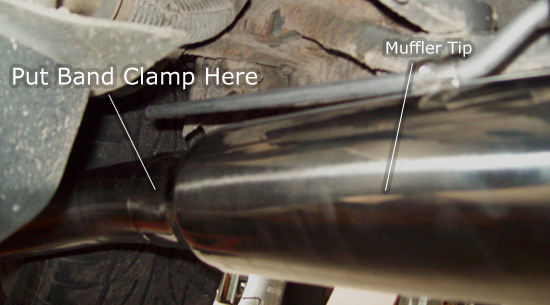
12. Grab your muffler tip and push the hanger rod through the top. You will want to push the rod as far back as it can go to make hanging them up easier.

13. Put the muffler clamp on the extension pipe so that you do not forget to do this. Now slide your muffler tip onto the extension pipe as far back as it can go, and slide the rod into the hanger. Once the hanger rod is in its place, you can slide the tip to where you would like. Note: Magnaflow recommends at least a 1/2" gap between the muffler tip and bumper to prevent any heat-related damage.
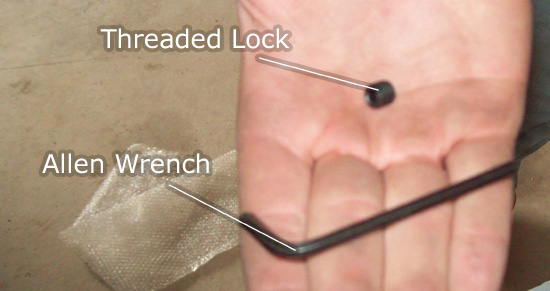
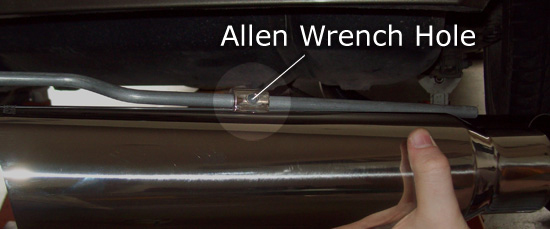
14. Once the tip it hung and set to where you want it, you want to keep it that way. So grab the allen wrench and the small threaded lock. These go in the hole highlighted in the image below. Tighten these against the rod to help it stay in place.
15. Slide the band clamp over the muffler tip and begin to tighten. Make sure the tip doesn't move any while tightening. If it does, just loosen the clamp (or the threaded lock), reposition, and re-tighten.
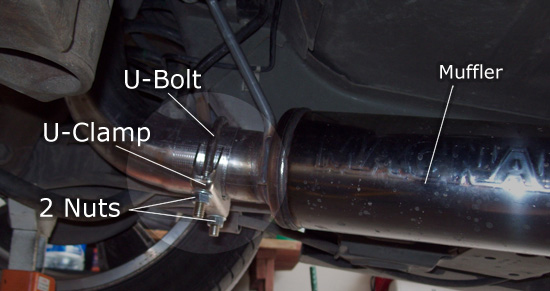
16. Take your U-Clamps and place them around where the extension pipe and muffler meet. Go ahead and put the nuts on but do not tighten them yet. It's always best to do the tightening last after you make sure everything looks well and the clearance is set.
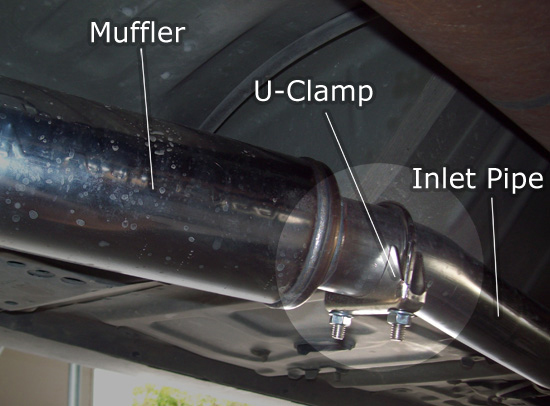
17. Put a U-Clamp around where the muffler and inlet pipes meet.
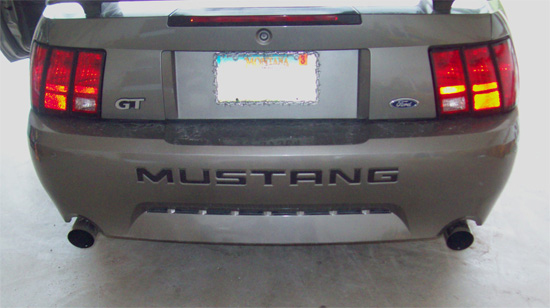
18. Do a quick run through and make sure all the pipes are fitted correctly and that there is proper clearance between the ground and the pipes, and between the tips and the bumper. Once everything looks good, tighten the inlet pipes to the mid pipe, all the u-clamps, and the band clamp on the muffler tip. You will want to get everything very tight to keep them from rattling loose.
19. If all looks good, start up the car and quickly get underneath to check for any leaks.Take cautionas the exhaust pipes get hot very fast. Just place your hands around where the pipes connect together to check for exhaust leaks.
20. After 25-50 miles, jack the car back up and check that all the nuts/bolts are still tightened down.
Installation instructions provided by AmericanMuscle customer Wes Foster 6.24.09
Related Guides
-
Installation
-
Installation
-
Installation
