 FREE 1 to 3-Day Delivery on Orders $149+ Details
How to Install Projector Headlights for 2005-2009 Mustang
Installation Time
2 hours
Tools Required
- Phillips-Head Screwdriver
- Flat-Head Screwdriver
- Pliers
- 10mm, 5.5mm sockets or wrenches

Shop Parts in this Guide
Installation
1. Begin by jacking the car up and removing the front wheels. This will make it easier to access the inner fender wells.
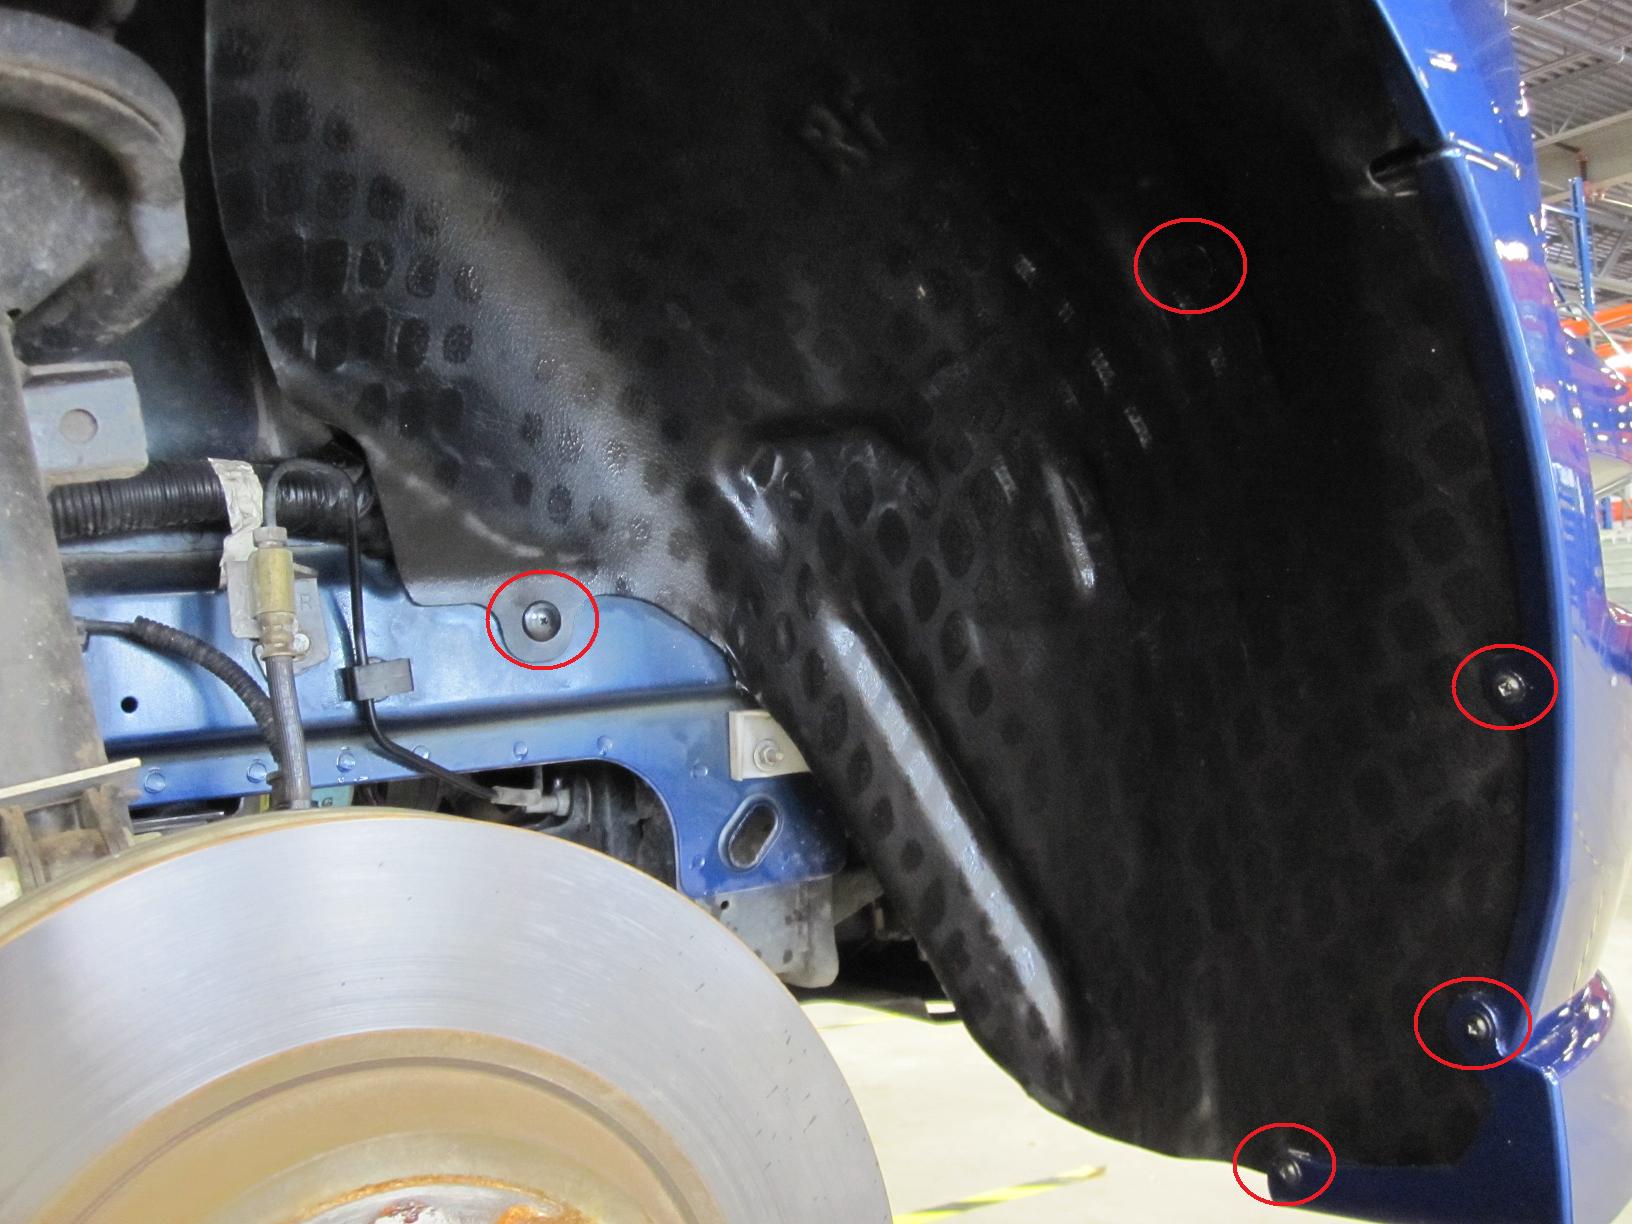
2. Once the vehicle is properly supported, remove the three sheet metal screws and 5 plastic retainers holding the plastic inner fender well to the vehicle. Repeat for other side and remove inner fender wells.
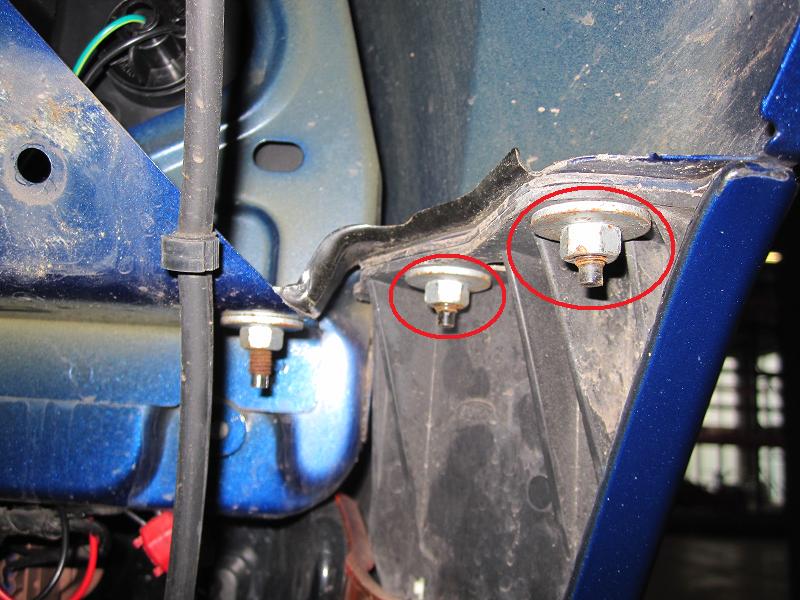
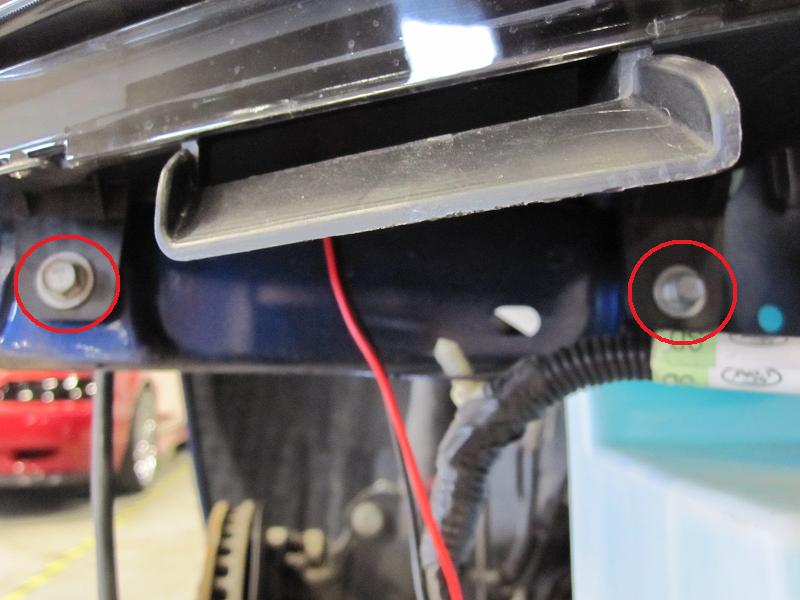
3. With the fender wells removed, you will see two 10mm bolts on each side where the bumper meets the fender; remove these bolts. Take this opportunity to remove the parking light bulbs as well.
4. Remove the plastic radiator cover by removing the 6 plastic retaining clips.
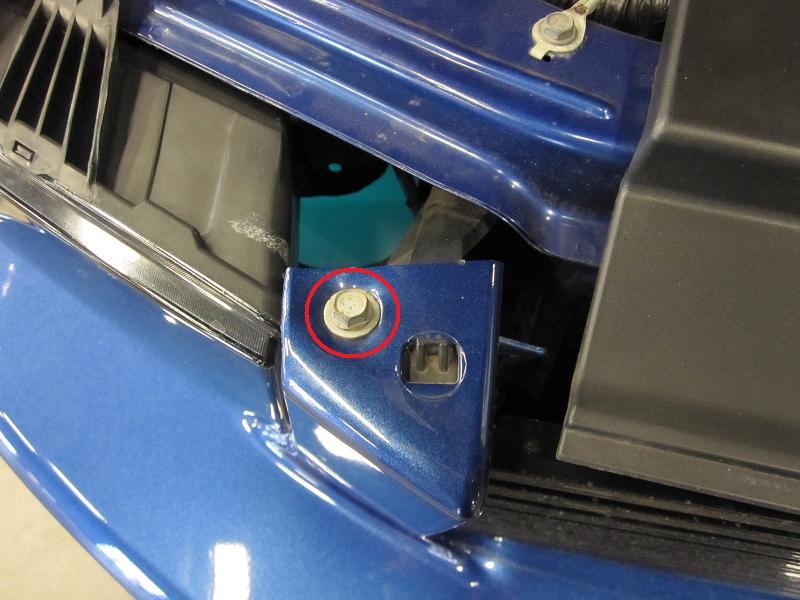
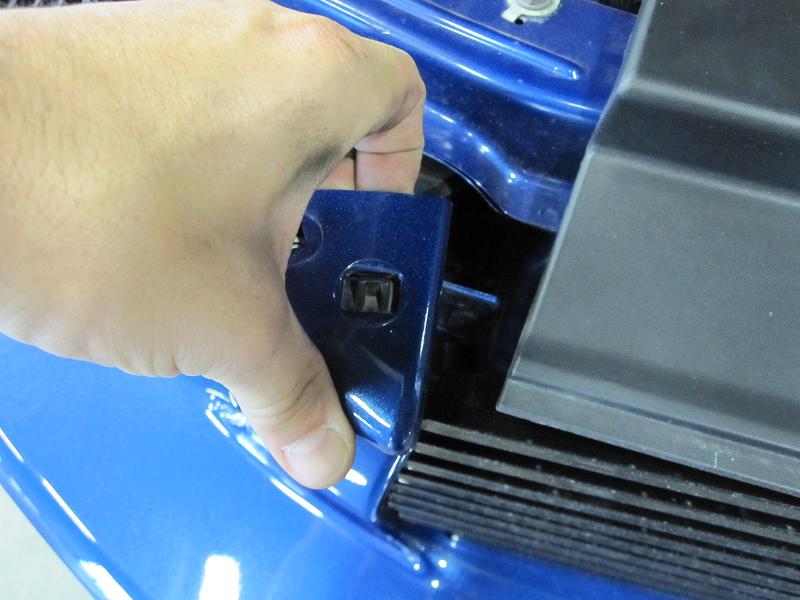
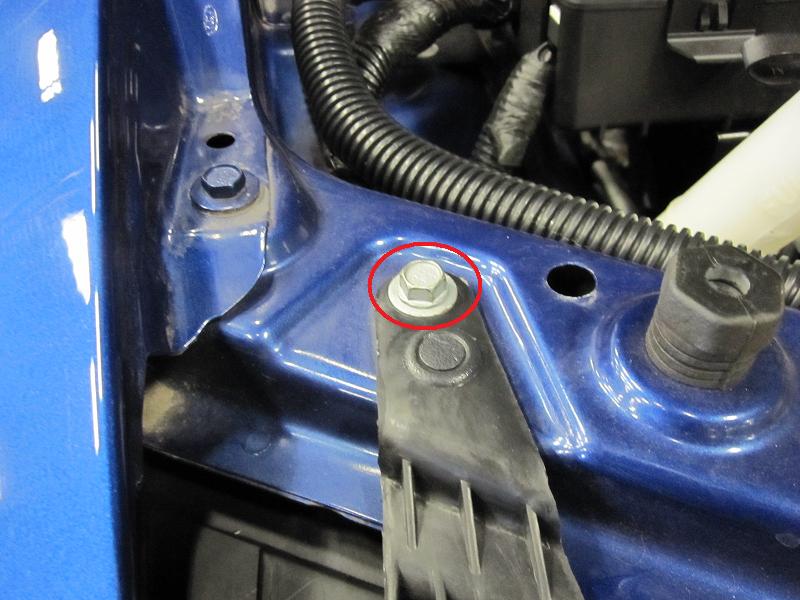
5. Remove the 10mm bolts (one per side) securing the bumper to the radiator support. Once the bolts are removed, pull the bumper over the black plastic tab as shown.
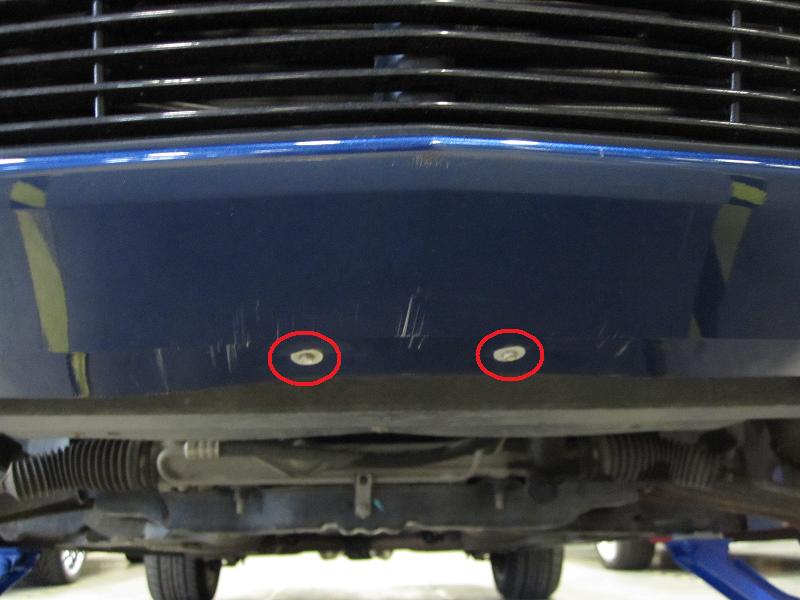
6. Remove the (4) 5.5mm bolts holding the lower splash pan to the underside of the front bumper cover. Only two are shown in the photo below, the other two are on the outer edges.
7. You are now ready to remove the front bumper cover. It is helpful to have another set of hands at this point to avoid any damage, but it can be done with just one person carefully. Pull the sides of the bumper away from the studs(shown in Step 3) and carefully pull it away from the vehicle. If you have a GT, be sure to unplug the fog lights as you pull the bumper away. You will now be able to see the lower mounting bolts for the headlights. Using a 10mm socket, remove the two bolts on each side as shown below, as well as the upper 10mm bolts (one per side), and remove the headlights from the vehicle.
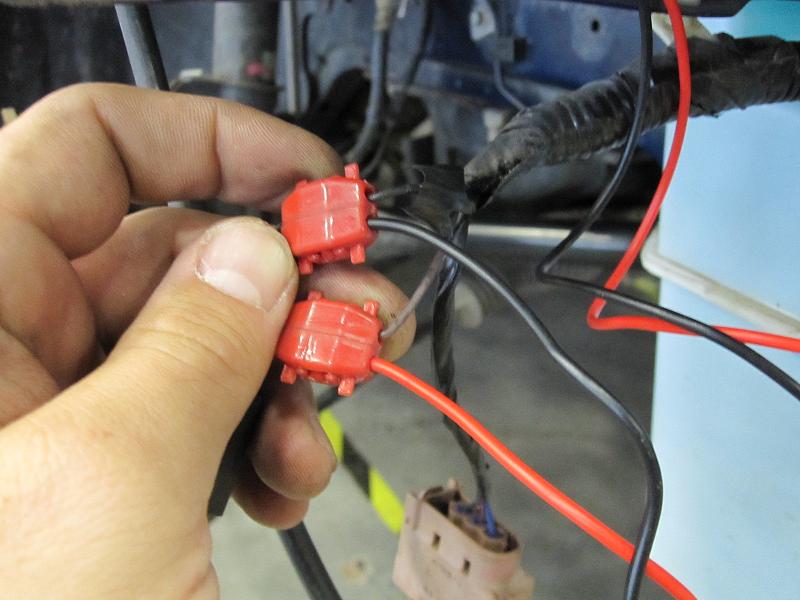
8. It is now time to wire your new headlights. You will be wiring them into the smaller 2- wire parking light bulb harness removed in Step 3. Use the scotch-locks provided to wire the headlights as follows Passenger Side: Red wire from new light – brown wire from parking light Black wire from new light – black wire from parking light
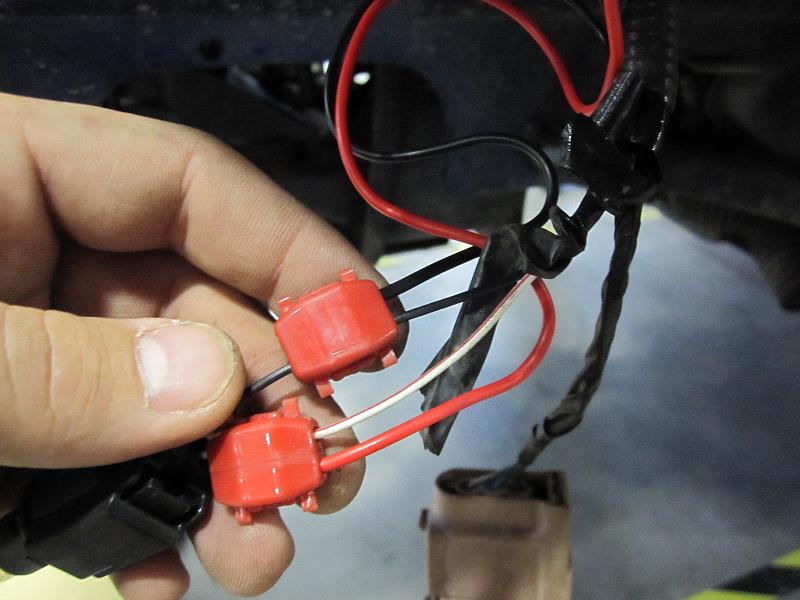
Driver Side: Red wire from new light – white w/ red stripe wire from parking light Black wire from new light – black wire from parking light
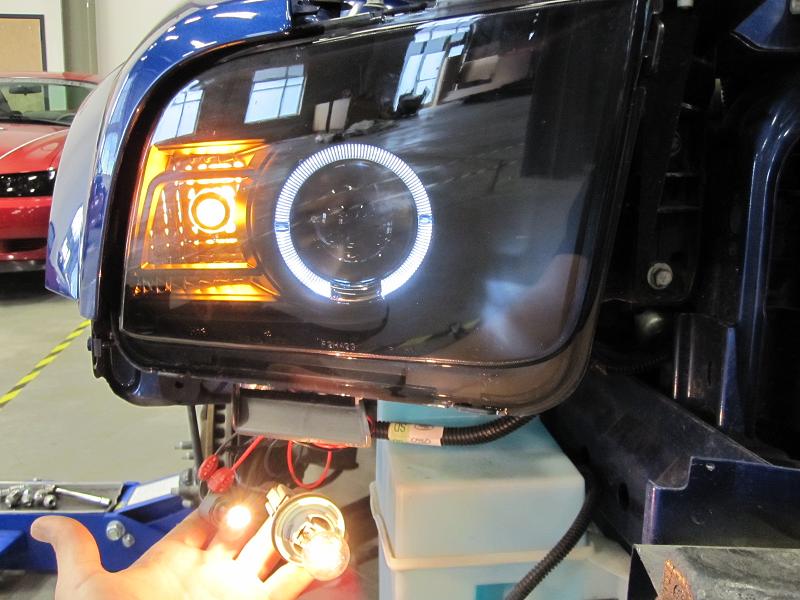
9. Plug in the main headlight harness from the vehicle to the connector on the new headlights. Be sure to test the lights at this point before putting the bumper cover back on the vehicle. If wired correctly, the lights should look as follows: Parking Lights ON:
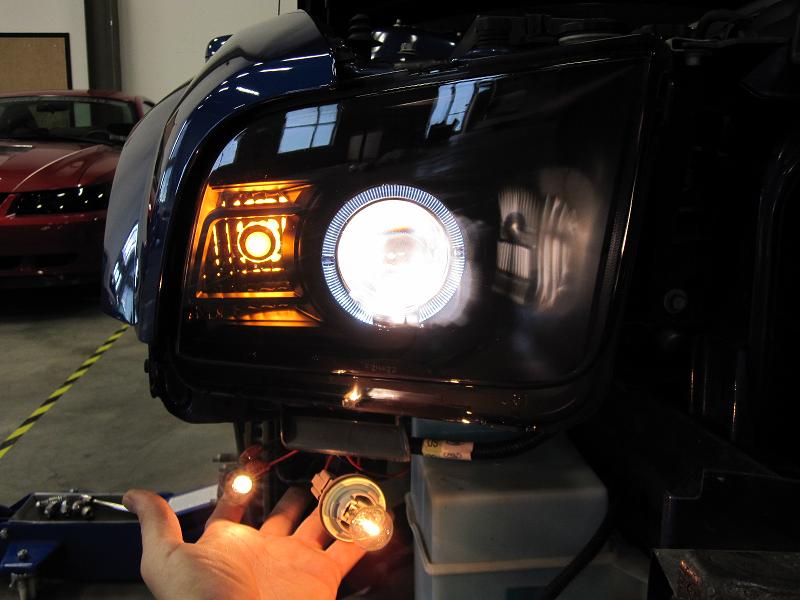
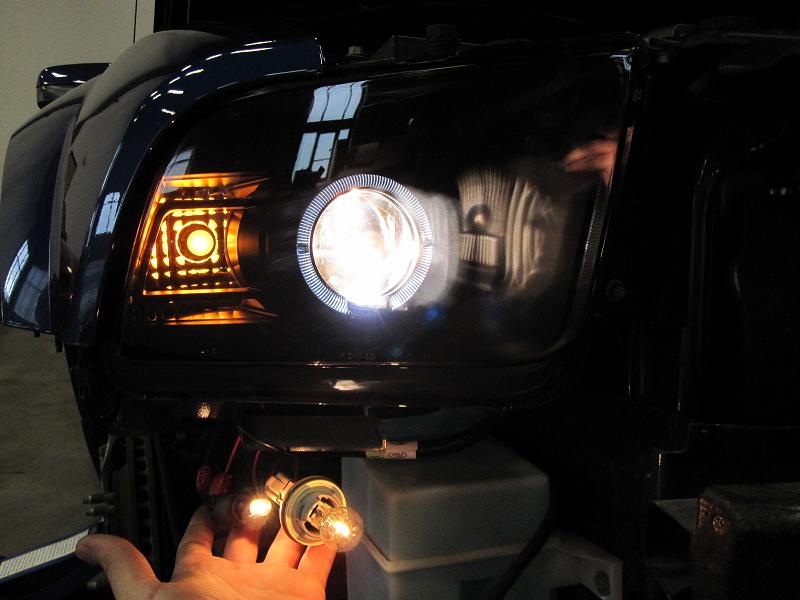
Headlights ON:
10. If the new headlights and parking lights are operating properly, reverse Steps 1-7 to re-install the front bumper cover and inner fender wells to complete the installation.
Related Guides
-
Installation
-
Installation
-
Installation
