 FREE 1 to 3-Day Delivery on Orders $119+ Details
Best Sellers


How to Install a Front Fascia to Fender Bracket on your 2005-2009 Mustang GT and V6
Installation Time
2 hours
Tools Required
- Phillips head screwdriver
- Flat head screwdriver
- 6mm socket
- 10mm socket
- Ratchet or nut driver
- 3" ratchet extender
- Drop cloth, blankets, or towels (not pictured)
Shop Parts in this Guide
Installation
Right Side Removal and Installation Procedure:
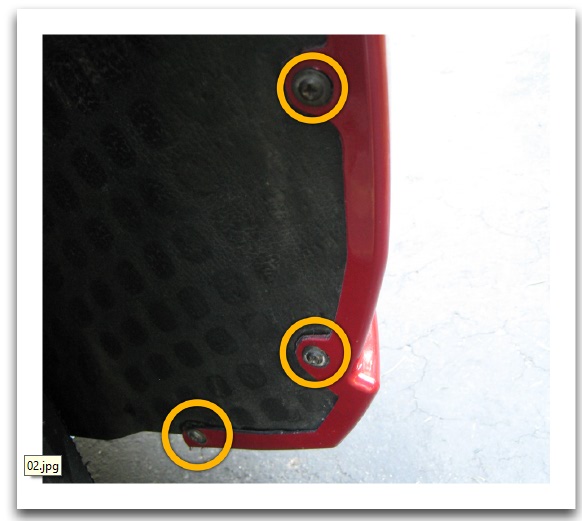
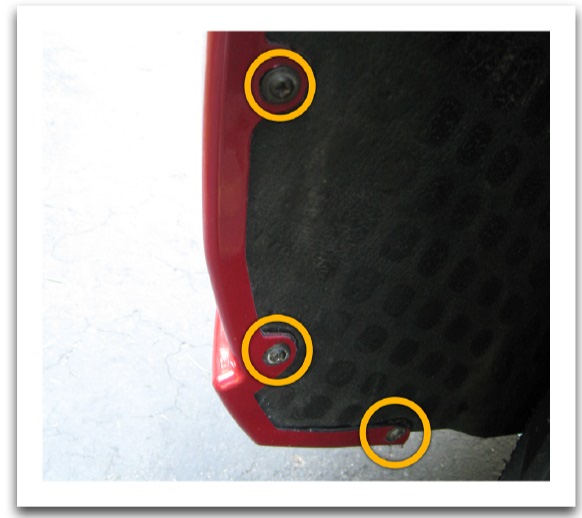
1. Remove the three Phillips head fasteners in each wheel well. To gain easier access, turn the tires all the way in both directions.
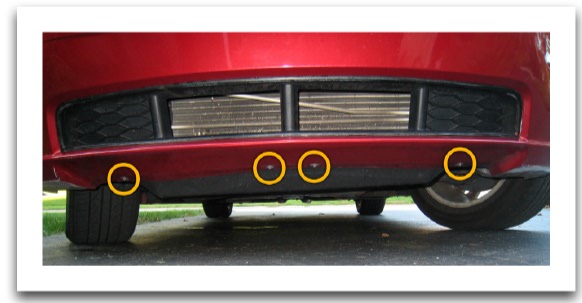
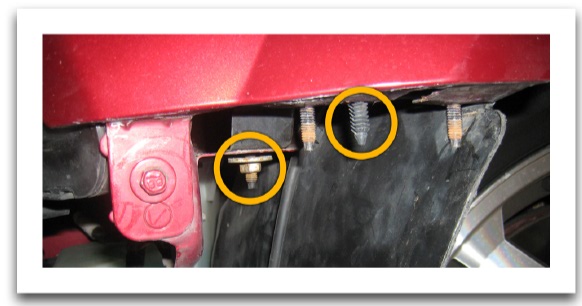
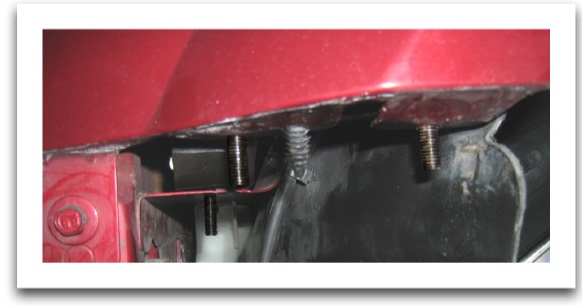
2. Remove the four 6mm hex bolt fasteners under the front bumper that attach the bumper to the splash guard

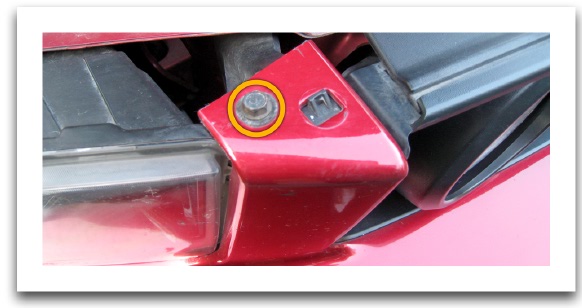
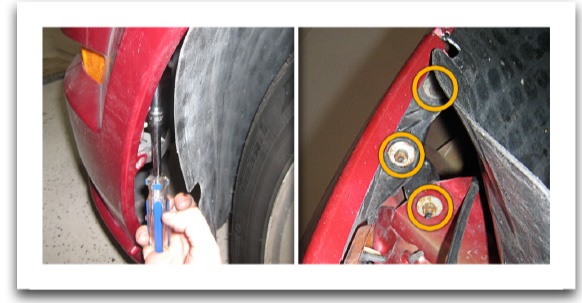
3. Pull back the plastic guard inside the wheel well and use a socket and extender to reach up and remove the two 10mm nuts on each side of the bumper. Pull the sides of the bumper down and slightly out so that the bolts are no longer through the holes in the bumper.

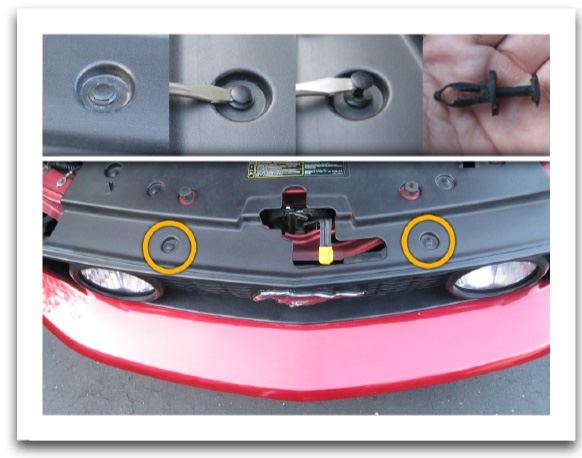
4. Remove the two plastic fasteners located under the hood above the radiator. Use a flat head screwdriver to pull the center out and then the outside portion of the fastener. Do not use pliers you will just crush the fastener.
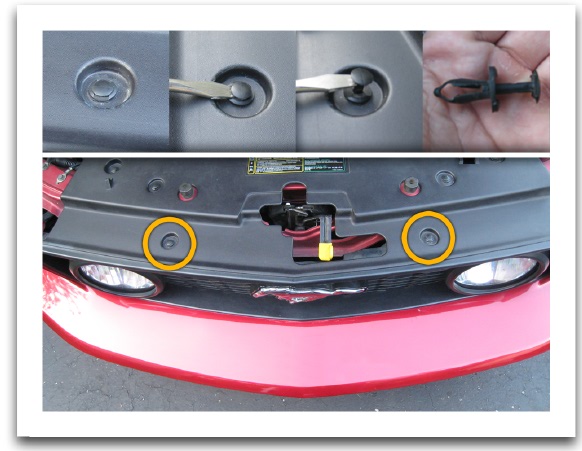
5. Now remove the two 10mm bolts that hold the top of the bumper onto the Mustang.
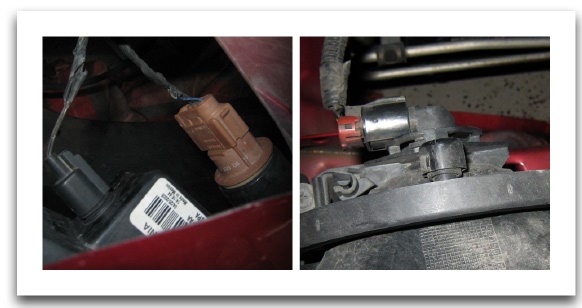
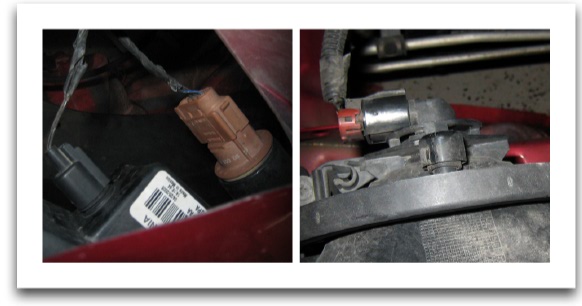
6. You may now lift up slightly to get the top of the bumper off of the plastic hooks at the top. Pull out just enough to gain access to the wiring to the turn signals, fog lights, and headlights. To disconnect the lights they either turn and pull out the bulb or separate the connector.
7. Now the bumper is ready to be removed. It is recommended that you lay down blankets or towels on the floor below the bumper before removing it so that you do not damage it on the ground.
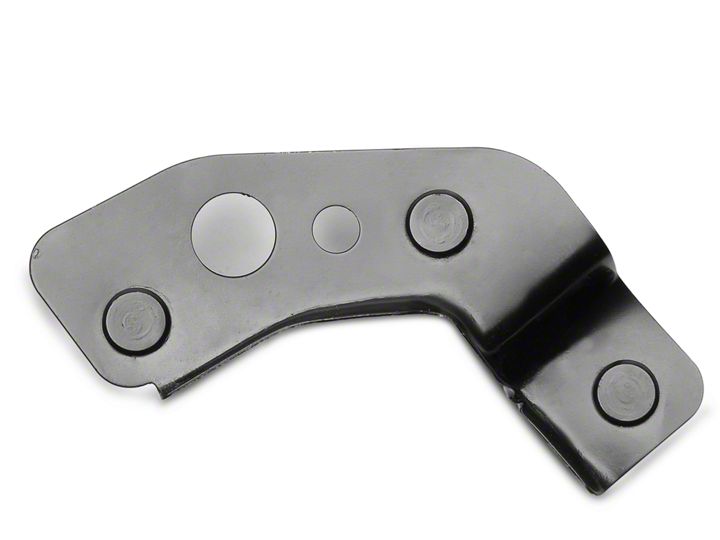
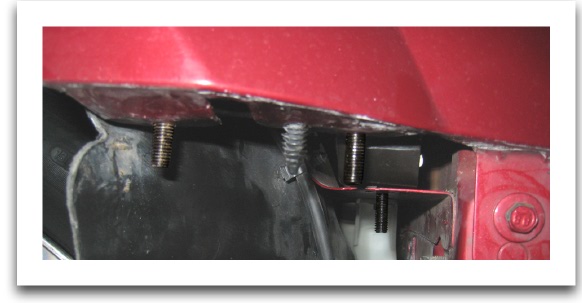
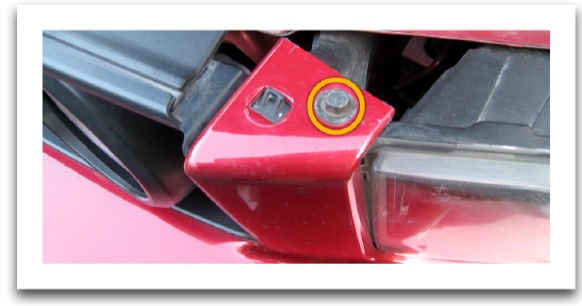
8. With the bumper off now the bumper mounting brackets can be accessed. Remove the plastic fastener and 10mm nut and the bracket can be removed and replaced.

With the bracket replaced now insert the plastic fastener and put on the 10mm nut. Now reinstall the bumper by repeating these steps in reverse.
Left Side Removal and Installation Procedure:
1. Remove the three Phillips head fasteners in each wheel well. To gain easier access, turn the tires all the way in both directions.
2. Remove the four 6mm hex bolt fasteners under the front bumper that attach the bumper to the splash guard
3. Pull back the plastic guard inside the wheel well and use a socket and extender to reach up and remove the two 10mm nuts on each side of the bumper. Pull the sides of the bumper down and slightly out so that the bolts are no longer through the holes in the bumper.
4. Remove the two plastic fasteners located under the hood above the radiator. Use a flat head screwdriver to pull the center out and then the outside portion of the fastener. Do not use pliers you will just crush the fastener.
5. Now remove the two 10mm bolts that hold the top of the bumper onto the mustang.
6. You may now lift up slightly to get the top of the bumper off of the plastic hooks at the top. Pull out just enough to gain access to the wiring to the turn signals, fog lights, and headlights. To disconnect the lights they either turn and pull out the bulb or separate the connector.
7. Now the bumper is ready to be removed. It is recommended that you lay down blankets or towels on the floor below the bumper before removing it so that you do not damage it on the ground.
8. With the bumper off now the bumper mounting brackets can be accessed. Remove the plastic fastener and 10mm nut and the bracket can be removed and replaced.
With the bracket replaced now insert the plastic fastener and put on the 10mm nut. Now reinstall the bumper by repeating these steps in reverse.
Installation Instructions written by AmericanMuscle customer Ryan McGill 10.7.13
