 FREE 1 to 3-Day Delivery on Orders $119+ Details
Best Sellers


How to Install a Steeda Heavy Duty Front Sway Bar on Your 1994-2004 Mustang
Installation Time
1 hours
Tools Required
- Hydraulic Jack
- Jack Stands
- Lug nut wrench
- Key for wheel locks (if applicable)
- Socket Set with 6" extension
- 14mm deep socket for end link nuts
- 15mm for sway bar to sub-frame brackets
- Locking Pliers
- Panel Puller or Flathead Screwdriver
- Torque Wrench
- Penetrating Lubricant (PB blaster or WD-40)
- Disposable gloves
- Safety Glasses
Installation
Please read through the instructions carefully before starting this project. Take the time to get all the materials together as well as all the safety equipment prior to beginning install. The following install guide was done on a 1994 GT Mustang.
Required Parts:
- End-link kit required for 1994-1995 Mustangs
- Swaybar spacer kit required for 2003-2004 SVT Cobra
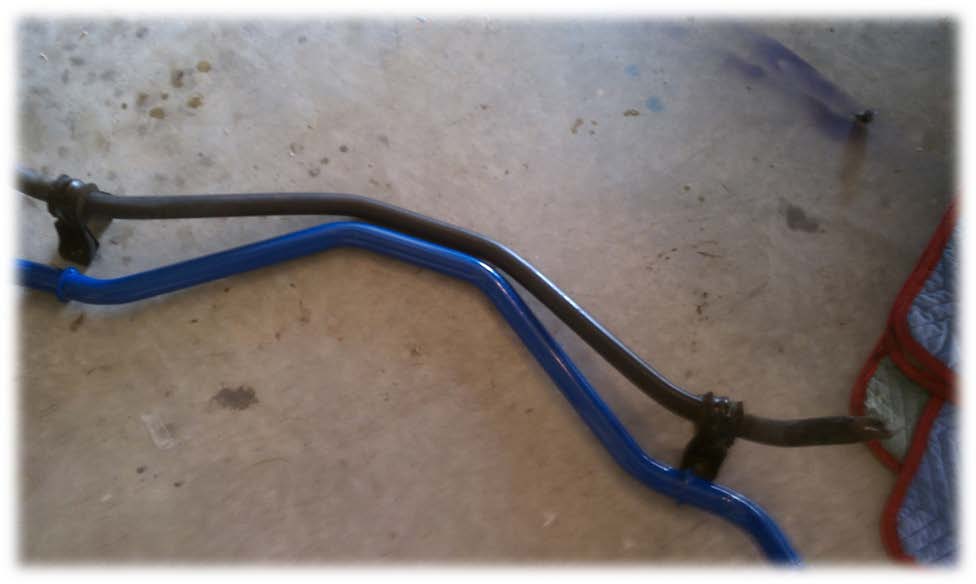
Steeda Sway bar compared to stock GT sway bar
Installation Instructions:
1. Start by working on a stable and level surface. Make sure your car is in park and the emergency brake is engaged. Don’t forget to slightly loosen the lug nuts before jacking up the car.
2. Place the jack under the car at the appropriate jacking point. Jack the car up carefully, until its high enough that the front wheel is about 2-3” off the ground. Due to the overall size of the sway bar, this will allow for the necessary movement to get it into place.
3. Secure the car by placing your jack stand under the sub frame rail and SLOWLY lower the jack so that the car will rest on the jack stand.
4. Pull the jack out from under the car and repeat steps 2-3 on the opposite side.
5. Now remove the lug nuts. Be sure to put them somewhere you remember so they don't become lost as you move around the front end of the car. Remove the (2) front wheels.
6. Remove the plastic push retainers closest to the sway bar from the plastic shroud with the panel puller or screwdriver on both sides of the car. Carefully bend the shrouds from around the sway bar and secure them out of the way. My ‘94 GT has the ABS brake lines in the same area, be careful.
7. Locate the stabilizer bar and the end links attached to the control arms. NOTE: The end-links have blue-green bushings in the picture shown below.
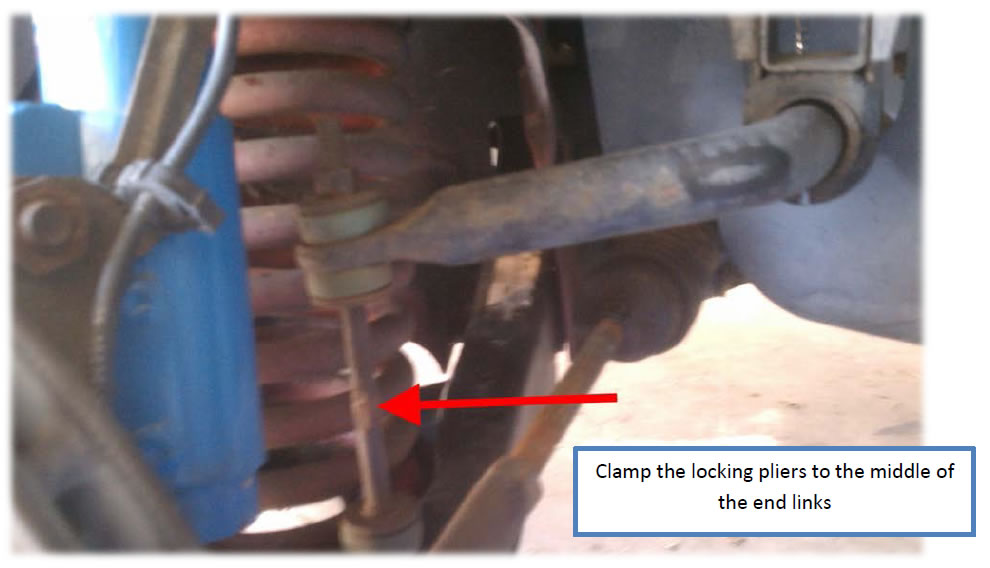
8. Clamp a pair of locking pliers onto the center of the end-link to keep it from turning while removing the nuts on the top and bottom of the link. Spray penetrating oil on the nut and threaded portions of the end link if necessary. Repeat this process for the other side of the sway bar.

9. It is necessary to support the sway bar at this point to keep it from falling once the brackets have been removed. Locate the brackets and bracket nuts connected to the sub-frame rails on either side of the car.
10. Pull the brackets off the sway bar by pushing the metal tabs outward with the screwdriver and pulling up. Be careful not to bend or distort the brackets badly because these will be reused.
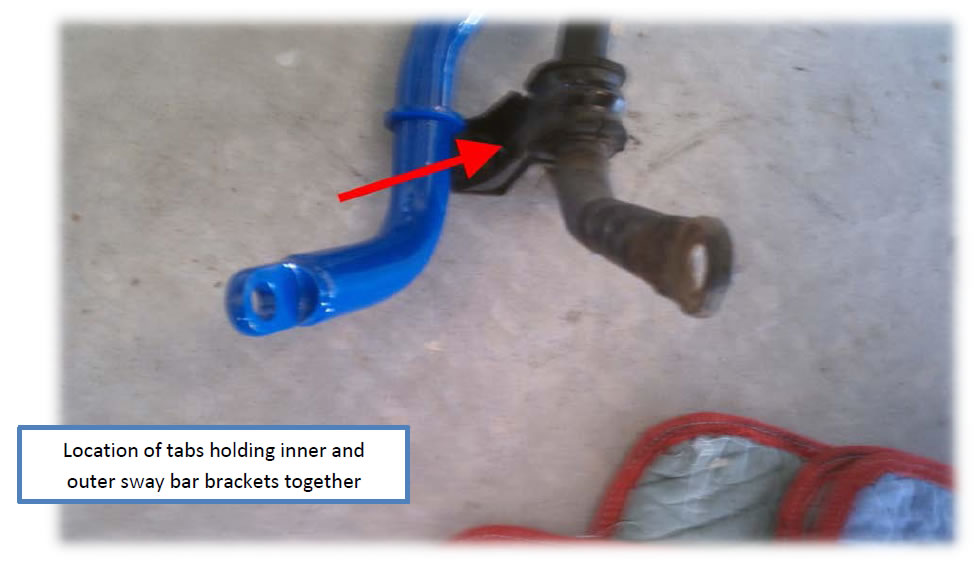
11. This is where the disposable gloves come in. Take the new pivot bushings supplied with the swaybar and put about half of the included tube of silicon grease inside each bushing. Spread the lube around the inside of the bushing evenly and put a little on the side of the bushing that will face the flange on the swaybar. NOTE: I decided to face the part number molded into the bushing outward just in case I needed a new pair in the future, which is certainly doubtful since these are high quality polyurethane instead of the factory rubber pieces. The part number implies they are from energy suspension.
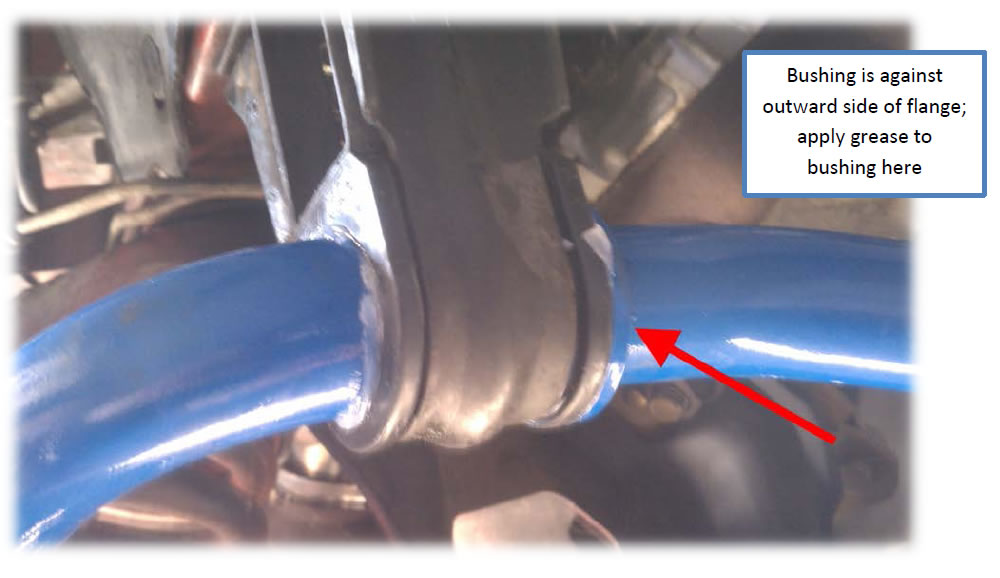
12. The bushings are already split for easy installation. They install against the outside edge of the flanges on the sway bar. Push the brackets over the bushings and press the tabs on the bracket back into position. The brackets do not need to fit super tight at this point, but the holes in the brackets need to line up.
13. Raise the swaybar into position and install the brackets with the factory bracket nuts, being careful to mind the plastic shroud. Do not tighten the nuts down completely at this time.
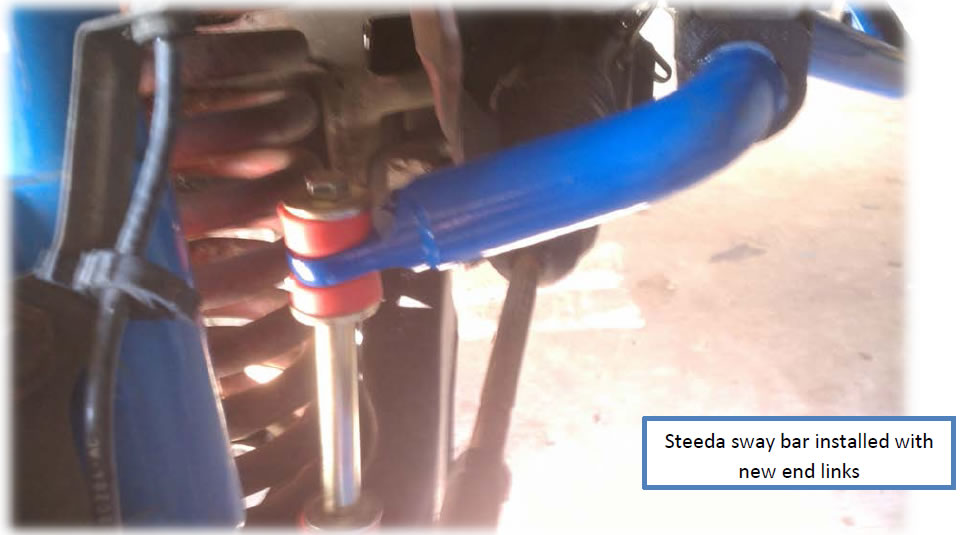
Note:You can reuse the factory end links for 1996-2004 Mustangs, but a new end-link kit is required for the 1994-1995 Mustangs. I found a set of upgraded end links at my local parts-store.
14. Install the bushings onto the end links and put them into place between the sway bar and the control arms. Install the rest of the bushings, spacer washers and nuts.
15. Using the torque wrench, tighten the bracket nuts to 44 to 59 in/lbs, then the factory end-link nuts to 132 to 192 in/lbs. If you’re using aftermarket end links, follow the included assembly instructions and torque values.
16. Push the plastic retainers back into place on the plastic shroud and check for any clearance issues throughout your steering range. Your new heavy duty front sway bar is now installed!
Installation Instructions written by AmericanMuscle customer Michael Bates 11.21.11
