 FREE 1 to 3-Day Delivery on Orders $119+ Details
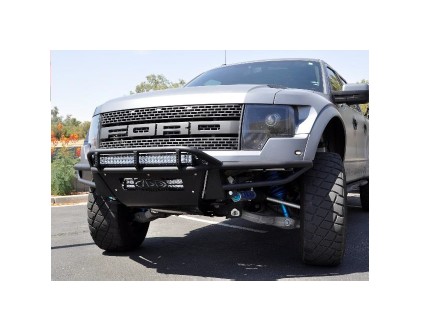
How to Install an Addictive Desert Designs Race Series Front Bumper on your Ford F-150
2010 – 2014 Ford Raptor
Race Series Front Bumper
Installation instructions
PREPARATION STEPS
1. Disconnect the negative terminal on the battery. With the vehicle on level ground and the emergency brake set.
2. You will need the following tools:
a. ½” drill bit
b. ¾” wrench
c. ¾” Socket
d. Ratchet
e. 15MM socket and ratchet
f. Sharpie type marking pen
g. Center punch
3. Hardware Included:
a. 8 – ½” x 1 ½” Bolts
b. 8 – ½” Nuts
c. 12 – ½” Flat washers
**2 – 15mm Skid plate Bolts will be re-used in the installation
INSTALLATION INSTRUCTIONS
1. Remove factory Front Bumper and front skid plate (Keep the 2 – 15mm Skid plate Bolts for re-use) .
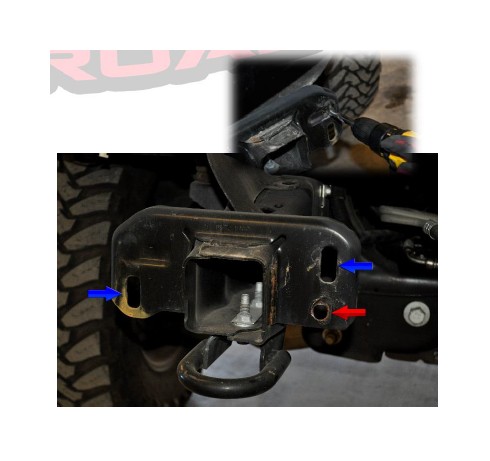
2. Fit the Bumper onto the truck and use the Sharpie to mark the frame horn to drill the ½” holes. The red arrows are the holes to be drilled, the blue arrows show the factory slots. Slots and holes will be opposite for the Drivers side
***If you purchased lights that fit behind the bumper, now is a good time to install those into the bumper****
3. Fit the bumper back onto the truck and attach using the supplied ½” x 1 ½” Bolts (8 ea.), ½” Nuts (8 ea.) and ½” Flat Washers (12 ea.). Leave finger tight until all of the bolts are installed, then tighten to 70 ft./lbs.
***The Upper outside holes will not be used and the holes will be kept open.***
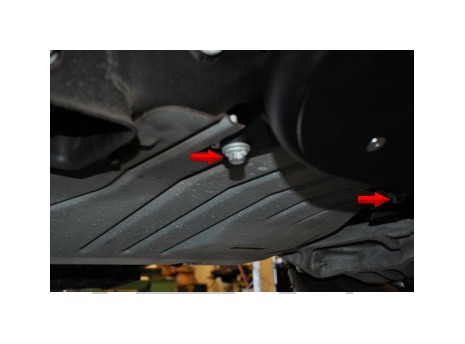
4. Attach the lower section using the 2 – 15mm Skid Plate Bolts taken from the factory skid plate.
5. Step back and enjoy your new A.D.D. bumper.
6. Check, and re-tighten if needed, all mounting bolts after 100 miles and periodically thereafter.
