FREE 1 to 3-Day Delivery on Orders $119+ Details
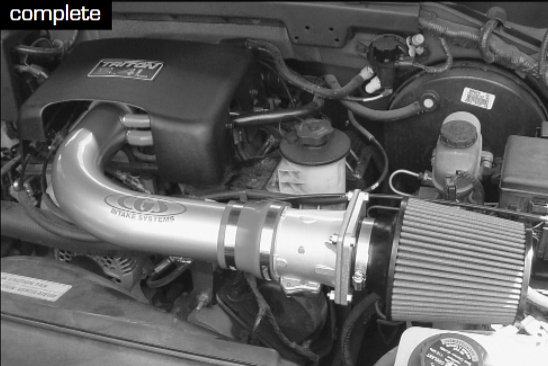
How to Install CGS Motorsports Air Intake System on your F-150
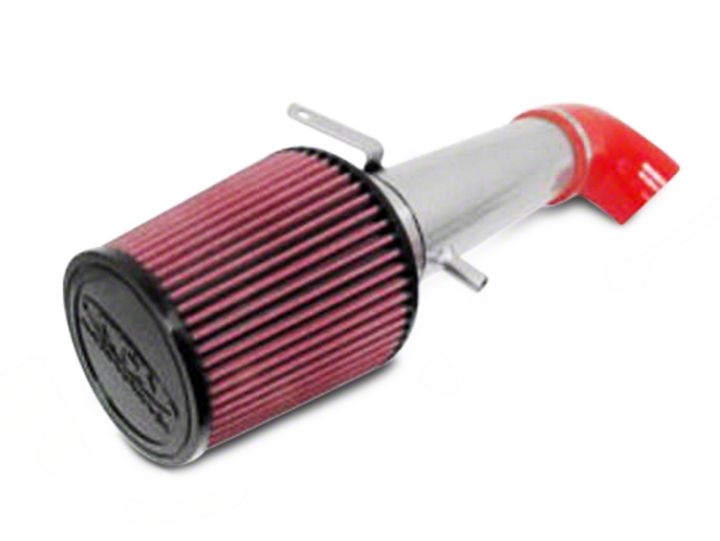
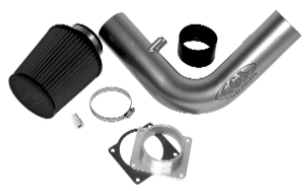
Shop Parts in this Guide
Thank you for choosing a CGS Intake System™ to
power your vehicle. These instructions will take you
through the installation of your new air intake system
for your vehicle. We always recommend that you keep
your stock air intake system in storage in case you
might need it later.
Kit includes: filter, air intake tube, billet mass airflow
sensor adapter, mass airflow sensor
gasket, (4) 1/4” hex bolts and nuts, (4)
hose clamps [(3) 3” and (1) 31/2”
diameter], (2) red connecting hoses (1/2”
and 3/4” diameter), (2) 3” red connecting
hoses, and rubber grommet.
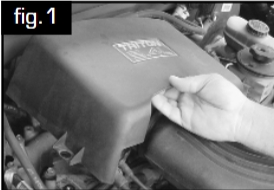
1) Removing stock air intake system
Remove cover over throttle body by loosening the 3
10mm bolts (fig.1).
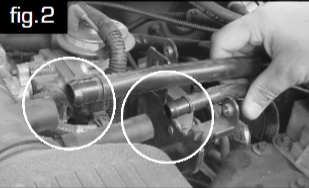
Remove the 2 breather hoses (fig.2).
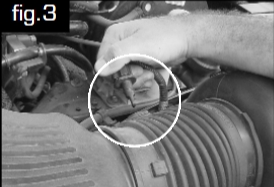
Remove sensor (fig.3).
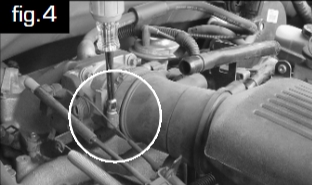
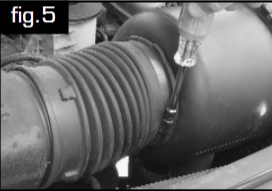
Remove hose clamp at throttle body (fig.4) and at air
box (fig.5). Pull out stock intake tube. Unclamp air box
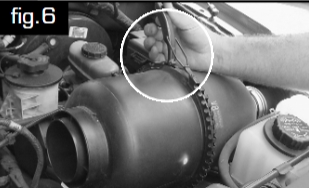
strap (fig.6) and remove filter from box.
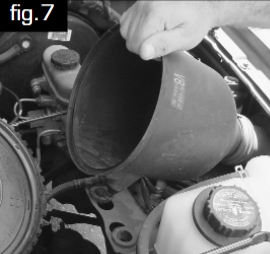
Pull the fender-side of the box up and out (fig.7 below).
Pull the center of the mass airflow sensor out of the
other end of air box and unplug (fig.8 below).

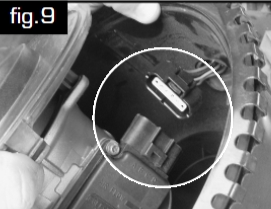
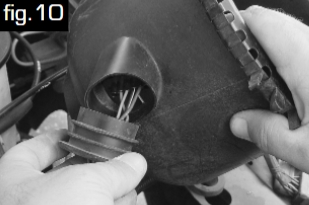
Pull outer plug out (fig.9) and remove outer casting
(fig.10).
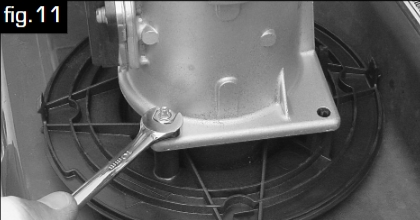
Remove mass airflow sensor from black ring (fig.11).
2) Installing your new air intake tube
Attach red connecting hose to intake tube with hose
clamp (fig.12).
Slide another hose clamp on connecting hose and
attach to the throttle body (fig.13). Secure hose
clamps. Be sure bracket on tube lines up with lower
stud on head (13A). Remove stock nut on that lower
stud and replace after installing bracket.
Re-attach 2 small breather hoses.
Use the provided mass air flow adapter and gasket
and attach to mass airflow sensor (fig.14) with the
provided nuts and bolts (fig.15).

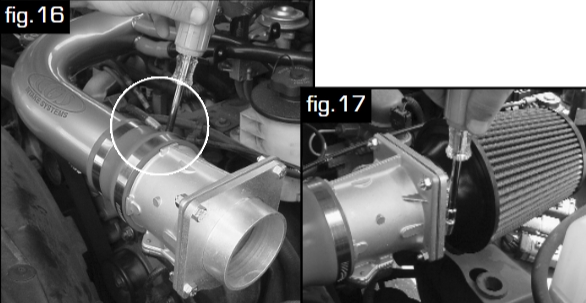
Take the other connecting hose and slip it on to the
mass airflow sensor and attach using a hose clamp.
Slip another hose clamp on and attach to intake tube
about 11/2” (fig.16).
3) Installing the air filter
Loosen the hose clamp on the air filter and slide onto
the mass airflow sensor adapter (fig.17).
Re-attach cover over throttle body with the 3- 10mm
bolts.Tighten all screws. Congratulations! You just
installed more horsepower to your truck by allowing it
to breathe easier with a CGS Intake System™.
Slowly close the hood to verify fitment and clearance.
Once completed, check your work and then enjoy. Your
vehicle will take approximately 100 miles to become
accustomed to the new air intake system. Every 5,000
to 10,000 miles, take the filter off and tap out the
accumulated dust and dirt. At least twice a year or
more, use a cleaning kit to clean the filter properly and
re-oil it. These filters are cleanable and reusable and
should not be thrown away when dirty.
If there is a C.A.R.B. EO Exemption sticker enclosed,
place it in a visible area under the hood for reference
by officials from the State of California.
Thank you again, we know you will enjoy your new CGS
Intake System™.