 FREE 1 to 3-Day Delivery on Orders $119+ Details
How to Install MBRP 2.5 in. Intercooler Pipe Kit, Cold Side on your F-150
Removal of Stock Pipe:
1. Remove the "Y" section of the air intake by loosening the hose clamps from the rubber connections.
2. Disconnect the vent line from the cold side (CS) stock pipe by lifting the grey locking clip and pulling on the fitting.
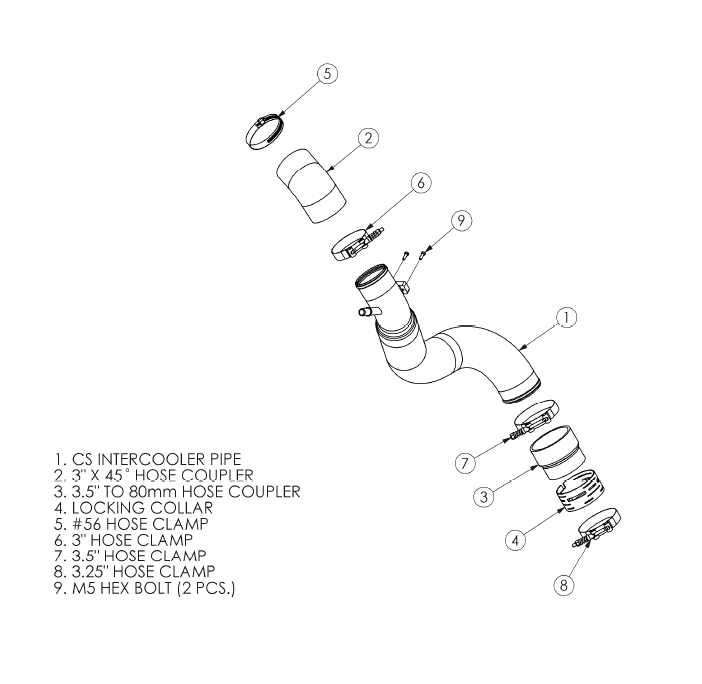
3. Remove the two screws securing the MAP sensor to the stock pipe, then remove the sensor (It will be reused). Refer to Figure 1.
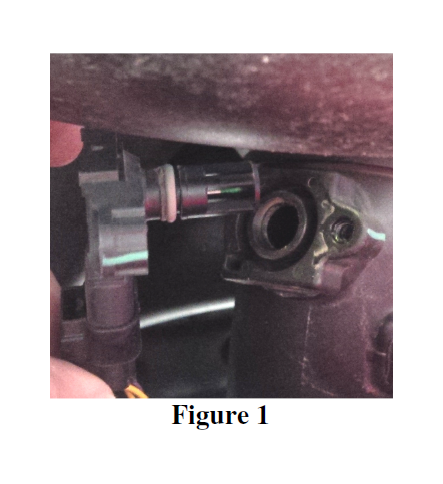
4. Remove the quarter-turn and push-pin fasteners holding on the flexible panel underneath the vehicle, and remove the panel. Refer to Figure 2
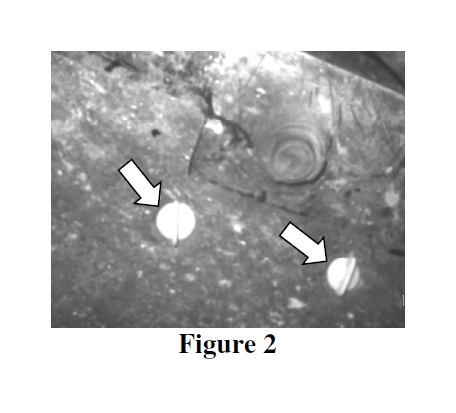
5. Loosen the hose clamp on the intake and then remove the hose. Refer to Figure 3.
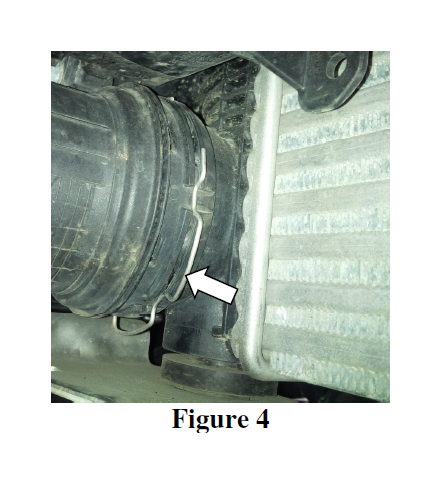
6. Remove the wire retaining ring at the intercooler outlet and then remove the bottom end of the CS pipe from the intercooler. Remove the pipe completely from the bottom of the vehicle. Keep the wire retaining ring; it will be reused with the new pipe.
Refer to Figure 4.
Installation of MBRP Inc. Intercooler Pipe:
NOTE: ENSURE THAT THE INSIDE OF THE INTERCOOLER PIPE IS CLEAN BEFORE INSTALLATION.
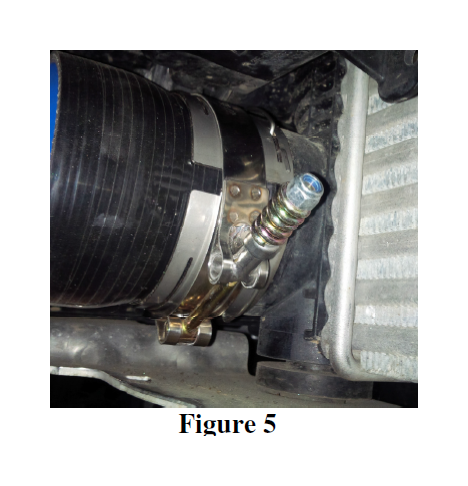
1. Install the 3.5" to 80mm Hose Coupler onto the intercooler outlet, by first placing the Locking Collar over the hose coupler, and the 3.25" Hose Clamp over the collar. Slide the hose coupler completely onto the intercooler outlet and position the collar such that the outer slots are directly over the radial groove on the outlet, and the split in the collar is facing downwards. Centre the hose clamp between the narrow collar slots and tighten it.
Refer to Figure 5.
2. Slide the previously-removed stock retaining ring over the Locking Collar such that the wire tabs fall into the collar slots and into the groove around the intake.
3. Install the 3" X 45° Hose Coupler onto the top end of the CS Intercooler Pipe, securing it loosely using the 3" Hose Clamp, then install the hose coupler onto the intake, loosely securing it with the #56 Hose Clamp.
4. Insert the bottom end of the CS Intercooler Pipe into the 3.5" to 80mm Hose Coupler at the intercooler outlet, loosely securing it with the 3" Hose Clamp.
5. Position the CS Intercooler Pipe to obtain the best fit and maximize clearances, and then fully tighten all clamps.
6. Reinstall the vent tube onto the CS Intercooler Pipe fitting, making sure that the retaining clip locks it into place.
7. Reinstall the sensor onto the CS Intercooler Pipe using the supplied M5 Hex Bolts.
8. Replace the panel underneath the vehicle and the "Y" from the air intake.
9. Verify that there is adequate clearance around all hoses, wiring, covers, etc. If not, relocate or adjust.
Congratulations! You are ready to begin experiencing the improved power and driving excitement of your MBRP Inc. intercooler pipe upgrade. We know you will enjoy your purchase.
