FREE 1 to 3-Day Delivery on Orders $119+ Details
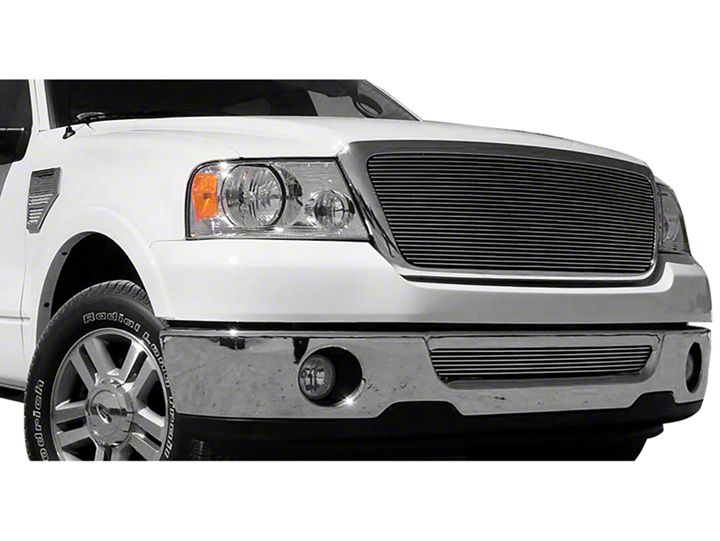
How to Install T-REX Billet Series Black Upper Grille on your F-150
Installation Time
1 hours
Tools Required
- Needle Nose Pliers
- Phillip & Flat Screw Driver
- Drill & 1/8” Drill Bit
- Socket Set
- Torx Driver
- Black Spray Paint
Shop Parts in this Guide
2004-2008 Ford F-150 & 05-07 Lincoln LT
Hardware / Parts Included:
1 Main Billet Insert (20 Bars)
4 #8 x ¾ Phillip Screws
4 #8 Flat Nuts
6 6-32 x ¾” Machine Screws
6 6-32 Nylon Lock Nuts
6 #6 Flat Washers
2 Brackets
Read and understand instructions before attempting installation
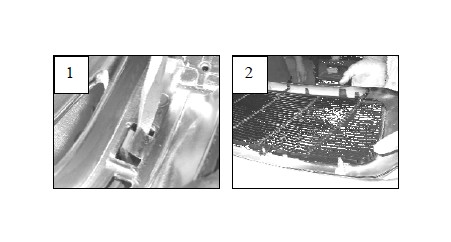
Step 1
Remove the grille shell from the vehicle. Place it face down on a workbench. Now remove the screws holding the metal brackets. Separate the factory plastic grille insert from the outer chrome or painted shell (1). Use a flat head screw driver or pliers to carefully unfasten the molded clips.
Step 2
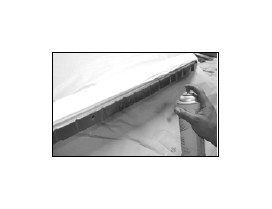
Mask a line across the front of the hood just above the grille mounting holes. Apply
a coat of black paint to hide the paint that will be visible behind the billet grille. If
the vehicle is a dark color skip to Step 3.
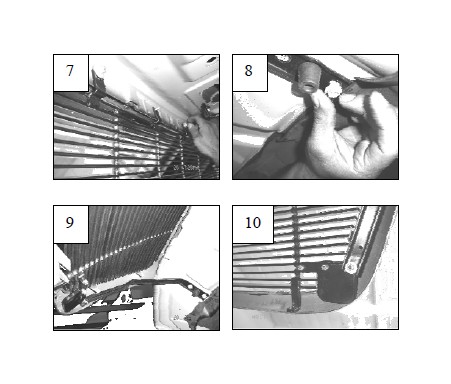
Step 3
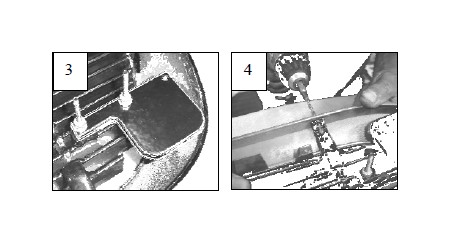
Fasten the brackets in each corner as shown (3). Use the machine screws and Nylon lock nuts. Note the eight brackets (four along the top and four along the bottom) welded to the rear of the billet insert. Center the billet into the outer shell (2). Drill a 1/8” hole aligned with the lower mounting tabs (4). Fasten using #8 screws and flat nuts.
Step 4
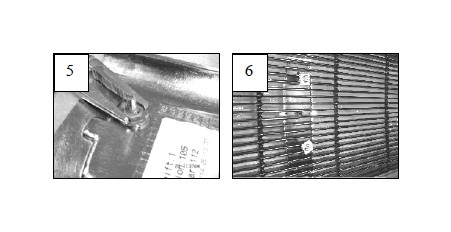
If the vehicle is a Lincoln LT, remove the emblem and attach it to the billet grille (5 & 6). Remove the black plastic inner cover and replace it with the billet mounting plate (p/n 19556 – LT billet mounting plate sold separately).
Step 5
It will be helpful to have an assistant to help with the following steps.
Install the grille assembly onto the hood; DO NOT TIGHTEN THE HARDWARE AT THIS TIME. Thread the nuts by hand onto the mounting studs (7).
Hold the grille in place; attach the factory metal grille brackets to the grille (9 &10). Fasten the bottom hole to the brackets as shown (10). Tighten the mounting
brackets where they attach to the hood.
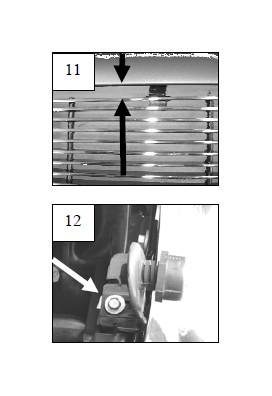
Apply pressure the bottom of the grille and the top; this will close the gap
between the top billets (11). Now tighten the nuts in back of the grille along the
hood.
Slowly close the hood until it grabs the first lock. Check the alignment of the
detent brackets to the rubber hood stops (12). The grille assembly may need
more adjustment; loosen the hardware if needed and adjust.
Slowly close the hood all the way. Check to see if the detent brackets contact the
hood stops. If not, open the hood and adjust the hood stop by twisting the rubber
bushings (12). If more adjustment is needed the location can be adjusted by
loosening the retaining bolts holding the brackets (see arrow in picture 12).
Thank You for purchasing a T-Rex billet grille. 5/15/06