 FREE 1 to 3-Day Delivery on Orders $149+ Details
Fox Body Mustang LED Projector Headlights Installation Guide ('87-'93)
Installation Time
2 hours
Tools Required
- 7/16 open/box end wrench.
- 7/16 socket and socket wrench.
- Wire cutter/stripper with (8) 14-16Ga. Wire splicer.
- Tube black RTV gasket sealer.
Installation
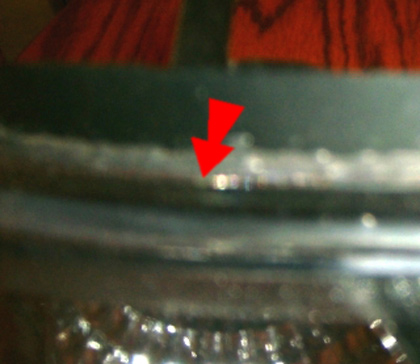
1. Place a bead of Black RTV sealant around the clear lens of your new head lights between the clear lens and the black backing. Be sure to fill channel/seam completely so no moisture can penetrate. Let the RTV sealant set up for at least one hour before installation of your new Black One Piece Mustang LED Projector Headlights for the 1987-1993 Fox Mustang.
2. Disconnect the negative (-) battery terminal from battery. For safety precautions of electric shock, and/or damage to your head lights.
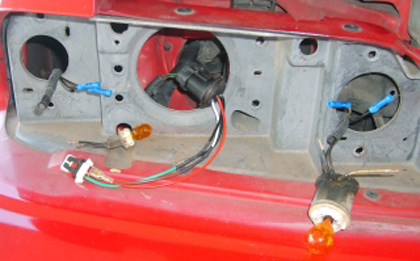
3. Remove the OEM head lights by loosening the (8) 7/16 nuts from behind the lights on each side of your Mustang. Be sure to keep the (8) nuts for the installation of the new head lights. With a slight turn of the side marker, head light, and turn signal remove the bulbs and discard the OEM head lights, and head light bulb.
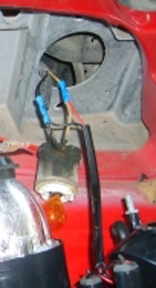
4. Cut and strip the side marker lights, turn signal lights about 2 inches from behind the bulb socket. Only cut the Black wire and the Striped wire on both sides drivers and passengers side of the Turn Signal Bulbs. Crimp (2) splicers at the car side of the wires for reinstallation of head lights. Install wiring harness into the socket where the OEM light bulb plugs in. As shown below.
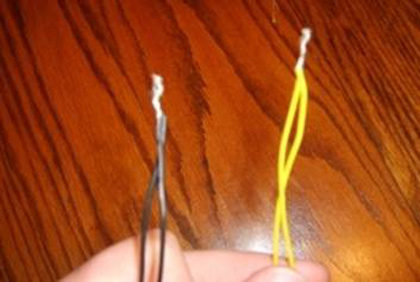
5. Strip and connect the Yellow and Black wires from the "Angel Eye Rings". As shown below.
6. Next twist the Black wires of the "Angel Eye Rings" to the Black wire of the Side Marker (aka Parking Lights) light bulb together and place into the 14-16Ga. Splicer and crimp. Twist the Yellow wire to the Brown wire of the Side Marker bulb together and place into the 14-16Ga. Splicer and crimp. As shown below.
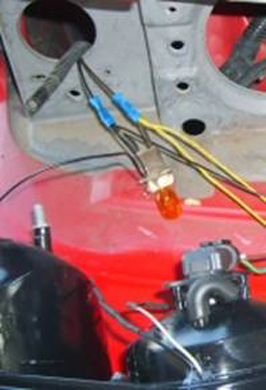
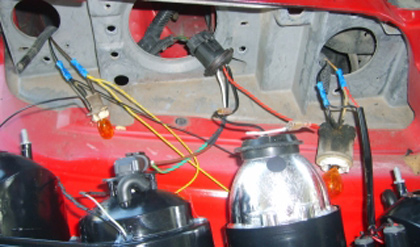
7. Cut off about 3/8 of an inch of the soldered Red and Black wires of the LED's. Twist the Black wire of the LED's to the Black wire of the Turn Signal, place in the 14-16Ga. Splicer and crimp. Do the same with the Red wire to the Striped wire. Leave the Brown wire in tacked to the bulb socket.
NOTE:Only follow this step if you want the three vertical LED's to function as turn signal indicators.
Ifnotwire the three vertical LED's in to the cars Side Marker (aka Parking Lights) as stated in step 6 above.
8. Replace the Turn Signal light bulb, and the Side Marker light bulb into their slots in the new head lights.
9. Place the wires into the holes where they protrude from, then carefully place the new head lights into their slots.
NOTE:If the new head lights do not fit in the spot easily you will need to remove the head light, pull the high beam bulb out turn it where the wires are pointing towards the middle of the car and replace into the housing. Bolt the new head lights into place and tighten the nuts.
DO NOT OVER TIGHTEN THE NUTS.
NOTE:There will be 3 nuts that are easy to tighten with the 7/16 open/box end wrench. The only one that will be tough is the top nut on the turn signal studs of both sides. You will have to attack these ones with 7/16 socket wrench. From the top of the car, this will still be kind of tough but it works better this way.
10. Repeat steps 4 through 9 for the other side of your Mustang.
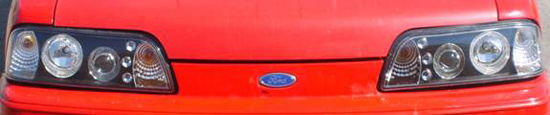
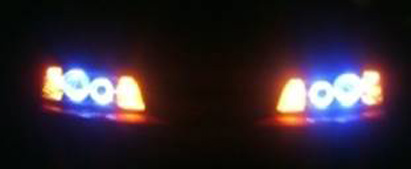
11. Turn on the parking lights and check if the side marker, angel eye rings, LED's, and the turn signals are working. The LED's will only work with the turn signal and hazard lights (if you wired the LED's into the turn signal lights). Be sure to check the high and low beam head lights. Your new head lights should look like the ones pictured below.
12. Enjoy the complements, stares, and night driving again.
Installation instructions provided by AmericanMuscle customer Brandon Craddock
Related Guides
-
Installation
-
Installation
-
Installation

