 FREE 1 to 3-Day Delivery on Orders $119+ Details
Best Sellers


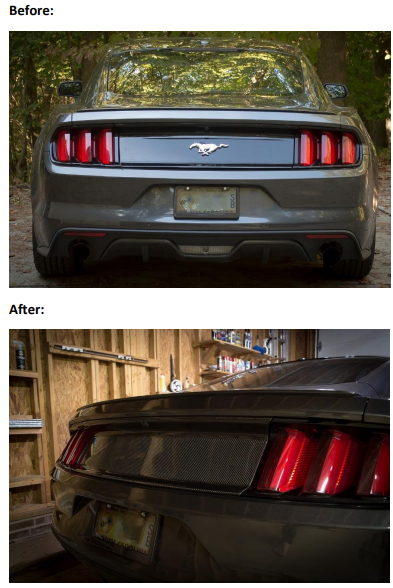
How to Install Anderson Composites Emblem Delete Decklid Panel - Carbon Fiber (15-18 All) on your Ford Mustang
Installation Time
30 minutes
Tools Required
- 5.5mm Socket
- 7mm Socket
- Plastic/Non-Marring Trim/Pry Tool
- Masking Tape or Towel
- Phillips-head Screwdriver

Shop Parts in this Guide
Note: Though carbon fiber is known for its strength, you should still handle the decklid with care. It is easy to scratch or damage, and when damaged cannot be easily repaired.
Installation Instructions
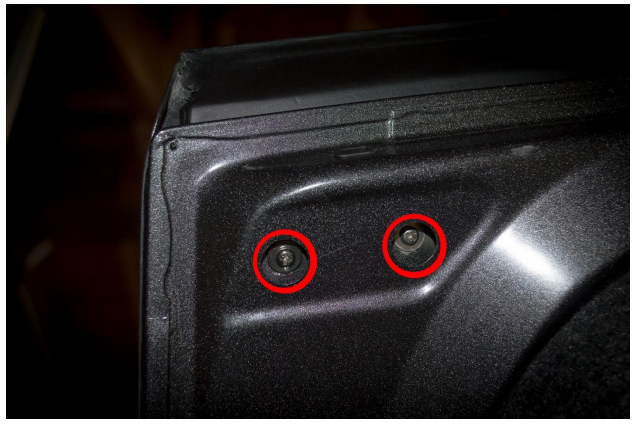
1. Begin by opening your trunk and identifying the two plastic tabs on the inside of the trunk lid.
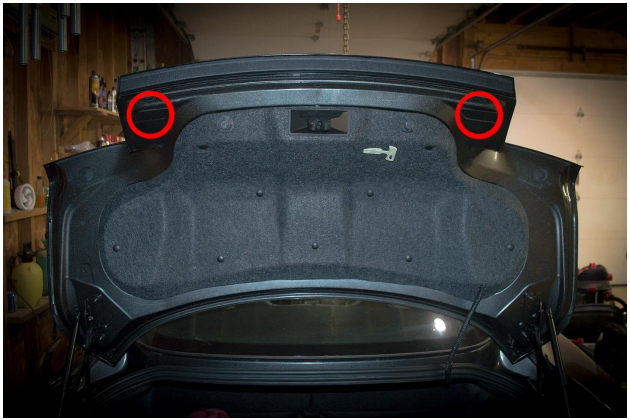
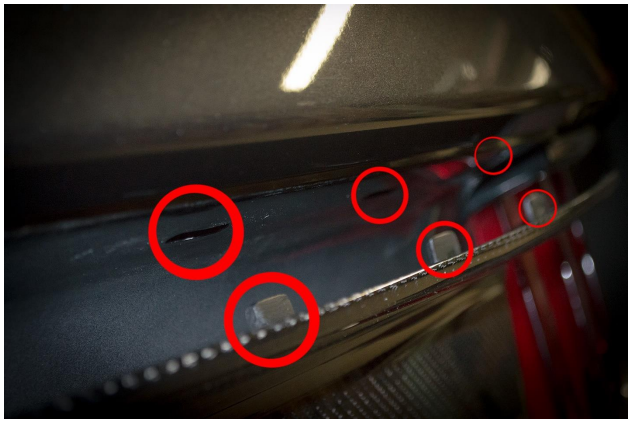
2. Remove the two (2) plastic panels by hand, exposing four (4) total 7mm bolts; two (2) on each side securing the bottom of the decklid in place. Remove them.

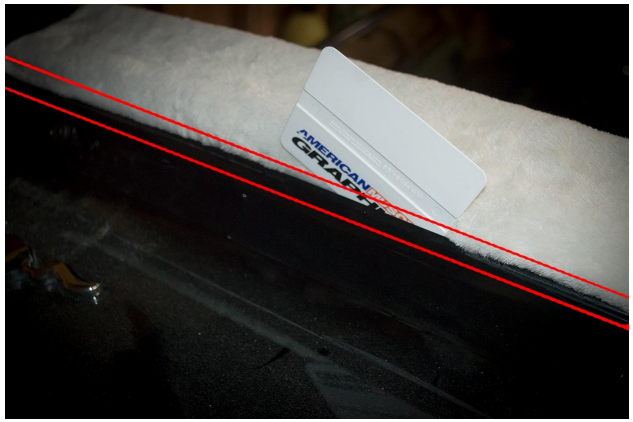
3. After removing the screws, you’ll want to use masking tape or a towel to prevent damage to your trunk lid, tucking it between the decklid and the trunk lid. You can then use your plastic/non-marring pry or trim tool to carefully pry the top of the decklid away from the trunk lid.
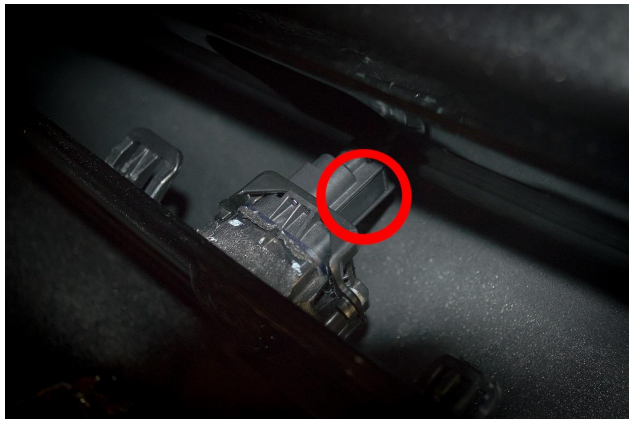
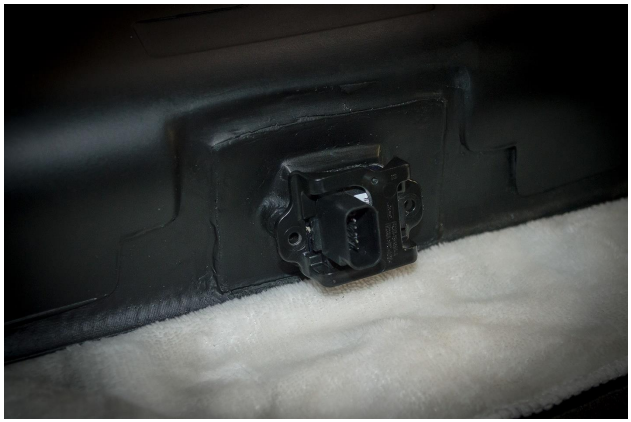
4. Once the decklid is separate from the trunk lid, you’ll want to carefully disconnect the rear view camera by squeezing the right side of the connector and pulling it out.
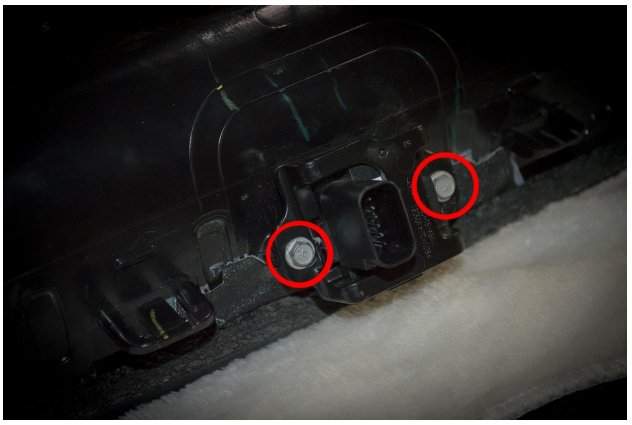
5. Identify the two (2) 5.5mm bolts securing the rear camera in place. Take note of the orientation of the camera, and then remove these bolts.
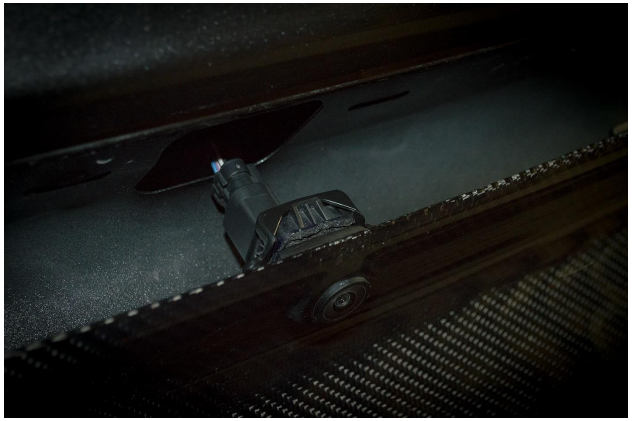
6. Remove the phillips-head screws from the back of the carbon fiber decklid (there are six (6) total) and position the camera so that the connector is towards the left side of the decklid.
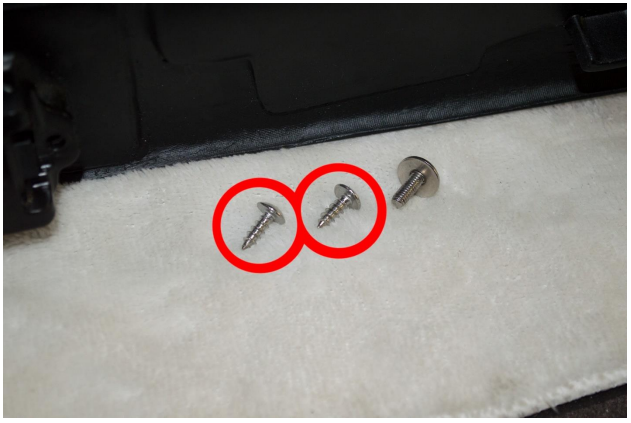
7. Using the two (2) screws with thicker threads, secure the camera to the carbon fiber decklid using a phillips-head screwdriver.
8. Connect the camera back to the car; at this point, it might be a good idea to step into the car and put the car into reverse, ensuring that the rear view camera is functional and oriented correctly.
9. Line up the decklid’s inserts with the holes on the trunk lid, sliding it into place. Bear in mind that they do not clip in, so you’ll want to be careful that the decklid does not slip out of place during the next step.
10. Using the four (4) thinner-threaded screws and washers, use the phillips-head screwdriver to screw them into the holes on the bottom of the trunk lid, securing the bottom of the decklid to the trunk lid.
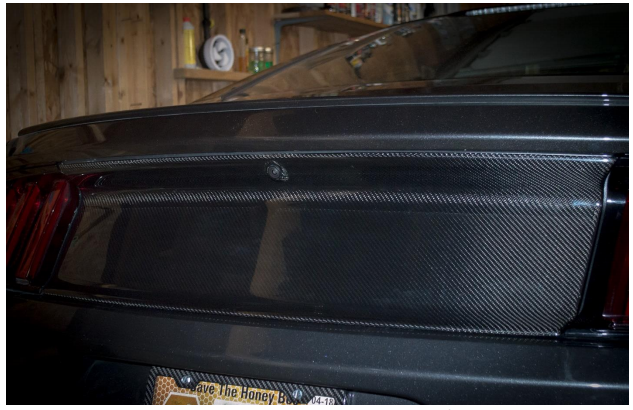
11. Close the trunk, take a step back, and admire your newly installed carbon fiber decklid. Installation is now complete.
Installation Instructions Written by AmericanMuscle Customer on 10/6/17
