 FREE 1 to 3-Day Delivery on Orders $149+ Details
How to install a BBK 78mm Throttle Intake on your 1996-2004 GT Mustang
Installation Time
2 hours
Tools Required
- 1/4 or 3/8 Drive Ratchet
- 5/16 socket
- 10mm deep socket
- 3 extension
- 4 and 6mm Allen wrenches
- Small pliers
- Phillips Screwdriver
Shop Parts in this Guide
Installation
1. The first step you will want to take is to inspect and clean the new BBK throttle intake. It is a good idea to look for rough edges, metal shavings, dirt or other things that you don’t want to have sucked down into your engine. After you have done this, you will want to disconnect the negative terminal on your battery. Now you will remove the following from the stock throttle body and plenum:
- Air intake hose
- Electrical connector from the TPS
- Electrical connector from the IAC valve
- Vacuum hose next to TPS
- Vacuum hose located behind plenum near the throttle cable bracket
- Hose connected to IAC valve
- Hose connected to PCV fitting
- Remove the two EGR tube bolts

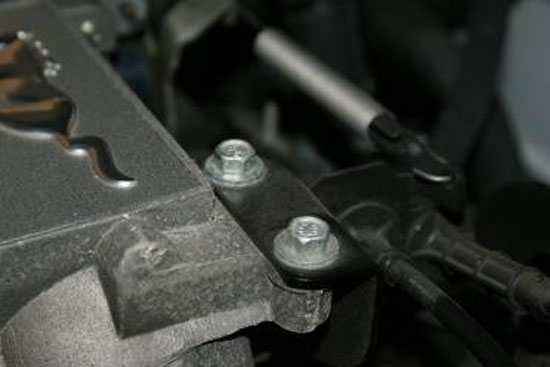
2. Remove the two throttle cable bracket screws.
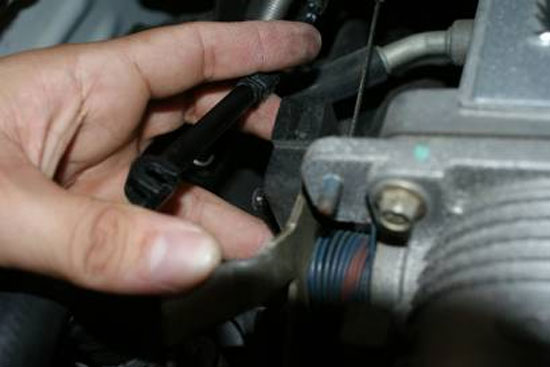
3. Now remove the throttle spring from the throttle body. Then remove the cruise control cable, by pulling upwards on the fitting. It will be snapped on pretty tight, but with some coaxing it will come up and off. Here is what it will look like:
4. Remove the throttle cable from the stock throttle body. The cable will curl up and under the guide, and is fitted with a metal stud that needs to pop out to release. It helps if you push the throttle forward with your finger in order to loosen the slack on the cable.

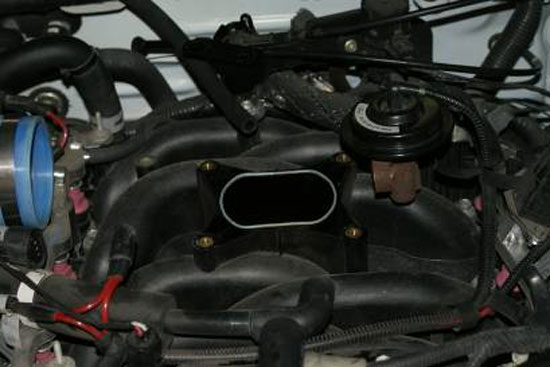
5. With everything disconnected, you can continue and remove the five bolts that hold the plenum to the intake manifold. Your ratchet extension will come in handy here. With the bolts removed, you can pull up and remove the throttle body and plenum as one piece and set it aside.
6. With the plenum off, inspect the gasket and mating area on the intake manifold to make sure it is okay, and wipe the surface of any dirt, leaves or other things. If you’re working in an area that has flying debris, it may be a good idea to put a towel over the opening to keep anything from going into your intake manifold.
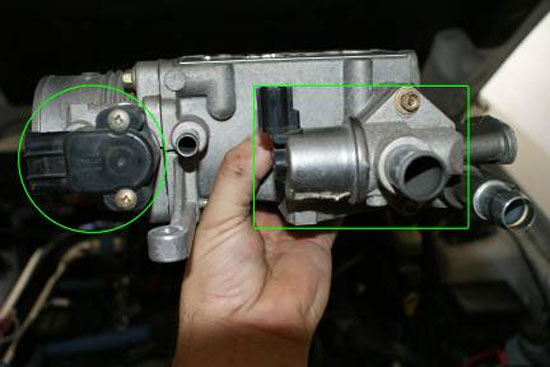
7. Now return to your stock throttle body / plenum and remove the following:
- Throttle position sensor (2 screws you won’t need to reuse)
- IAC Valve (2 bolts you will need to reuse)
8. On the new BBK unit, you can now install the TPS using the two screws supplied with your kit. Place the supplied TPS bushing onto the TPS shaft. You will turn the TPS downward to match up the slot with the blade, and then turn it upwards to match up the mounting holes.
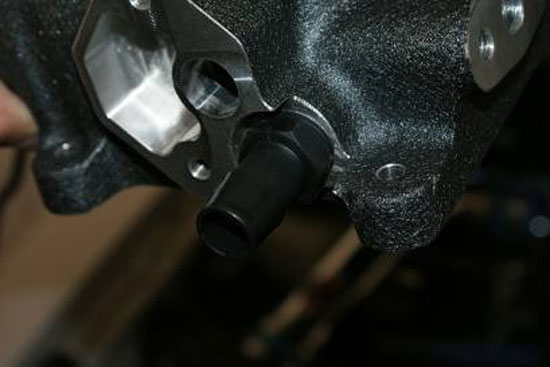
9. Now determine which PCV fitting you need to use and install it into the plenum.
- 96-01 – you will use the small PCV fitting
- 02-04 – you will use the Large PCV fitting
*You will need to screw the fitting into place as much as you can by hand, and then use a pair of pliers to turn it into the plenum all the way. It can be a bit difficult to do because the plenum limits where you can get a grip on the fitting. You must install it all the way in, or else the IAC valve will not be able to sit onto the plenum correctly.
10. Next use the supplied IAC gasket to mount the IAC valve onto the new unit, using the original bolts.

11. You are now ready to place the plenum back onto the intake manifold and line up the mounting holes. You will only use 4 mounting points for this unit, and you will use the four 6mm Allen bolts supplied with the kit. If you need more torque on these bolts, you can use the open end of a box wrench to turn your Allen wrench further.
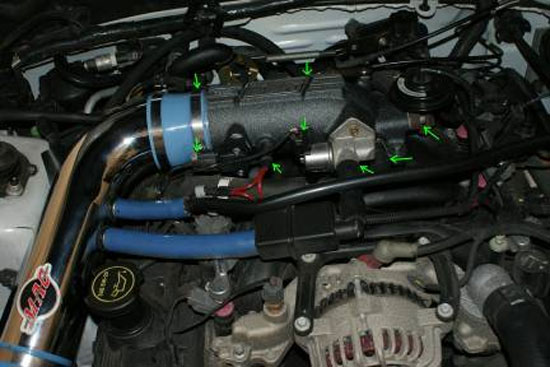
12. Next go around your throttle intake and reconnect all the connections.
- Reconnect the electrical connector on the TPS
- Reconnect vacuum hose next to TPS
- Reconnect electrical connector on IAC valve
- Reconnect vacuum hose on IAC valve
- Reconnect vacuum hose onto PCV fitting
- Use supplied gasket and original bolts to reconnect the EGR tube
- Reconnect vacuum hose near throttle cable bracket

13. After the connections have been reestablished, you can move on to reconnecting the throttle cable bracket, throttle spring, throttle cable and cruise control cable. First start off by bolting on the throttle cable bracket with the new 4mm Allen bolts supplied in the kit. Now channel your throttle cable under and up into the guide, which is the reverse of how you removed it. The guide will be different from the stock one, in that you will need to snap the cable past a little plate that keeps it from coming off the guide.

14. You will need to push the throttle forward with your finger to get some slack and pop the metal stud into the new location hole. It is a tighter fit than stock was, but it will eventually pop into the hole and sit correctly. Next, snap the cruise control cable end into place by pushing downwards on it. Reconnect the throttle spring into place. Give the throttle a few pushes with your finger to make sure your cables are correct. Ensure that they're not snagging on anything, and the throttle is not sticking open.
15. Lastly, reconnect the air intake hose and negative battery terminal. The new throttle body opening will be much larger than stock so you might have to do a bit of wrestling to stretch your rubber coupling around it.
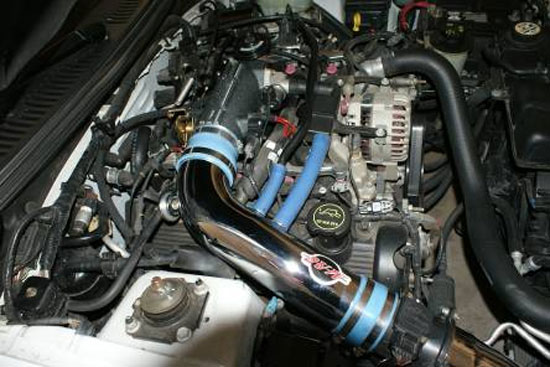
16. Start your engine and let it run at idle for a few minutes to let the computer learn about the new air volume that’s been introduced. Press the gas pedal a few times to make sure it is engaging the throttle correctly and is not sticking open. Take it out for a test drive and enjoy the extra ponies!
Installation instructions provided by AmericanMuscle customer Michael Cortez 11.10.08
Related Guides
-
Installation
-
Installation
-
Installation

