FREE 1 to 3-Day Delivery on Orders $119+ Details
Best Sellers


How to Install Borla Stinger S-Type Cat-Back Exhaust on your Mustang
Installation Time
2 hours
Tools Required
- 3/8 drive Ratchet
- 15mm Socket
- Short Ratchet Extension
- Quality Spray Lubricant such as PB Blaster
- Ramps or Jack and (2) Jack Stands or lift
- Wheel Chock(s)
- Flat Head Screwdriver
- Pry Bar (Optional)

Shop Parts in this Guide
Overview:
This installation guide will cover installation of the Borla Stinger S-Type Catback Exhaust for all Mustang GTs from 2005-2009. Installation of this exhaust system does not require a custom tune (although it certainly would not hurt).
Warnings: Exhaust systems get extremely hot. Do not drive the vehicle directly prior to removing the exhaust system to avoid burns. Always wait for the exhaust system to cool down before working on it.
1. Check your Borla exhaust inventory. You should have two (2) mufflers, two (2) over-axle pipes, two (2) straight pipes and four (4) exhaust clamps. My system also came with a Borla sticker and a Borla baseball cap.
2. Spray quality spray lubricant such as PB Blaster on each of the four (4) OEM exhaust clamp nuts and bolts. This will help to loosen the bolts. It If possible, let the spray lubricant sit on the hardware overnight to increase ease of removal of the old clamps. Reference the pictures below for the locations of the four (4) clamps. There is one directly behind each muffler and one to the rear of each catalytic converter where the midpipe meets the H-Pipe.
3. Make sure the vehicle is turned off and the emergency brake is on. For automatic vehicles, the transmission should be placed in park. For manual vehicles, the transmission should be placed in first gear if you will be raising up the rear end using jack stands or ramps.
4. PLACE WHEEL CHOCKS BEHIND THE FRONT WHEELS TO ENSURE CAR DOES NOT ROLL BACK. MAKE SURE THE CAR IS ON A FLAT SURFACE SINCE THE EMERGENCY BRAKE IS LOCATED ON THE REAR WHEELS SO NOTHING IS STOPPING THE CAR FROM ROLLING ONCE THE REAR WHEELS ARE IN THE AIR. You can skip this step if you are using a lift.
5. Raise the rear of the car with a jack and place onto jack stands or drive the rear of the vehicle onto ramps or drive the vehicle onto a lift and ensure that the vehicle is secure.
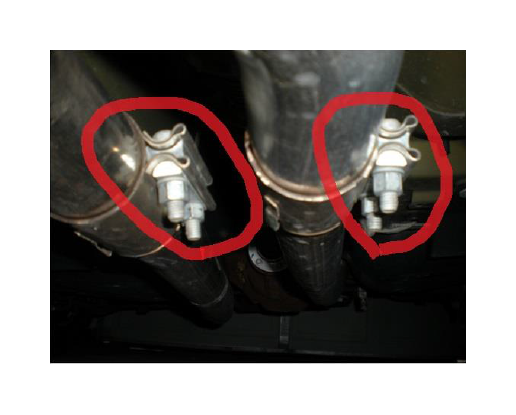
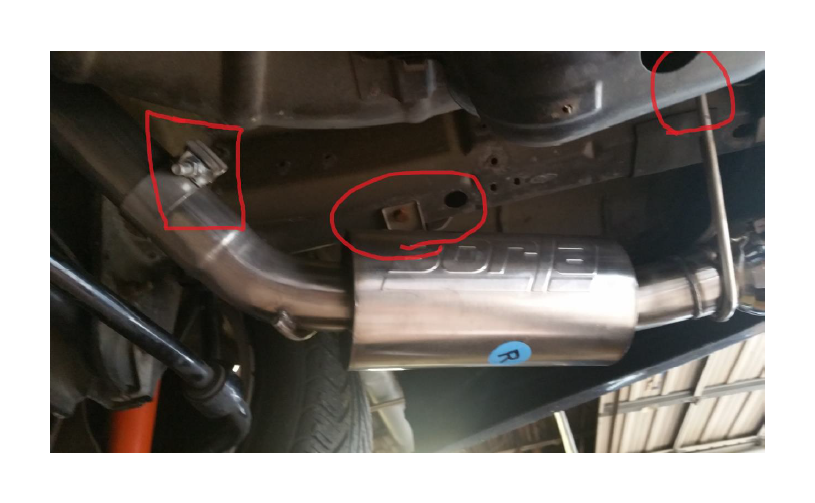
6. Using the ratchet, short extension and 15mm socket, loosen the clamp bolt behind one of the mufflers (choose either left or right) so that the clamp is no longer securing the muffler. Wiggle the muffler back and forth until it comes loose from the over-axle pipe. If the muffler will not come loose, use the flat head screwdriver or pry bar to pry it loose while wiggling it back and forth. If this does not work, liberally spray additional penetrating lubricant on the pipe-to-pipe connection and repeat this process until it comes loose. See picture directly below for guidance - the clamp bolts are circled.
Right Muffler:
Left Muffler:
7. Once the muffler is loose, pull it out of the exhaust hangers and away from the vehicle. Repeat this process on the other muffler.
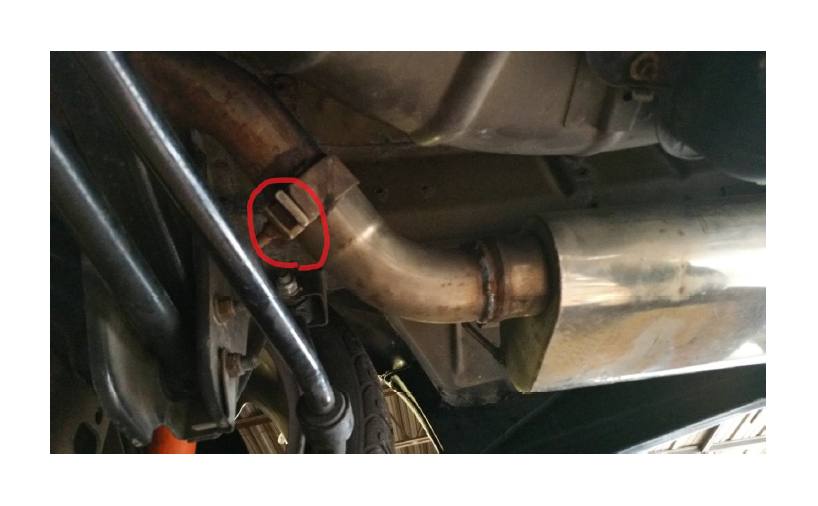
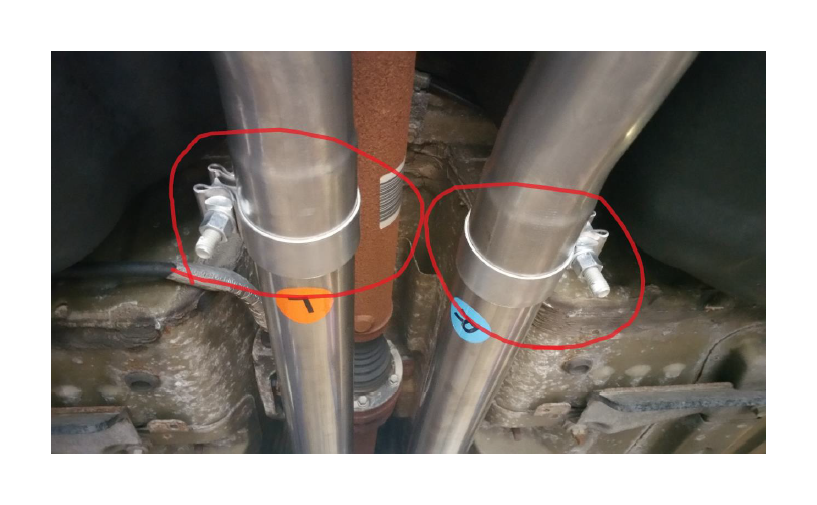
8. Using the ratchet, short extension and 15mm socket, loosen each of the two (2) bolts on one of the clamps connecting the OEM over-axle pipes to the H-Pipe (these are located near the catalytic converters, on the rear side). See picture directly below - the clamp bolts to be removed are circled.
9. Repeat the process described above on the other over-axle pipe to H-Pipe clamp.
10. Pry the tab back on each of the clamps using the flathead screwdriver. The tabs are visible to the left side of the clamps on the picture above.
11. Wiggle the over-axle pipes back and forth until each comes loose from the H-Pipe and remove the over-axle pipes from the vehicle. If the pipes will not come loose, use the flat head screwdriver or pry bar to pry them loose while wiggling it back and forth. If this does not work, liberally spray the penetrating lubricant on the connection and repeat this process until each of the pipes comes loose. Do not damage the H-Pipe or these sleeve clamps since the new Borla over-axle pipes will connect to the H-Pipe using the OEM sleeve clamps.
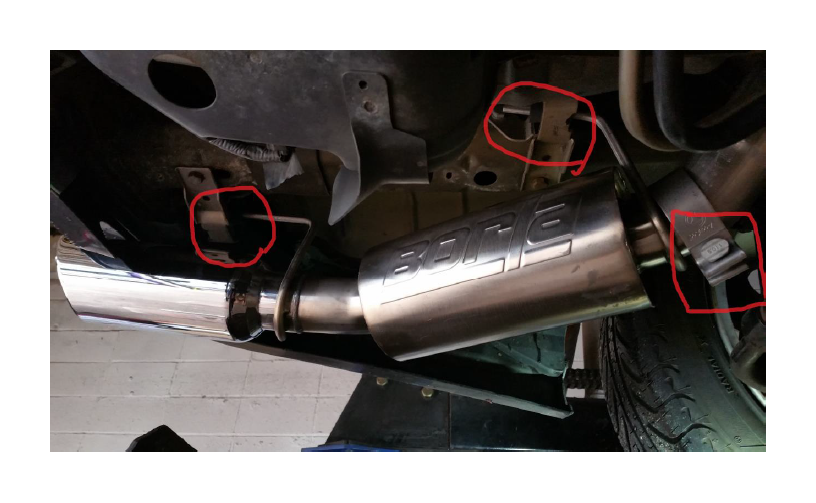
12. Place the right Borla muffler into the OEM exhaust hanger rubber isolators so that it is hanging in the vehicle. See pictures directly below - the exhaust hangers are circled.
Right Muffler:
Left Muffler:
13. Place one of the OEM sleeve clamps over the straight portion of the new Borla piping and the OEM H-Pipe. Tighten the clamp just enough to hold it on. See picture in step 8, above.
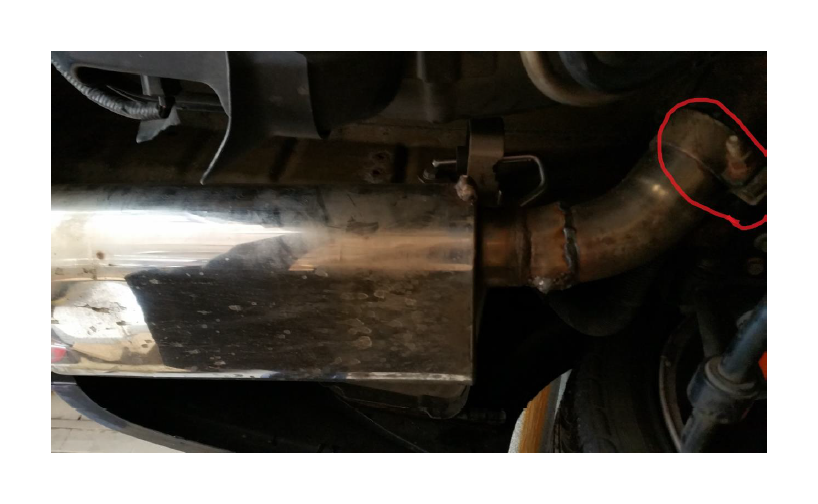
14. Slide a new exhaust clamp onto each end of the left Borla over-axle pipe so that it is positioned for installation. Slide the over-axle pipe onto the straight pipe (which is now connected to the H-Pipe based on step 13, above) and into the new muffler. I found it easier to start with the muffler side. Please see picture below - the over-axle pipe to straight pipe connection is circled.
15. Move the exhaust pipes around until you are happy with the positioning and tighten both clamps (i.e. both the axle-back clamp and the over-axle pipe clamps) just tight enough to hold them on using the ratchet, short extension and 15mm socket. Do not overtighten because you can damage the exhaust flanges. You may also need to loosen and reposition the exhaust pipes later to ensure that the other side is even and that it is completely straight.
16. Repeat steps 10-13 for the left side.
17. Once you are satisfied with the positioning of the exhaust system, tighten all clamps to 32 ft. lbs.
18. (Optional) Flash the PCM with a new tune.
19. Start the engine and check for any exhaust leaks while the engine is running. Exhaust leaks can be found by listening for the location of the loud sound and sometimes by feeling the escaping exhaust at the leak.
20. Drive car for about thirty (30) minutes and check again for leaks. Tighten anything if necessary.
21. Enjoy your amazing new exhaust sound!
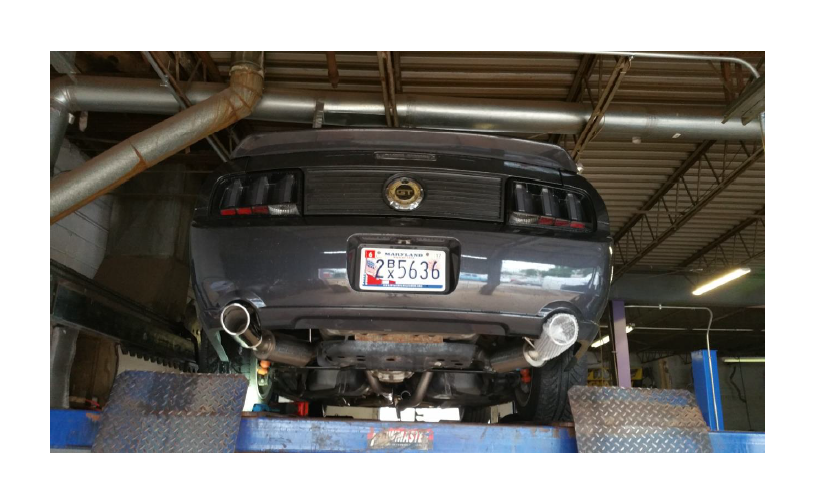
Before:
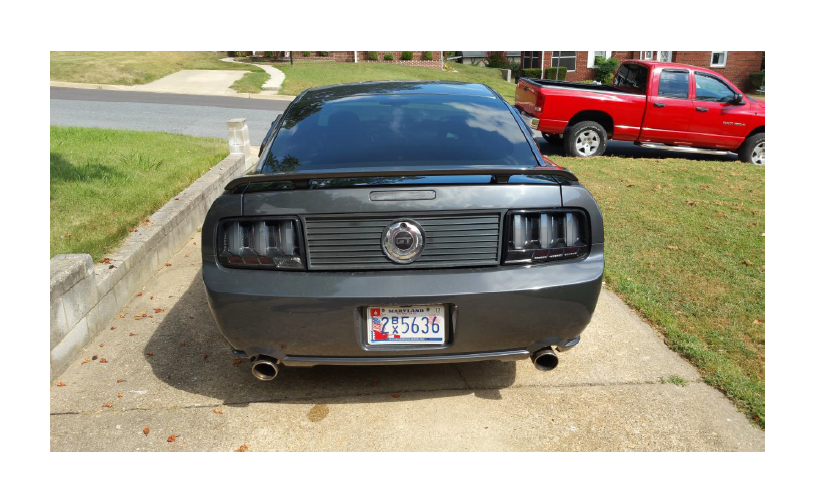
After: