 FREE 1 to 3-Day Delivery on Orders $119+ Details
Best Sellers


How to Install Ford Performance Front Tow Ring Kit (13-14 GT, BOSS) on your Ford Mustang
Installation Time
3 hours
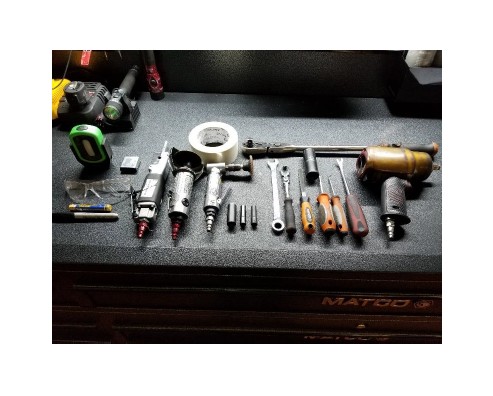
Tools Required
- Floor jack and 2 jack stands (or a lift)
- Fastener removal tool (or flat head screw driver)
- 13mm Box wrench
- 1/4” Drive 7mm socket
- 1/4” Drive 8mm socket
- 1/4” Drive 13mm socket
- 1/4” Drive Ratchet
- 1/2” Drive Breaker bar or Impact wrench (optional)
- 1/2” Drive 19mm socket (optional)
- Philips screwdriver
- Small pick tool or pocket screwdriver
- Masking tape
- Marker or chalk
- Tape measure
- Air compressor
- Cut off tool
- Air saw
- Die grinder (sandpaper will work but may take much longer)
- File
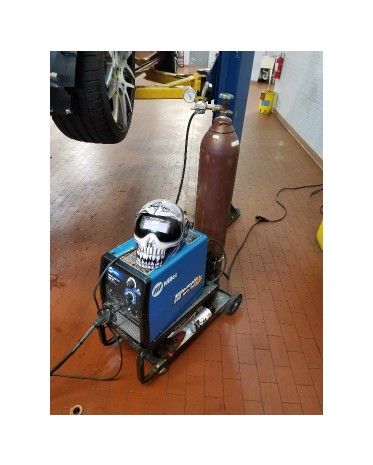
- Mig welder
- Safety glasses
- Welding mask and gloves
- Flashlight
- Big piece of cardboard
Shop Parts in this Guide
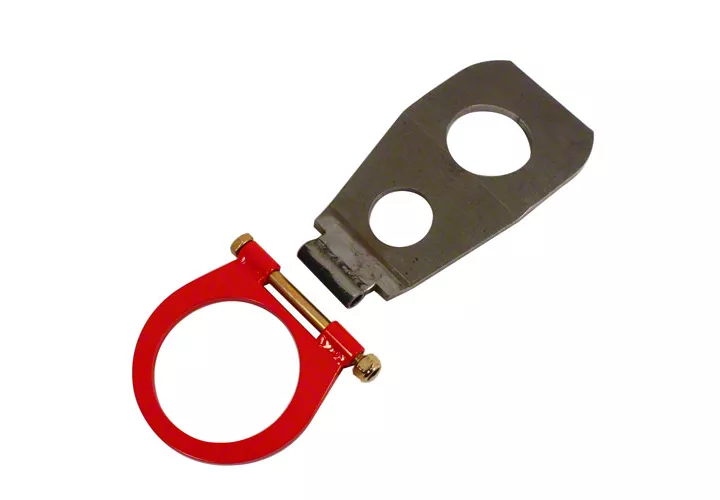
Included in kit:
-Tow ring (1)
-Tow ring bracket (1)
-Bolt and nut to attach tow ring to bracket (1)
General Summary of Install:
1. Remove front bumper cover
2. Find center point of bumper and cut out notch
3. Weld tow ring bracket into place
4. Cut bumper and lower grille to fit tow ring bracket through
5. Install bumper, then install tow ring to bracket
Step 1: Using a floor jack at the designated lifting points raise the front of your mustang so the front wheels are off the ground and install jack stands under the frame rails or on the pinch weld. If using a lift set the lift at the lifting points shown by little arrows on the side skirt on all 4 corners and lift the car just so the wheels are off the ground.
Step 2: Open hood and remove upper radiator cover by removing 8 push clips with a fastener removal tool.
Step 3: After removing the radiator cover on top of the bumper cover you will remove four 8mm bolts and 4 Philips screw push clips.
Step 4: At this point if you choose you can remove the wheels for additional room but you can easily access the bolts on the inside of the fender well by simply turning the front wheels. To access the left side, turn the wheel to the right and to access the right side turn the wheel to the left. There are three 7mm bolts per side.
Step 5: Now you will get under the front of the vehicle and remove the front splash shield. There at seventeen 7mm screws holding this shield in.
Step 6: From the bottom using a flashlight look up behind the bumper on each side and unplug the side marker lights by simply pushing the tab down on the back of the connector and pulling it off.
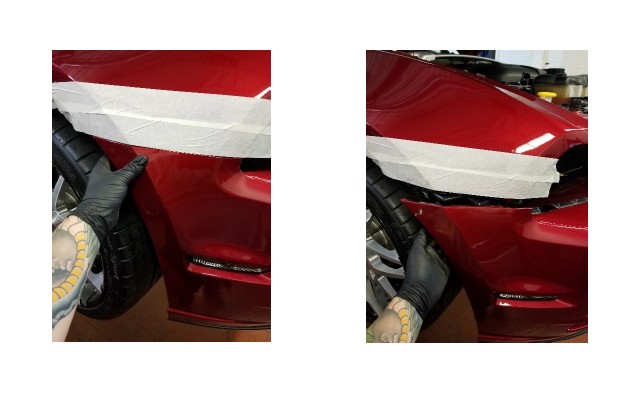
Step 7: Install masking tape or painters tape right on the top of the line where the fender and bumper meet on each side to protect your paint from any accidental scratches when removing the bumper cover. Just below where you tape, at the top of the bumper where it meets the fender you will grab it from inside the fender well and pull the corners of the bumper straight out.
Step 8: Prepare somewhere to lay the bumper cover where it won’t get scratched or damaged. I laid mine on a piece of foam I had laying around. Now you will pull the top center of the bumper cover back just enough to get your hand behind it and unplug both fog lights. You can use a small pick or pocket screw driver here to lift the tab up and pull the plug off. Remove the bumper cover with fog lights and place to the side in a safe location.
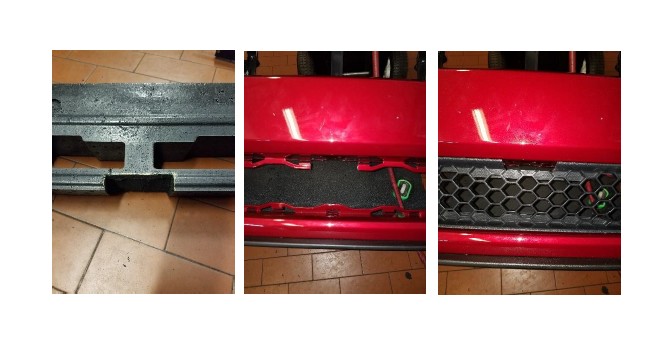
Step 9: Now you will see a piece of black Styrofoam across the bumper with 4 black plastic push pins holding it in, 2 per side. Remove these with your fastener removal tool or flat head screwdriver and remove the Styrofoam and put it off to the side for now.
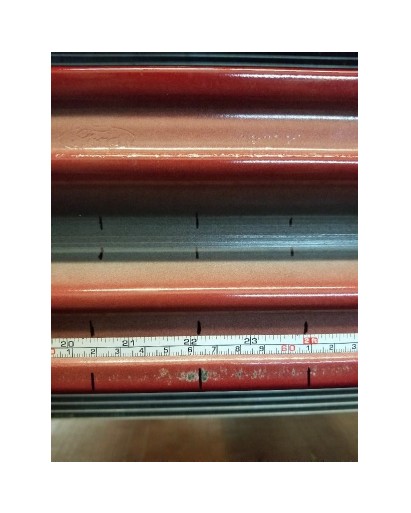
Step 10: Using a tape measure find the center point of the bumper. My bumper was approximately 44 inches but be sure to measure your own as some vehicles may vary. Mark the half way point and then measure the total width of the bracket included with your tow ring. Mine measured 3.5 inches. So now we want to divide the bracket width in half which is 1.75 inches and measure this distance on each side of our previously measured center point and mark them. Keep this measurement handy as you will need it 3 more times for this install.
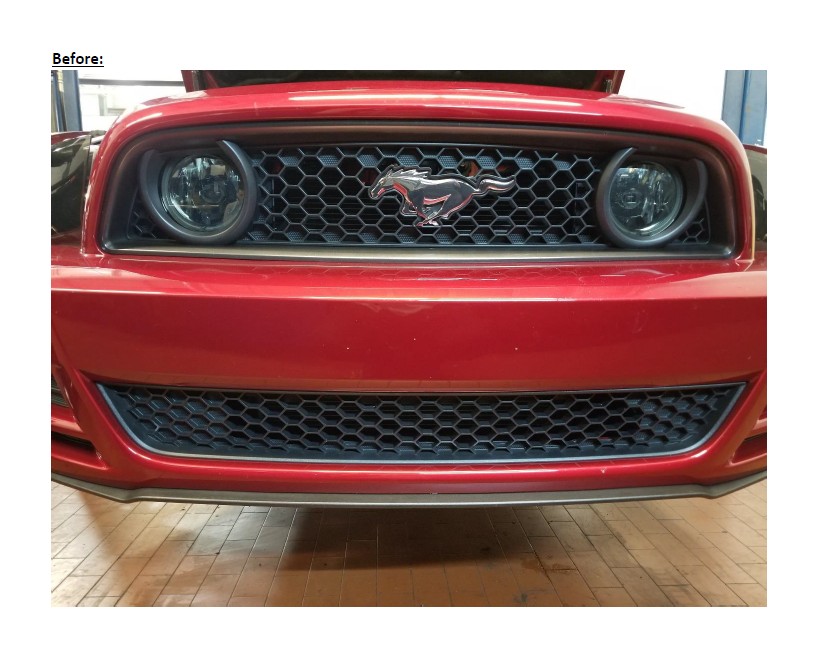
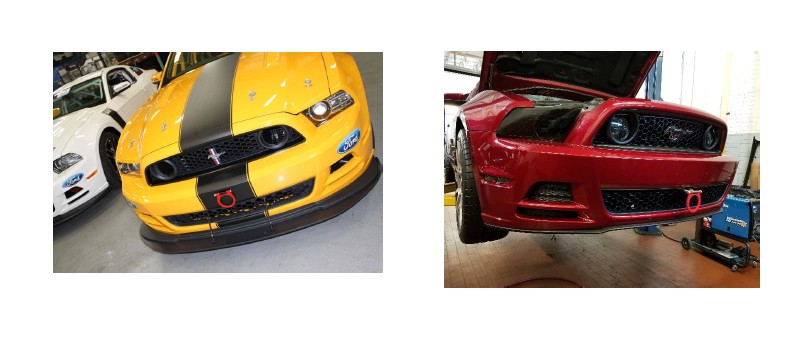
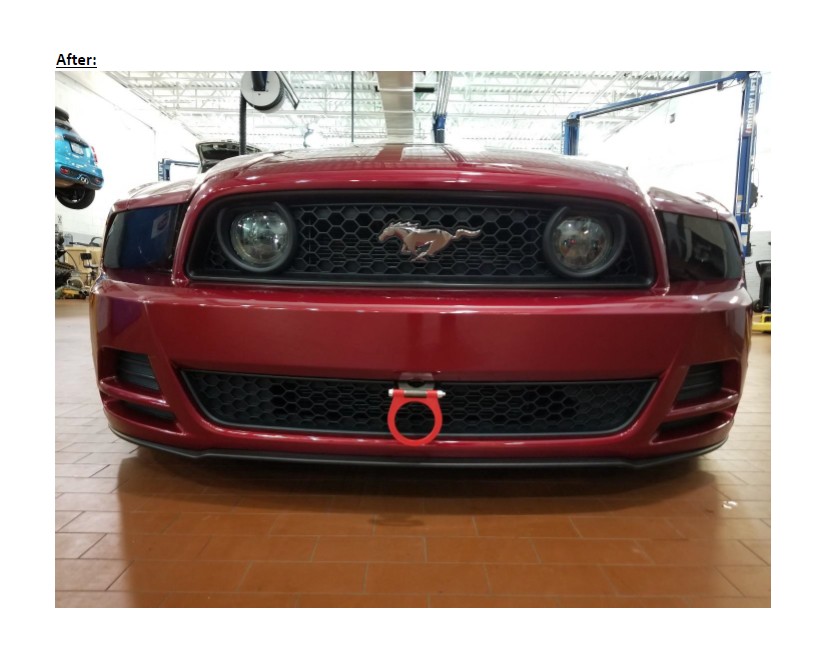
Step 11: Remove temperature sensor located on bottom of bumper with fastener removal tool or flat head screwdriver. Next you will use a piece of cardboard to put in front of the radiator to protect it from any debris while cutting and welding the bumper. For this part, you can choose two different options. If you want the hook to come through the center of the bumper like the factory Boss 302R you will be cutting the top lip off the bumper and if you want it to come through the lower grill below the center bumper you will be cutting the lip off the bottom of the bumper. The picture of the yellow Boss is a generic picture I found on Google images and is not my photo. The red one is the finished product of my own vehicle just shown here to show the difference of where the hook can come out.
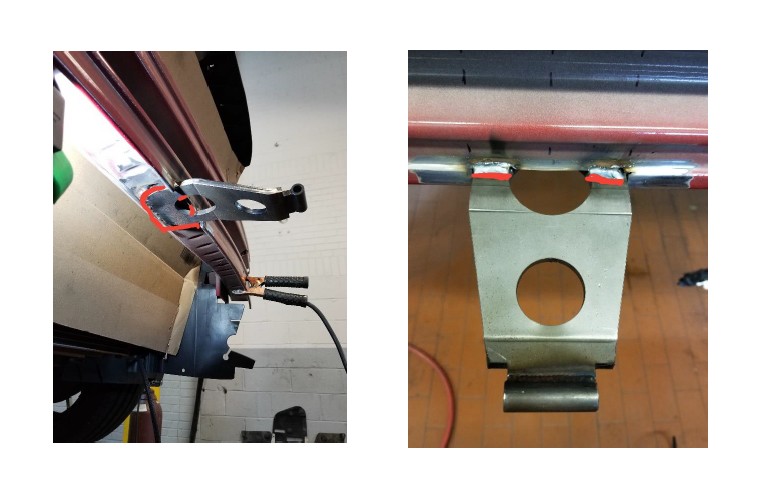
Step 12: Depending on your choice to cut the top or bottom (I chose the bottom so I wouldn’t have to cut a hole in the middle of my bumper) begin to cut the lip off the bumper so the bracket will sit flush to weld on. After cutting use a die grinder, sand paper or file to clean up the edges and use the die grinder or sand paper to clean off the metal surfaces that will be welded. Line the bracket up so it sits flush against the bumper and is straight. There are lines on top of the bracket to help you line it up straight. Spot weld the bracket on, DO NOT do any permanent welds yet, first the fitment and cuts on the bumper need to be done.

Step 13a: If installing on the bottom of the bumper, remove lower grill insert. From the back of the bumper you will see small tabs. Push down on these tabs with a flat head as you pull on the front of the grill to release it. Now find the center point of the bumper along the top row of slots where the lower grill attaches. Also find the center point of the lower grill, and the black Styrofoam piece removed earlier. Take your measurement of the bracket from earlier and measure the width of it across the center of the bumper, grill and Styrofoam and cut approximately 2-3mm into the Styrofoam and grill and for the bumper cover just cut out the part with the slots that hold the grille. (See images here for more clarity)
Step 13b: If you are welding on the top of the bumper and want to have the tow ring come through the middle using a straight ruler or something similar hold it at the lowest point of the bracket and straight to the bumper. Mark the bumper here and measure from this point to the top of the bumper. Now take this measurement and measure inside the bumper cover from where it rests on top of the bumper down to whatever your measurement was. Find the center point of the bumper from left to right. Now measure the width and thickness of the bracket where it will be coming through the bumper and using your center point and earlier height measurement cut a slit in the bumper just slightly larger than that width and thickness of the bracket end so it will fit through without rubbing. (sorry no pictures for this method as I did it the other way)
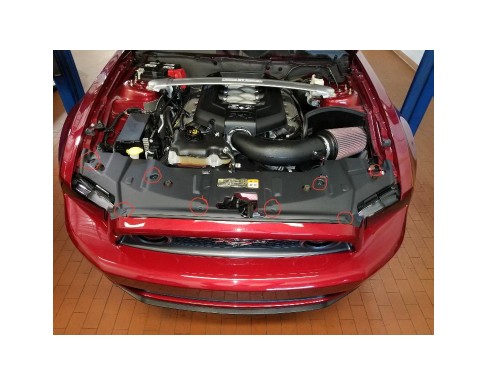
Step 14: After making all your cuts in the bumper cover install it loosely without any hardware to ensure it fits properly over and around the bracket. If anything needs to be trimmed further do so now. If everything lines up properly you can take the bumper cover back off and begin to weld the bracket on permanently. Weld all points of contact to ensure the strongest hold when the vehicle needs to be towed. Make welds where all red lines are located. The same spots are there to weld if you install the bracket on top of the bumper they will just be reversed from these pictures.
Step 15: Let area cool a few minutes after welding. Install Styrofoam piece with 4 push clips. Install front bumper just reversing the disassembly instructions. Hang bumper, connect fog light plugs, line up sides and snap into place, install three 7mm screws on each side, install four 8mm screws and 4 plastic screw clips on top of bumper, plug in side marker lights from bottom, install lower splash shield with seventeen 7mm screws, install radiator cover with 8 push clips. Remove masking tape from fenders. Install lower grill if you removed it by just lining it up properly and pushing it into place. Using supplied nut and bolt install the tow ring to the bracket with a 13mm socket and ratchet on one side and a 13mm box wrench to hold the other side from turning. After fully tightening, the tow ring should still be able to swing freely.
Installation Instructions written by AmericanMuscle customer Corey Davis 09.10.17
