 FREE 1 to 3-Day Delivery on Orders $119+ Details
Best Sellers


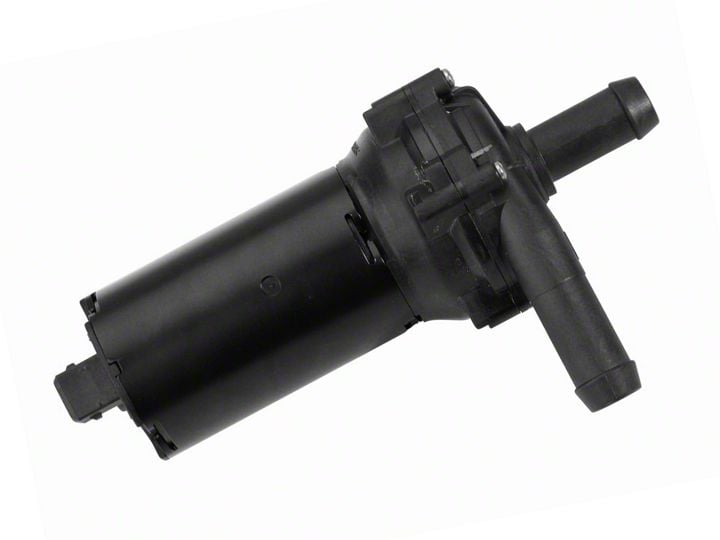
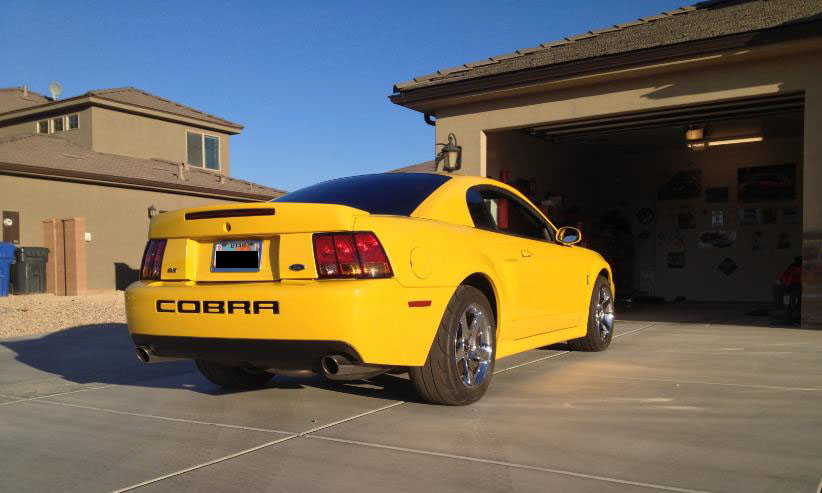
How To Install a Ford Racing Electric Intercooler Water Pump on your 2003-2004 SVT Cobra Mustang
Installation Time
1 hours
Tools Required
- Phillips point screw driver
- Common (Flat head) screw driver
- 10mm socket with 6 or 12 inch extension
- Needle nose Pliers
- Hose clamp pliers
- Safety goggles
- 2 gallons of new coolant
- FT/LB Torque Wrench (100 ft/lb capable)
- 2 inch piece of 16G insulated wire
- Floor Jack
- Jack Stand(s)
- Razor blade/box cutter
- Catch can/ bucket for coolant
- Breaker Bar
- 13/16” deep socket
Shop Parts in this Guide
Step 1. Diagnosis
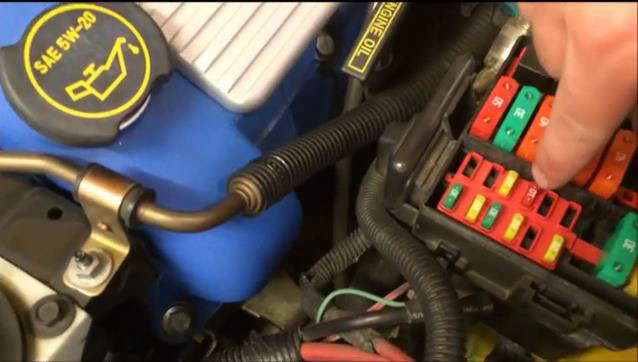
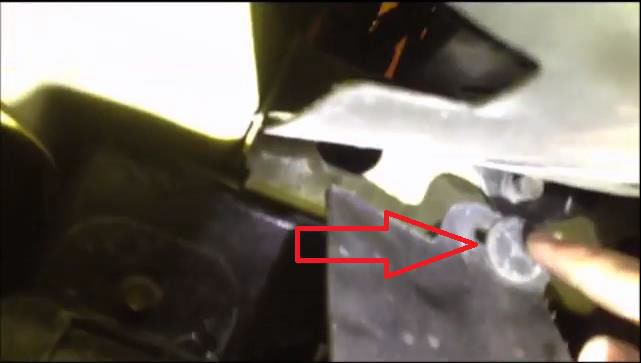
A. Determine the pump itself is bad and has not simply blown a fuse by checking the 10 amp fuse found on the driver side fuse panel in the engine compartment.

B. Remove the 10 amp fuse with a pair of needle nose pliers.
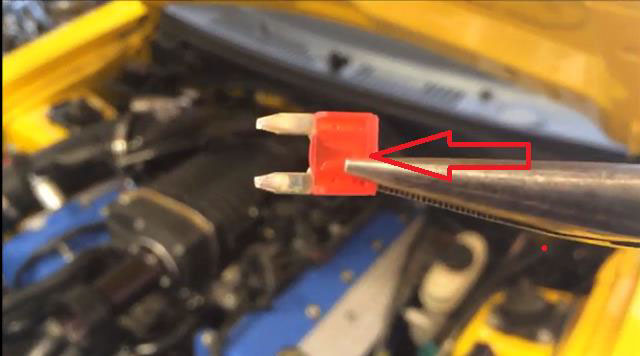
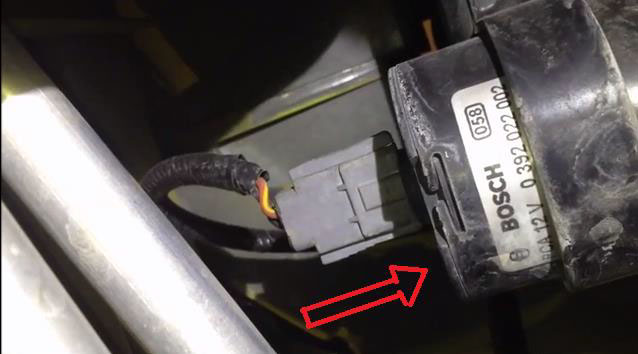
C. Examine the fuse. If the fuse has blown, the circuit will be burned where the above arrow is pointing. This fuse has a continuous piece of metal. This fuse is okay.

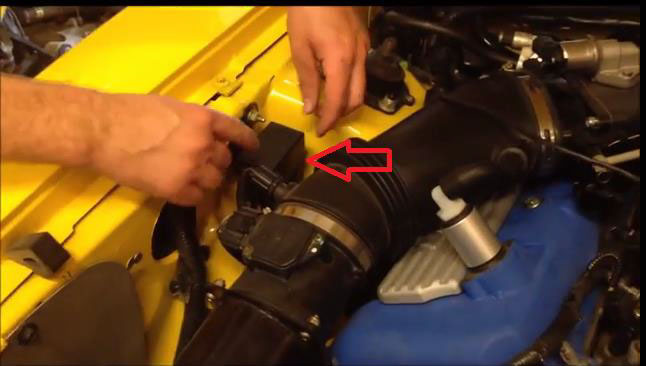
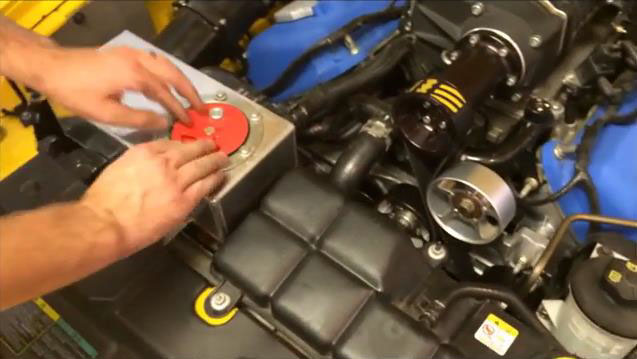
D. Locate the intercooler relay. The relay is found beneath this cover. Pull out on both tabs that hold the cover in place, and then remove the cover.
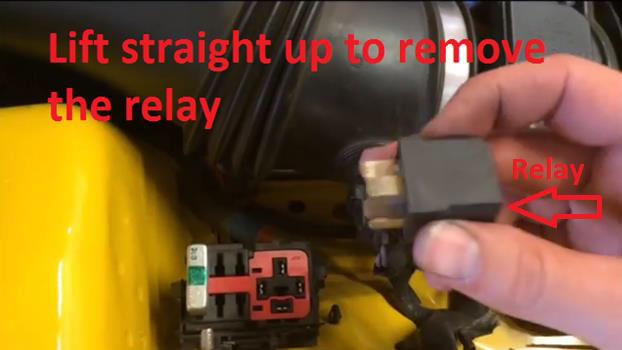
E. The relay is the small black box found beneath the cover. Pull straight up while rocking the relay back and forth to remove the relay.
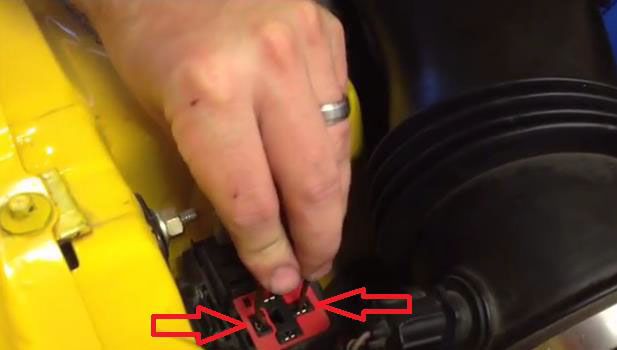
F. With the relay removed, you can manually run the Intercooler pump by using a small piece of wire to connect the circuit. Place the wire on the two opposite ports of the relay. The car does not need the key in the ignition for this to work.
G. If the pump does not operate, it is most likely bad and should be replaced.
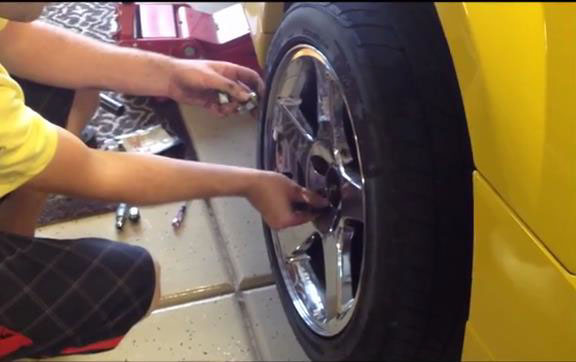
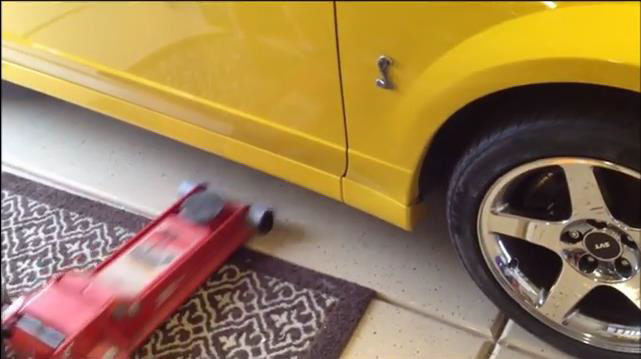
Step 2: Remove the passenger side, front Wheel:
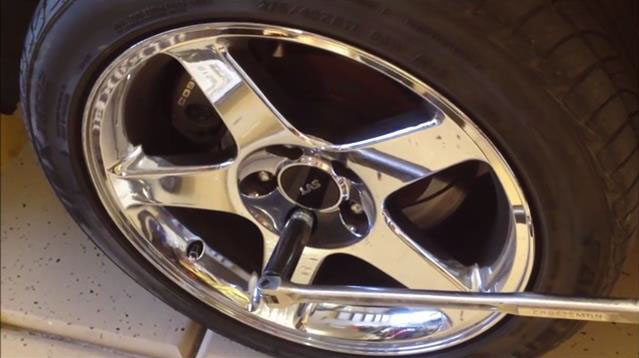
A. Using a 13/16 socket and a breaker bar, break the lug nuts free while the car is still on the ground. Do not remove the lug nuts entirely.
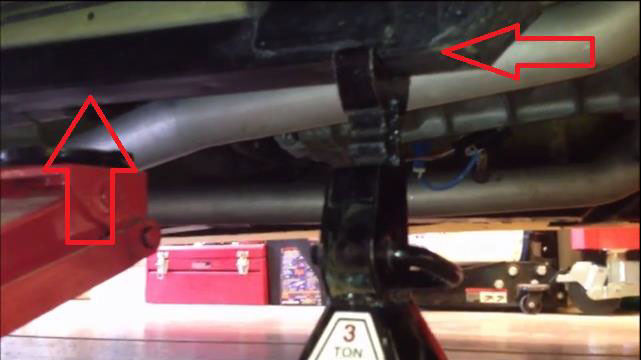
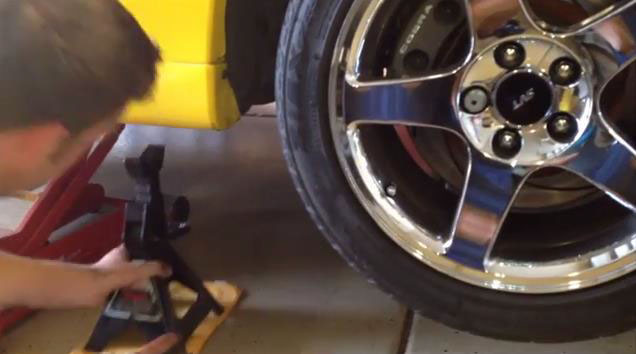
B. Using a floor jack, lift the vehicle in the air, placing the jack on part of the car’s frame (or sub frame connector if equipped) and place the car securely on jack stands.
C. Remove the lug nuts.
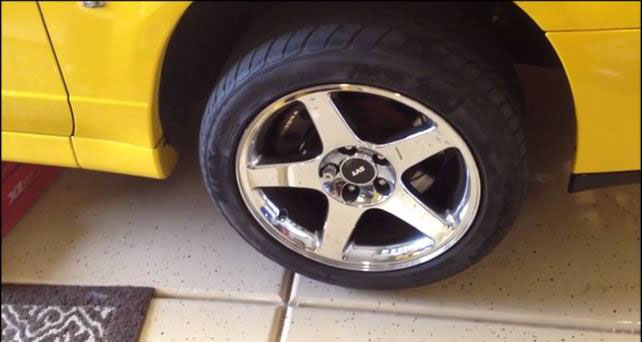
D. Remove the passenger side wheel.
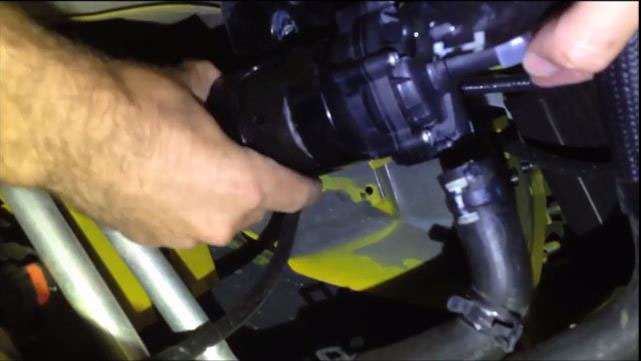
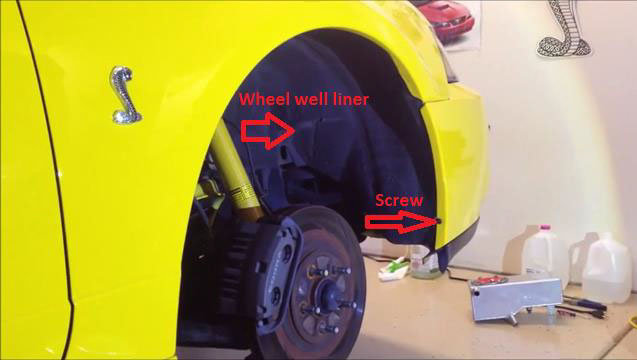
Step 3: Remove the passenger side wheel well liner:
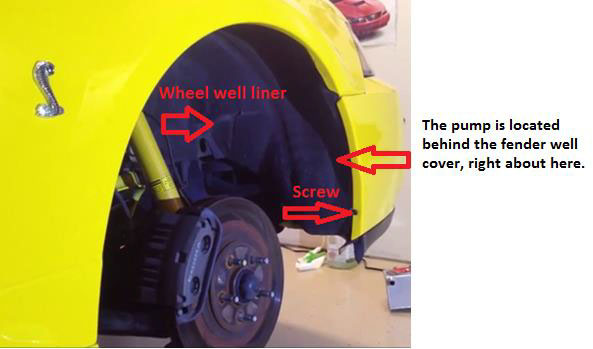
A. With the wheel removed, the wheel well lining will need to be pulled back to access the pump. Start by removing the small Philips point screw located on the bumper.
B. Follow the fender well liner towards the front of the car until you find the front pull pin that is holding the fender liner to the car. Remove the pull pin with a pair of needle nose pliers or a common screw driver.
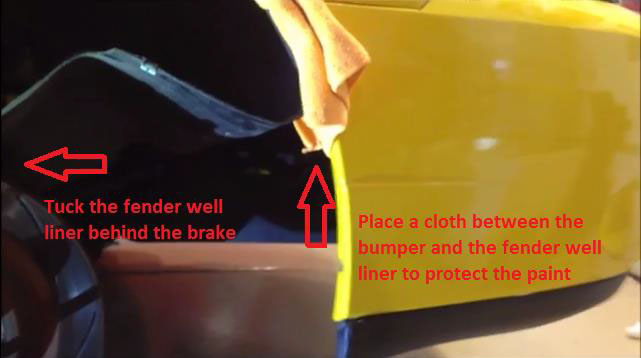
C. Carefully untuck the fender well liner from behind the front bumper, working your way up until you can pull the fender well liner back and tuck it behind the brake rotor.
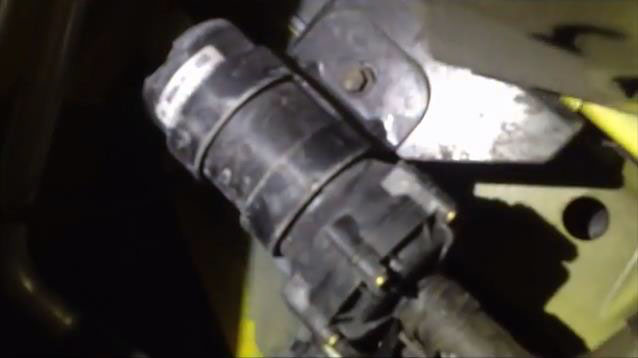
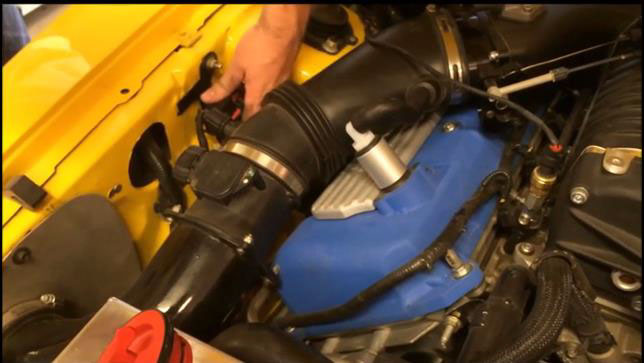
D. With the liner pulled back, you will find the intercooler pump, located on the frame in the passenger side fender.
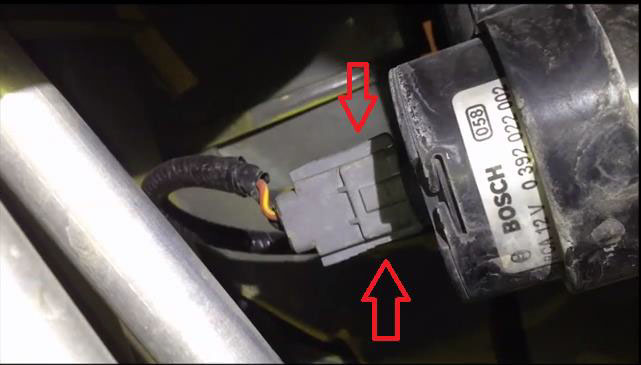
A. Unplug the electrical connector on the intercooler pump by pushing on the two tabs simultaneously and pulling the connector away from the pump.
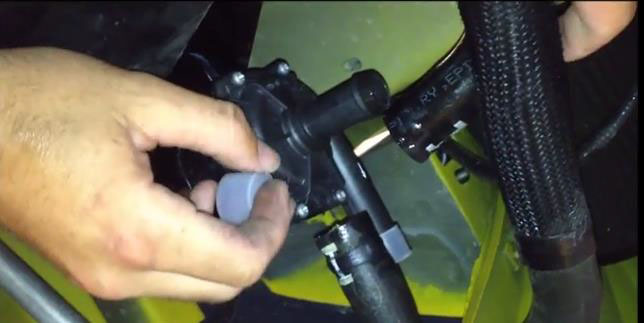
Step 5: Move the hose clamps that hold the intercooler lines to the pump:
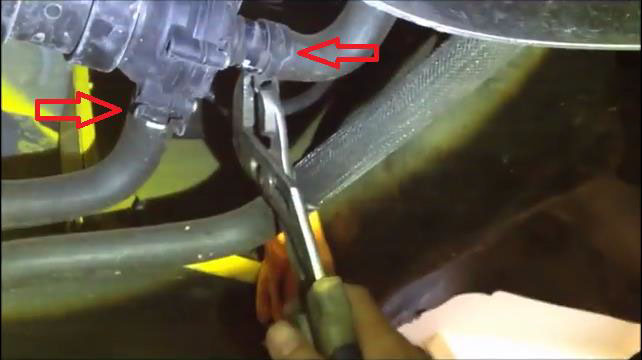
A. Slide both hose clamps away from the intercooler pump with a pair of pliers. Squeeze the clamp ends together to relieve the pressure of the clamps on the hose and slide the clamps away from the pump
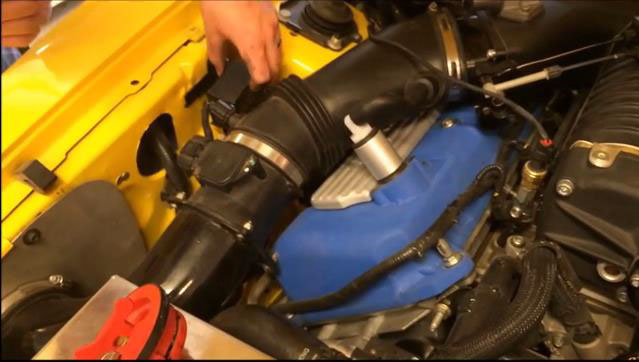
Step 6: Remove the intercooler hoses (2) from the intercooler pump:
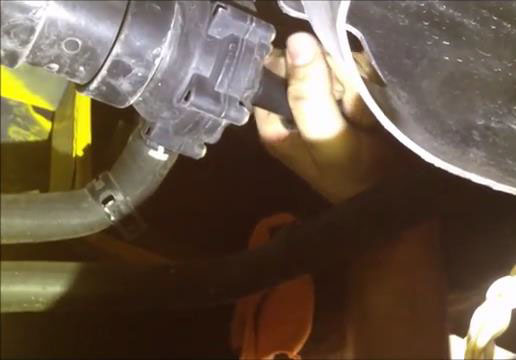
A. Next you will need to put a catch bucket in place below the pump to catch the coolant that will come from the pump and the lines. Plan to lose about a gallon of coolant.
B. With the clamps moved away from the pump, twist each hose off of the pump by twisting the lines clockwise and then counter-clockwise . a rotation in each direction while pulling the hose away from the pump.
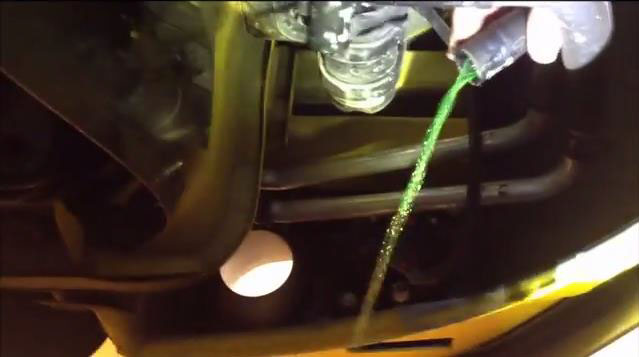
C. Drain each line into a catch can or bucket. The coolant found in the intercooling system IS NOT the same coolant the engine uses.
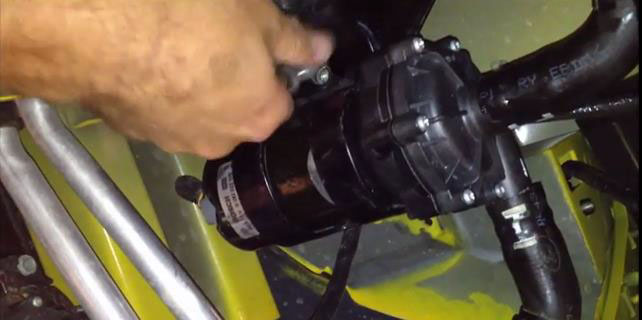
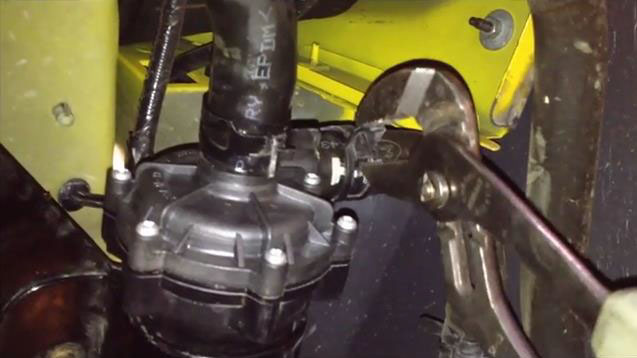
Step 7: Loosen the intecooler pump bracket:
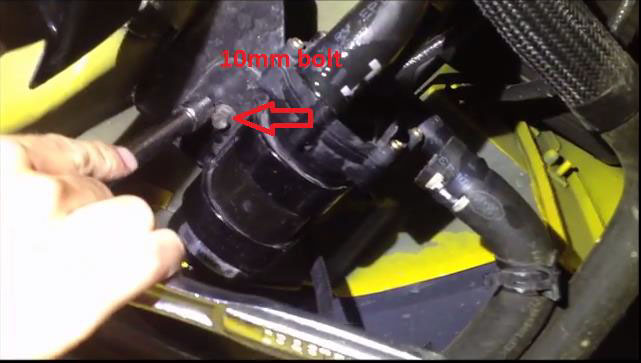
A. Next, remove the 10mm bolt located on the intercooler pump bracket. Removing this bolt will release tension of the bracket on the pump. This will allow you to slide the pump out of the bracket. The bracket will remain attached to the car.
Step 8: Remove the intercooler pump from the intercooler bracket:

A. With the bracket bolt removed, slide the pump towards the rear of the car, out of the bracket.
Step 9: (2003-2004 Cobra only) Remove the new intercooler pump bracket from the new intercoo
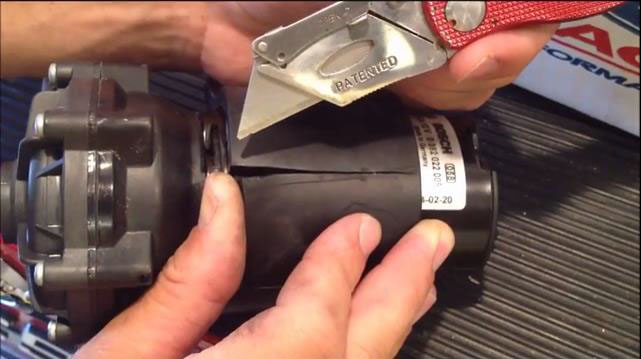
A. The new intercooler pump comes pre-assembled with a new bracket that that will not work on the 2003-2004 SVT Cobra. The new bracket is different. You have to remove the new bracket and use your existing bracket in order to use the new pump on a 2003-2004 Ford Mustang SVT Cobra (Terminator).
B. Using a razor blade/box cutter, carefully cut the rubber bracket off of the new pump. Do not cut into the pump.
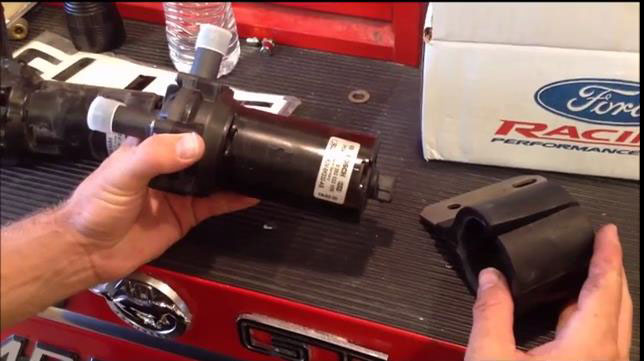
C. Discard the new bracket you removed from the new pump. It is of no use on the 2003-2004 Mustang Cobra. You can now slide the new pump back into the old bracket that is still on the car.
Step 10: Slide the new intercooler pump into the old intercooler bracket
A. Gently slide the pump back into the old intercooler bracket that is still on the car. You may have to slide the pump back and forth as it enters the bracket since the rubber lining on the bracket tends to slide with the pump.
Step 11: Replace the intercooler pump bracket bolt
A. With the pump back in the bracket, replace the 10mm bolt on the bracket. Use a 10mm socket with extension to tighten the bolt (hand tight).
Step 12: Reconnect the intercooler pump hoses
A. Remove the plastic dust covers on the pump and slide the intercooler hose lines back onto the pump.
B. Using pliers, return the two hose clamps back into their original positon. Try to line the clamp up into the same impressions it left on the hose.
Step 13: Replace the intercooler pump electrical connector
A. Reconnect the electrical connection on the pump (plug it in).
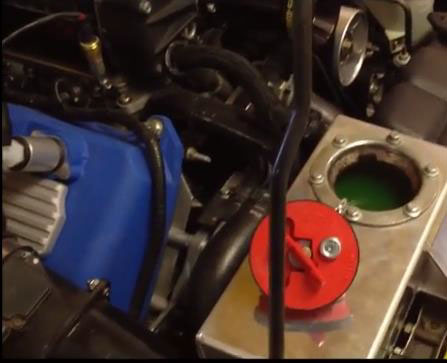
Step 14: Fill the intercooler reservoir with new coolant
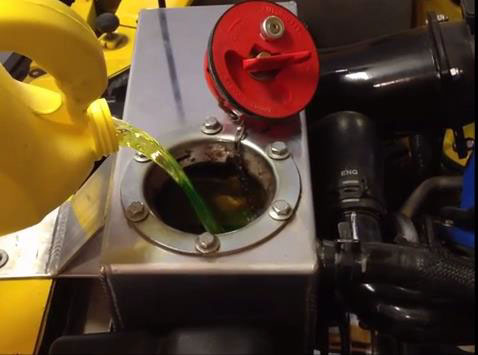
A. Fill the expansion tank with new coolant until the level is just below the brim
Step 15: Jump the intercooler pump to burp the system and test the intercooler pump
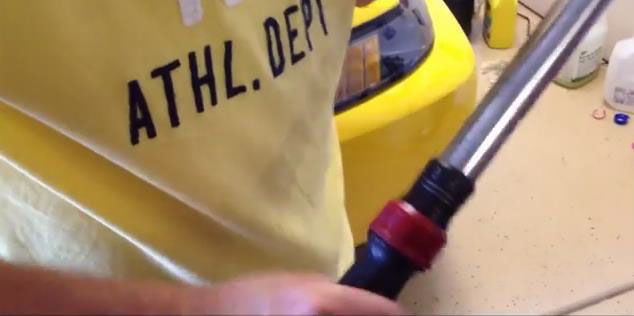
A. You will once again access the pump relay station to jump the pump. As the pump runs, it will verify the pump is working, bleed the intercooler system, and be a good opportunity to check for leaks.
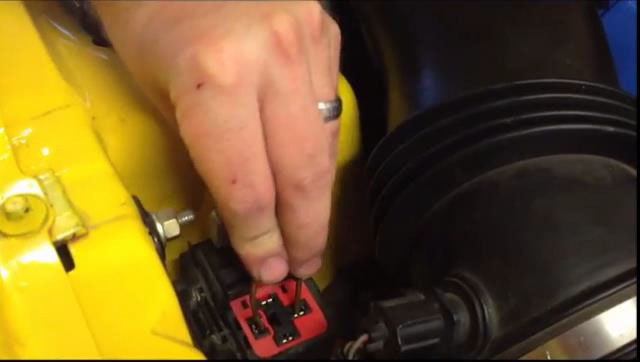
B. With the relay removed, jump the intercooler pump with a piece of wire as we did in the diagnosis.
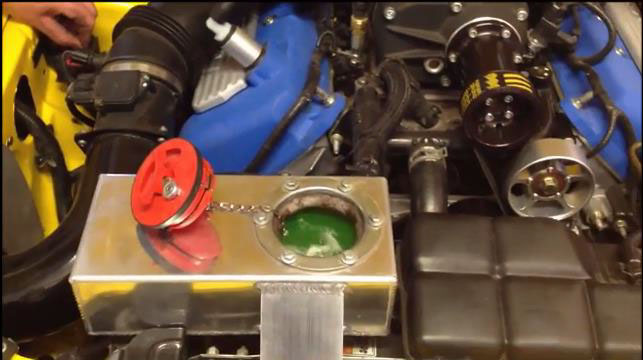
C. You will now hear the pump whine, and start to see fluid churning in the expansion tank. Add coolant as necessary to keep the expansion tank full, just below the brim. Run the pump for about 2-3 minutes.
D. Replace the relay by plugging it back in. It is a good idea to support the bottom of the relay tray as you push the relay back into position.
E. Replace the relay cover.
F. Replace the cap for the expansion tank.
Step 16: Replace the fender well cover
A. Put the fender lining back into place. Replace the push pin underneath the car, as well as the Philips screw in the bumper.
Step 17: Replace the Passenger side wheel
A. Replace the passenger side, front wheel. Screw the lug nuts on by hand to insure you do not cross thread them.
Step 18: Remove the jack stand
A. Lift the car with the jack and remove the jack stand.
Step 19: Torque the lug nuts to 100 foot pounds
A. Lower the car until the wheel is barely making contact with the ground. This will keep the wheel from moving as you torque the lug nuts.
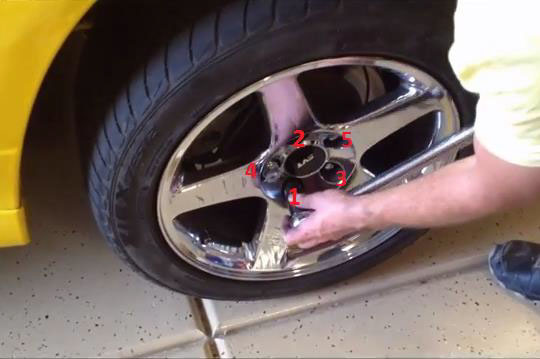
B. Torque the lug nuts to 100 foot pounds with a torque wrench. Use the “Star pattern” meaning you tighten each lug nut directly across from each other as if you were drawing a star. Use the numbered pattern shown in the picture above.
C. Always return the torque wrench back to “zero” so it will not lose accuracy.
Step 20: Lower the car to the ground
A. Make sure nothing is under the car. Lower the car completely, and remove the jack.
Step 21: Check the coolant level with the vehicle on level ground
A. With the car once again on level ground, check the coolant level in the expansion tank. Fill the tank until it is almost completely full.
Step 22: Take the car for a test drive
Finish: Take the car for test drive. While the car is running, remove the expansion tank cap and verify the pump is working. The pump engages at a pre-determined temperature, so it may not always be on when the car is running.
Installation Instructions written by AmericanMuscle customer Jeremy Smith 7.8.2015
